I still remember the night my roommate dared me to bake a cake that would make the whole apartment building jealous. She’d been bragging about a “dark chocolate masterpiece” she saw on Instagram, and I thought, why not turn that into a literal blackout? The kitchen was a battlefield of flour clouds, melted chocolate rivers, and a rogue espresso machine that sputtered like a caffeinated dragon. The air smelled like a chocolate factory after a rainstorm – rich, earthy, and just a hint of bitter that made my nose tingle with anticipation. When the batter finally hit the bowl, it was as dark as midnight on a moonless night, and I swear the spoon made a soft “whoosh” that sounded like a secret being whispered.
Fast forward to the next morning: I pulled the cake out of the oven, and the whole house was instantly enveloped in a scent that could have coaxed a bear out of hibernation. The top was a glossy, almost glass‑like crust that cracked just enough to reveal a moist, velvety interior that seemed to melt in your mouth like a dream. I cut a slice, and the fork slid through with a satisfying give, releasing a cascade of chocolate ganache that pooled like a midnight lake on the plate. The first bite was an explosion of deep cocoa, a whisper of espresso, and a buttery richness that made my taste buds perform a synchronized dance.
Most chocolate cake recipes out there are either fluffy fluff or dense brick – never both. This version, however, walks the tightrope between the two, delivering a texture that feels like a decadent brownie hugging a cloud. I’ve spent weeks tweaking the ratios, testing different types of chocolate, and even debating whether to use buttermilk or sour cream. The secret? A splash of hot coffee that intensifies the cocoa without adding any coffee flavor, and a double‑layered frosting that’s both silky and sturdy enough to hold up to a generous drizzle of chocolate glaze.
But wait, there’s a twist that you won’t find in any other recipe: I fold in a handful of melted dark chocolate just before the final bake, creating pockets of molten bliss that burst when you bite. I dare you to taste this and not go back for seconds. Okay, ready for the game‑changer? Let me walk you through every single step — by the end, you’ll wonder how you ever made it any other way.
What Makes This Version Stand Out
- Deep Flavor: The combination of high‑quality cocoa, espresso powder, and a splash of hot coffee amplifies the chocolate’s natural bitterness, giving the cake a complex, almost wine‑like profile.
- Moisture Mastery: Buttermilk and sour cream work together to keep the crumb unbelievably tender, while the melted chocolate ribbons add pockets of liquid gold.
- Texture Balance: A light, airy crumb meets a slightly denser edge, creating that “crispy on the outside, melt‑in‑your‑mouth on the inside” sensation.
- Simplicity: Despite its gourmet vibe, the recipe uses pantry staples and requires only basic mixing tools – no fancy equipment needed.
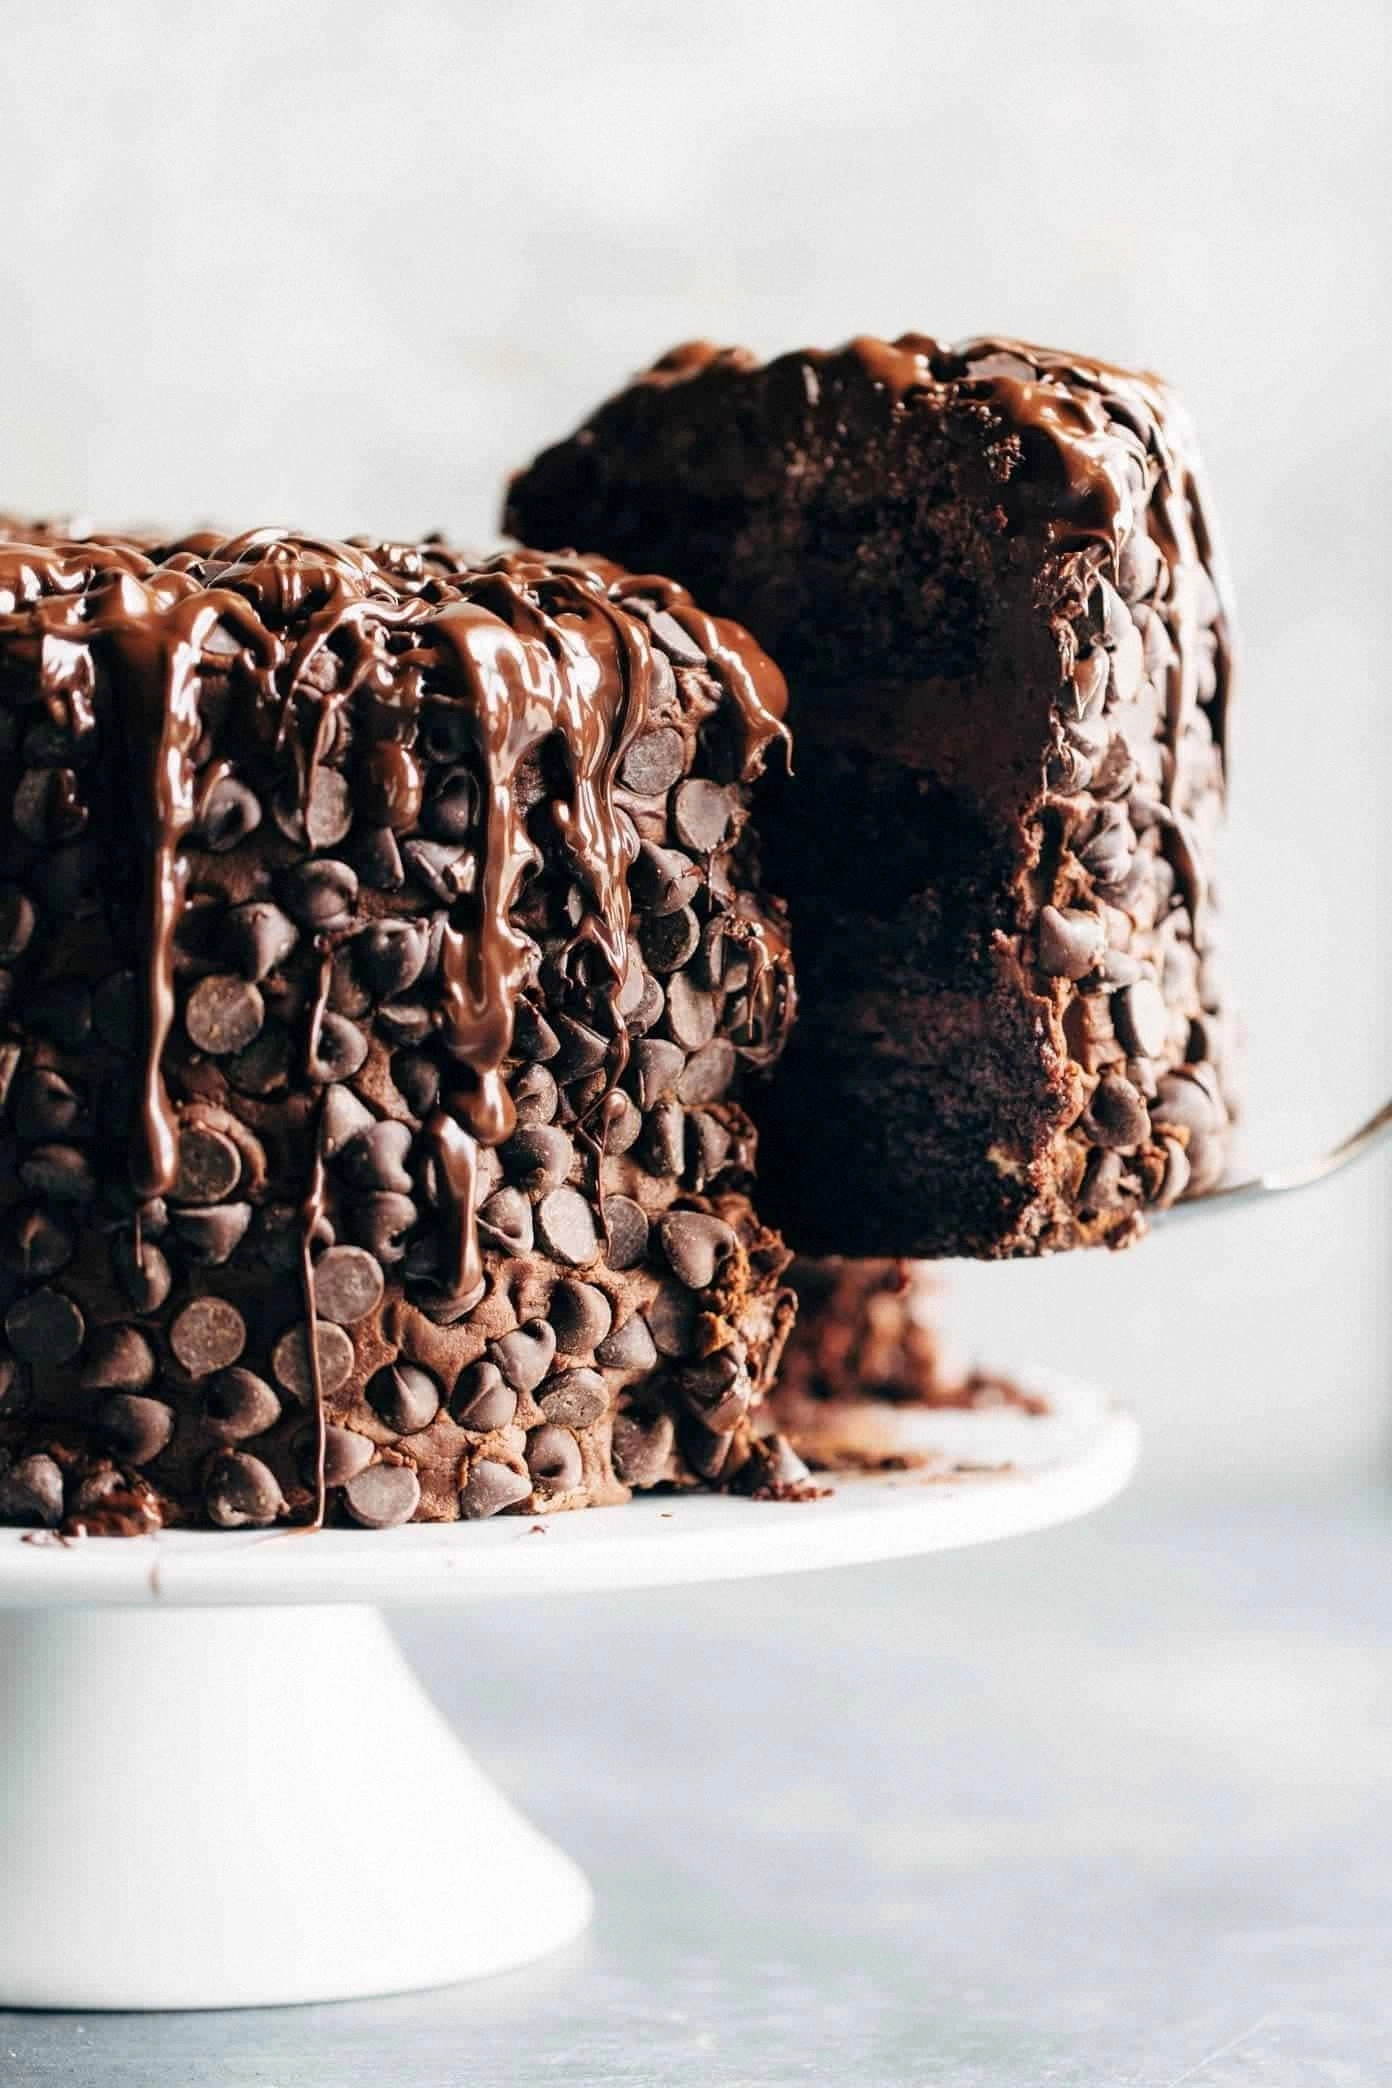
- Show‑Stopping Finish: A glossy ganache glaze that sets with a subtle shine, making the cake look like a piece of edible midnight sky.
- Make‑Ahead Magic: The cake stays fresh for up to three days, and the frosting actually improves after a night of resting.
- Universal Appeal: Whether you’re feeding a room full of chocolate lovers or a picky teen, this cake wins hearts and empty plates.
- Ingredient Integrity: Using 70% dark chocolate ensures a robust flavor without overwhelming sweetness.
Inside the Ingredient List
The Flavor Base
All‑purpose flour (2 cups) provides the structural backbone, but the real hero here is the unsweetened cocoa powder (¾ cup). It gives the cake its deep, almost bitter chocolate backbone. If you skip the cocoa, you’ll end up with a cake that tastes like a regular vanilla sponge with a chocolate coat – a tragic disappointment. For an even richer flavor, try Dutch‑process cocoa, which adds a smoother, less acidic note.
The Leavening Crew
Baking powder (2 tsp) and baking soda (1 tsp) are the dynamic duo that lifts the batter. Baking soda reacts with the acidic buttermilk, creating tiny air pockets that keep the crumb light. Forgetting the soda is a common mistake that leads to a dense, flat cake – I’ve seen it happen more times than I’d like to admit.
The Moisture Squad
Buttermilk (1 cup) and sour cream (½ cup) together create a tender crumb while adding a subtle tang that balances the chocolate’s bitterness. If you don’t have buttermilk, you can make a quick substitute by adding a tablespoon of lemon juice to a cup of milk and letting it sit for five minutes. The melted dark chocolate (200 g) is folded in at the end, creating molten pockets that surprise the palate.
The Sweetness & Enhancers
Granulated sugar (2 cups) sweetens the cake without masking the chocolate’s depth. A pinch of salt (1 tsp) is essential; it accentuates the cocoa flavor and prevents the cake from tasting flat. A teaspoon of instant espresso powder (1 tsp) intensifies the chocolate notes without making the cake taste like coffee, while a splash of hot water (½ cup) helps dissolve the cocoa and espresso, ensuring a smooth batter.
The Finishing Touches
Unsalted butter (1 cup, softened) adds richness and helps the cake stay moist for days. Four large eggs provide structure and emulsify the fat and liquid ingredients. Vanilla extract (2 tsp) rounds out the flavor, adding a fragrant backdrop that ties everything together. For those who love extra decadence, a cup of chocolate chips folded into the batter before baking adds surprise bursts of texture.
Everything's prepped? Good. Let's get into the real action...
The Method — Step by Step
Preheat your oven to 350°F (175°C) and grease two 9‑inch round cake pans with butter, then line the bottoms with parchment paper. The parchment ensures a clean release – trust me, a stuck cake is a nightmare. While the oven warms, set a rack in the middle position to promote even heat distribution.
In a large bowl, whisk together the flour, cocoa powder, baking powder, baking soda, and salt. This dry blend should be perfectly combined – no lumps, no pockets of flour. The aroma at this stage is already chocolatey, a good sign that the cocoa is fresh.
In a separate saucepan, melt the dark chocolate with a tablespoon of butter over a double boiler. Stir constantly until silky; this is where the magic begins. Watch Out: Do not let the chocolate boil – it will seize and become grainy, ruining the smooth texture.
In the mixer bowl, cream the softened butter and sugar together on medium speed until light and fluffy, about 3‑4 minutes. Scrape down the sides; the mixture should be pale and airy, a visual cue that air has been incorporated.
Add the eggs one at a time, beating well after each addition. Then stir in the vanilla extract. The batter should look glossy and a shade lighter than when you started – this is the foundation for a tender crumb.
Combine the buttermilk, sour cream, and hot water (or coffee) in a measuring cup. Pour this liquid mixture into the dry ingredients, stirring just until combined – over‑mixing will develop gluten and make the cake tough.
Now the moment of truth: gently fold the melted chocolate into the batter, followed by the chocolate chips if using. The batter will turn a deep, almost black hue, reminiscent of a midnight sky. This is the part where the cake becomes a “blackout.”
Divide the batter evenly between the prepared pans, smoothing the tops with a spatula. Tap the pans lightly on the counter to release any air bubbles. The batter should settle with a slight ripple – that’s the sign it’s ready to rise.
Bake for 30‑35 minutes, or until a toothpick inserted into the center comes out with a few moist crumbs but no wet batter. The top will be glossy and may crack slightly at the edges. Watch Out: Opening the oven door too early can cause the cake to sink; trust the timer.
Allow the cakes to cool in the pans for 10 minutes, then run a thin knife around the edges and invert onto a wire rack to cool completely. Patience is key – trying to frost a warm cake will melt the ganache and ruin the finish.
While the cakes cool, prepare the ganache: heat 1 cup of heavy cream until just simmering, then pour over 200 g of chopped dark chocolate. Let sit for a minute, then whisk until glossy. This glaze is the final veil that turns the cake into a midnight masterpiece.
Once the layers are completely cool, place one cake on a serving plate, spread a generous layer of chocolate buttercream (or your favorite frosting), then top with the second layer. Pour the ganache over the top, letting it cascade down the sides. Let the ganache set for 10 minutes before slicing.
That's it — you did it. But hold on, I've got a few more tricks that'll take this to another level...
Insider Tricks for Flawless Results
The Temperature Rule Nobody Follows
Never bake a chocolate cake straight from the fridge. Let the batter sit at room temperature for 10‑15 minutes before pouring it into the pans. This small pause lets the butter soften fully, ensuring an even rise and preventing the edges from over‑browning while the center stays undercooked.
Why Your Nose Knows Best
When the cake is about 20 minutes into baking, hover your nose over the oven (quickly, don’t open the door). You should smell a sweet, toasted cocoa aroma. If the scent is faint, the oven might be too low; if it’s sharp and almost burnt, the heat is too high. Trust that instinct – it’s a better gauge than a timer alone.
The 5‑Minute Rest That Changes Everything
After frosting, let the cake rest for exactly five minutes before slicing. This brief pause allows the ganache to set slightly, preventing it from sliding off the slice. It also gives the crumb a chance to firm up, so each piece holds together beautifully.
The Espresso Boost
If you’re a true chocolate aficionado, add a pinch of instant espresso powder to the dry mix. It doesn’t make the cake taste like coffee; instead, it deepens the chocolate flavor, a trick many professional bakers swear by. A friend tried skipping this step once – the cake tasted flat, and she confessed it was the most disappointing dessert she’d ever made.
Goldilocks Butter
Softened butter should be pliable but not melted. If it’s too soft, the batter can become overly liquid, leading to a dense cake. If it’s too hard, you’ll end up with a gritty texture. The perfect state is when a finger pressed into the butter leaves a shallow indentation that snaps back slowly.
The Final Glaze Trick
When pouring the ganache, start from the center and let it naturally flow outward. This technique avoids air pockets and creates a smooth, glossy finish. If you spot a bubble, gently tap the plate – the bubble will rise to the surface and pop.
Creative Twists and Variations
This recipe is a playground. Here are some of my favorite ways to switch things up:
Cherry Noir
Swap half the chocolate chips for dried cherries, and fold in a tablespoon of cherry liqueur into the batter. The tartness of the cherries cuts through the richness, making each bite a balanced dance of sweet and sour.
Spiced Midnight
Add a teaspoon of ground cinnamon, a pinch of cayenne pepper, and a dash of nutmeg to the dry ingredients. The warm spices give the cake a cozy, almost mulled‑wine vibe, perfect for cooler evenings.
White Chocolate Whisper
Replace ½ cup of the dark chocolate with white chocolate chips, and drizzle a thin layer of white chocolate ganache on top. The contrast of dark and white creates a visual and flavor pop that’s both elegant and playful.
Nutty Crunch
Fold in toasted hazelnuts or almonds just before baking. The nuts add a satisfying crunch and a buttery undertone that pairs beautifully with the deep cocoa.
Vegan Velvet
Swap the butter for coconut oil, the eggs for flax eggs, and use almond milk with a splash of apple cider vinegar instead of buttermilk. The result is a plant‑based version that doesn’t sacrifice any of the decadence.
Storing and Bringing It Back to Life
Fridge Storage
Cover the whole cake with a layer of plastic wrap, then store it in an airtight container. It will stay fresh for up to three days. Before serving, let it sit at room temperature for 20 minutes; the texture will soften, and the ganache will regain its shine.
Freezer Friendly
Wrap each layer separately in parchment, then a layer of foil, and place them in a zip‑top freezer bag. They can be frozen for up to two months. To thaw, move the wrapped layers to the fridge overnight, then bring to room temperature before assembling.
Best Reheating Method
When you want to serve a slice, place it on a microwave‑safe plate, sprinkle a tiny splash of water (about a teaspoon) over the top, and microwave for 10‑15 seconds. The steam revives the crumb, and the ganache re‑glosses, making it taste as fresh as the day it was baked.