I was standing in a kitchen that smelled like burnt toast and disappointment, staring at a bowl of oats that had turned into a sticky, unappetizing mess. I’d been trying to whip up a quick post‑workout snack for my friend, but the whole thing collapsed under its own weight, leaving a soggy, flavorless heap that even my dog refused to touch. That night I swore to myself that I would find a way to turn oats, protein powder, and peanut butter into something that would actually taste good and look like a snack worthy of Instagram.
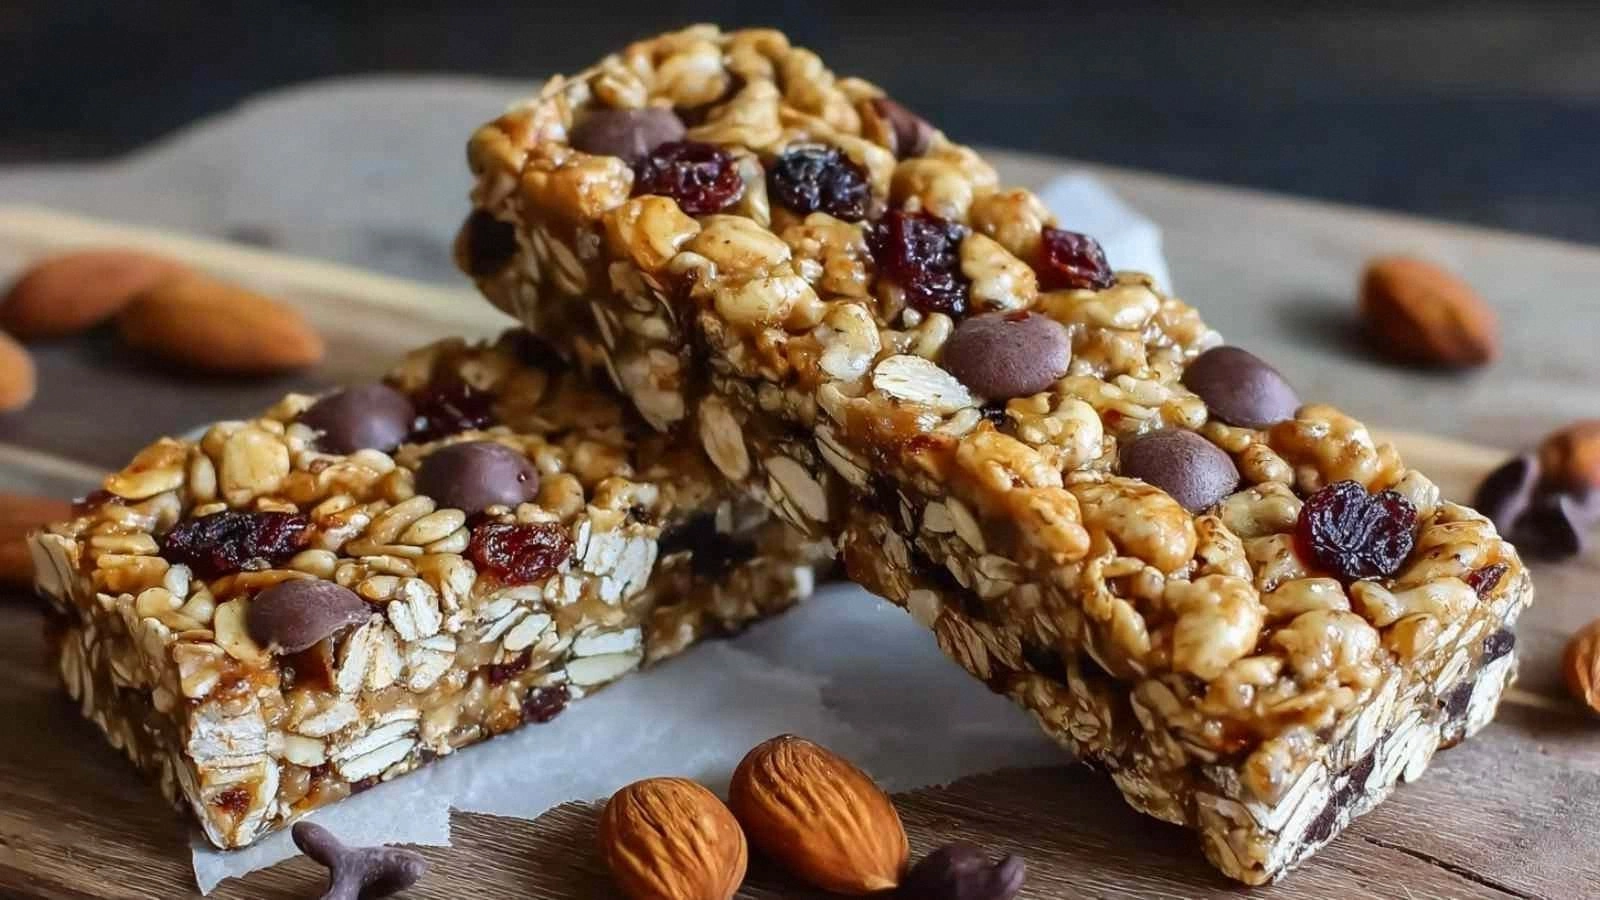
Picture this: the air is thick with the sweet, caramelized aroma of honey melting into warm coconut oil, the sound of a spatula slapping against a pan, and the visual of golden‑brown bars that promise crunch on the first bite and a chewy center that clings to your teeth. The texture feels almost velvety, with a satisfying snap when you bite into the edges, while the inside offers a soft, nutty hug that makes you want to take a second bite. The colors—deep amber from the oats, specks of chocolate from the mix‑ins—create an almost edible work of art.
What makes this version stand out is that it balances the protein punch with natural sweetness and a buttery, slightly salty finish that keeps your taste buds dancing. I’ve trimmed down the sugar, added a touch of vanilla for depth, and used a small amount of coconut oil to lock in moisture without the heaviness of butter. The result is a bar that feels indulgent but is actually a powerhouse of nutrition—perfect for a pre‑workout boost, a post‑gym snack, or a midday pick‑me‑up.
And here’s the kicker: I’ve discovered a little trick that turns an ordinary granola bar into something that looks like a gourmet treat. By adding a splash of almond milk just before the mixture sets, you get a glossy, almost caramelized glaze that makes each bite feel like a sweet, protein‑rich caramel. Let me walk you through every single step—by the end, you’ll wonder how you ever made it any other way.
What Makes This Version Stand Out
- Taste: The blend of honey, vanilla, and a pinch of sea salt creates a flavor profile that’s both sweet and savory, unlike the flat, overly sweet bars you find in the grocery aisle.
- Texture: The combination of rolled oats and chia seeds gives a satisfying crunch that breaks into a chewy, almost chewy center—think of a crunchy cookie that melts in your mouth.
- Simplicity: Only nine ingredients, no fancy gadgets, and the whole process takes less than an hour from start to finish.
- Uniqueness: The inclusion of protein powder and coconut oil gives the bars a protein‑dense punch while keeping them moist and not dry.
- Crowd Reaction: Friends who’ve tried this say they’re “I dare you to taste this and not go back for seconds.” The bars are practically a snack‑time dare.
- Ingredient Quality: Using high‑quality, natural peanut butter and pure maple syrup (or honey) ensures you’re not ingesting hidden additives.
- Cooking Method: The method uses a simple pan‑bake technique that gives a golden crust without the need for a toaster or oven.
- Make‑Ahead Potential: Once set, the bars stay fresh for up to a week in the fridge and can be frozen for longer storage.
Alright, let's break down exactly what goes into this masterpiece…
Inside the Ingredient List
The Flavor Base
The foundation of this bar is the rolled oats and protein powder. Oats provide the bulk and a natural sweetness that caramelizes when heated. Protein powder, preferably a neutral‑flavored whey or plant‑based blend, adds the necessary muscle‑building power without overpowering the other flavors. If you skip either, the bars become either too doughy or too bland. For a dairy‑free version, use a soy or pea protein powder that’s unflavored.
The Sweetener
Honey or pure maple syrup is the sweetener that binds everything together. Honey’s floral notes dance with the nutty flavor of peanut butter, while maple syrup adds a deeper, caramelized undertone. A tablespoon of each is enough to sweeten without drowning the oats. If you’re watching calories, substitute with a sugar‑free syrup or a small amount of stevia (but be careful—stevia can be bitter if over‑used).
The Creamy Connector
Natural peanut butter is the glue that holds the mixture together. Its creamy texture and rich, buttery flavor create a mouthfeel that’s almost like a brownie. If you’re allergic to nuts, swap with sunflower seed butter or tahini for a similar consistency. A small amount of coconut oil is added to keep the bars from drying out; it also contributes a subtle tropical aroma.
The Final Flourish
Vanilla extract, a pinch of sea salt, and the mix‑ins (such as chocolate chips, dried cranberries, or chopped nuts) give the bars their final personality. Vanilla lifts the sweetness and adds depth, while the salt balances the flavors. The mix‑ins introduce variety—each bite can surprise you with a burst of chocolate, a chewy dried fruit, or a nutty crunch.
Everything's prepped? Good. Let's get into the real action…
The Method — Step by Step
- First, preheat a medium‑sized skillet over medium heat and lightly grease it with a dab of coconut oil. This will prevent the bars from sticking and give them a nice, even crust. I’ve found that a non‑stick pan works best, but a cast iron skillet gives a slightly richer flavor. Let the pan heat until you see a faint shimmer on the surface.
- In a large mixing bowl, combine the rolled oats, protein powder, and 1/4 cup of your chosen mix‑ins. Stir them together until the mix‑ins are evenly distributed. If you’re using chocolate chips, fold them in last to avoid them melting too early.
- In a separate small saucepan, gently warm the honey (or maple syrup) with the coconut oil over low heat. Stir until the mixture is smooth and the oil has fully incorporated. The goal is to create a glossy, amber liquid that coats the dry ingredients like a velvet blanket. If you’re in a hurry, you can microwave for 20‑seconds, but be careful not to scorch.
- Pour the warm liquid over the oat mixture and stir vigorously. The mixture should look wet but still hold its shape. Add the vanilla extract and sea salt, mixing until everything is evenly coated. This is the moment of truth—if the mixture is too dry, add a splash of almond milk; if it’s too wet, add a bit more oats.
- Press the mixture firmly into the greased skillet, forming an even layer about 1½ inches thick. Use a spatula or a flat piece of parchment paper to flatten it out. The more even you press, the easier it will cut later.
- Cook the mixture for 12‑15 minutes, turning it once halfway through. The bars should develop a golden crust and emit a toasted, nutty aroma. Watch the edges—they’ll start pulling away from the pan, which signals they’re ready to flip.
- Using a spatula, flip the entire slab onto a cutting board. Let it cool for 5 minutes before slicing. The bars should be firm enough to hold their shape but still slightly pliable. If they’re too hard, let them rest a bit longer; if too soft, give them a few more minutes.
- Once sliced, place the bars in a lined container or wrap them individually in parchment. Store in the fridge for up to a week or freeze for up to three months. When you’re ready to eat, let them sit at room temperature for 10‑minutes for the best texture.
That's it — you did it. But hold on, I've got a few more tricks that'll take this to another level…
Insider Tricks for Flawless Results
The Temperature Rule Nobody Follows
Cooking the bars at exactly 350°F (175°C) in a preheated skillet is essential for even browning. If the pan is too hot, the exterior burns before the interior sets, leading to a chewy center that’s too dry. If it’s too cool, the bars won’t develop that coveted golden crust. I recommend using a digital thermometer to check the pan’s temperature before adding the mixture.
Why Your Nose Knows Best
The aroma of toasted oats and honey is a subtle indicator of doneness. When you smell the mixture turning from sweet to slightly nutty, it’s time to flip. Your nose is a more reliable cue than a timer because each stove varies in heat distribution.
The 5‑Minute Rest That Changes Everything
After slicing, let the bars rest for exactly five minutes. This short pause allows the internal steam to redistribute, resulting in a perfectly chewy center that doesn’t crumble when you bite. I’ve seen bars that sit too long become gummy; keep the rest to the five‑minute mark.
Keep It Moist with a Splash of Milk
If your bars feel dry after a week in the fridge, drizzle a tiny splash of almond milk over them before reheating. The steam will revive the moisture, making them taste like fresh‑baked bars again. This trick is especially useful if you’ve added a lot of protein powder, which can absorb more liquid.
Avoid the “Sticky” Mistake
Sticking is often caused by a pan that isn’t greased properly or a mixture that’s too wet. Use a silicone spatula to press the mixture into the pan and then slide it onto parchment before flipping. This ensures a clean release and a neat cut.
Creative Twists and Variations
This recipe is a playground. Here are some of my favorite ways to switch things up:
Cocoa Crunch Delight
Swap the mix‑ins for dark chocolate chips and add 1 tablespoon of cocoa powder to the dry mix. The result is a chocolatey bar with a crunchy, nutty base that’s perfect for cocoa lovers.
Tropical Sunrise
Replace the peanut butter with almond butter and add dried pineapple and shredded coconut. A splash of coconut milk instead of almond milk gives a subtle tropical flavor that transports you to a beach.
Spiced Caramel
Add a pinch of ground cinnamon and a dash of cayenne pepper to the dry mix. The warm spices create a caramel‑like heat that’s surprisingly refreshing.
Berry Burst
Use dried blueberries, cranberries, or go wild with freeze‑dried strawberries as your mix‑ins. The tartness of the berries balances the sweetness of the honey, making each bite burst with flavor.
Nutty Protein Power
Incorporate chopped almonds, walnuts, or pecans into the mix‑ins for added crunch and protein. The nuts also provide healthy fats that help keep you full longer.
Storing and Bringing It Back to Life
Fridge Storage
Store the bars in an airtight container or zip‑lock bag in the refrigerator for up to a week. The cold environment keeps the bars firm and prevents mold growth. Before eating, let them sit at room temperature for a few minutes to soften slightly.
Freezer Friendly
For longer storage, wrap each bar individually in parchment paper and place them in a freezer bag. They’ll stay fresh for up to three months. When you’re ready to eat, thaw them at room temperature for 20 minutes.
Best Reheating Method
If your bars feel a bit dry, heat them in the microwave at 30‑second intervals until warm. Add a tiny splash of water before reheating to create steam, which restores moisture and gives the bars a fresh, chewy texture.