When the kitchen lights flickered and the oven was still hot from last night's lasagna, I found myself staring at a bowl of ragi flour and feeling a mix of curiosity and culinary dread. My friend had dared me to make a breakfast that could rival my favorite bakery’s fluff, and I was determined to win that bragging right. The aroma of the dry millet, the muted clink of the measuring cups, and the faint scent of vanilla that floated through the air all set the stage for what would become a breakfast revolution. I promised myself I’d discover a secret that turns humble ragi into cloud‑like pancakes that melt on the tongue. If you’ve ever been tempted to skip the extra step of resting the batter, this recipe will convince you that patience is the secret sauce.
Picture this: a steaming skillet, a gentle sizzle as the first batter hits the pan, and the pancakes rising like sunrise over a calm lake. The sound is almost musical, a soft hiss that signals the batter is ready to transform. The sight of golden edges curling while the center remains moist is a visual cue that the magic is happening. The taste is a balanced harmony of nutty millet, sweet vanilla, and a subtle hint of cardamom that lingers long after the last bite. The texture feels like a feathered blanket—light, airy, and forgiving. I dare you to taste this and not go back for seconds.
What sets this version apart from every other ragi pancake recipe you’ll find online is the meticulous layering of flavors and textures, the intentional resting period that allows the flour to absorb liquid fully, and the clever use of cardamom to elevate the earthy base. The batter is designed to trap air, ensuring each pancake rises like a cloud without the need for heavy leavening. I’ve added a splash of water to keep the batter thin enough to spread easily, which gives the pancakes a tender crumb that melts in your mouth. The result? A pancake that is both hearty and delicate, offering a breakfast that feels like a treat but is packed with nutrition. If you’ve ever struggled with dense ragi pancakes that taste like porridge, you’re not alone—and I’ve got the fix.
And now, the game‑changer: I’ve discovered that letting the batter rest for exactly five minutes before cooking is the difference between a pancake that flattens and one that soars. The rest period hydrates the flour, allowing gluten to relax, which means the batter can rise without tearing. The technique might seem simple, but it’s the secret that most recipes overlook. Picture yourself pulling this out of the skillet, the whole kitchen smelling incredible, and seeing those golden, perfectly risen pancakes ready to be devoured. Let me walk you through every single step — by the end, you'll wonder how you ever made it any other way.
What Makes This Version Stand Out
- Flavor: The subtle sweetness of vanilla and the earthy depth of ragi create a flavor profile that feels both comforting and adventurous.
- Texture: The batter’s airy lift turns each pancake into a cloud‑like bite that melts effortlessly.
- Ease: With only ten straightforward steps, this recipe is beginner‑friendly yet impressive for seasoned cooks.
- Nutrition: Ragi’s high fiber and protein content make these pancakes a wholesome breakfast option.
- Versatility: Add nuts, raisins, or banana for variations that suit any palate or dietary need.
- Make‑ahead Potential: The batter can be prepared up to 24 hours ahead, making it ideal for busy mornings.
Inside the Ingredient List
The Flavor Base
Ragi flour is the star of this recipe, bringing a nutty, slightly sweet flavor that pairs beautifully with vanilla. Its dense protein network helps create a firm yet tender crumb, but if you skip it, the pancakes will lose that distinct millet taste and feel more like regular pancakes. For a purist, use only ragi flour, but mixing it with all‑purpose flour gives a lighter texture. When buying ragi, look for a dark brown hue with a subtle grainy feel; it indicates freshness and higher nutrient content.
All‑purpose flour is added to lighten the batter and improve rise. It provides a neutral canvas that lets the millet shine without overpowering it. If you’re gluten‑free, replace it with a gluten‑free blend that contains xanthan gum. The ratio of ragi to all‑purpose flour is 2:1, ensuring the pancakes remain hearty yet airy.
The Texture Crew
Baking powder and baking soda are the leavening agents that create lift. Baking powder is a double‑acting agent that releases gas when wet and again when heated, while baking soda reacts immediately upon contact with acidic ingredients. Together, they give the pancakes a fluffy interior and a slightly crisp exterior. If you use too much, the pancakes will taste metallic; too little, and they’ll be dense.
Salt is essential for flavor balance; it brings out the sweetness of vanilla and the nuttiness of ragi. A pinch of salt also helps activate the baking soda’s leavening power. If you prefer a low‑sodium diet, reduce the salt by half, but be aware that the pancakes will taste flatter.
The Unexpected Star
Cardamom powder adds a warm, aromatic note that complements the earthy ragi. It’s a subtle spice that elevates the pancake from simple to sophisticated. If you’re not a fan of cardamom, replace it with a pinch of cinnamon or nutmeg for a different flavor profile. The spice also provides antioxidant benefits, making the pancakes even healthier.
Vanilla extract infuses the batter with a sweet, floral undertone that balances the mild bitterness of millet. It also masks any raw taste from the eggs. A natural vanilla bean would be a luxurious upgrade, but a standard vanilla extract works just as well. If you’re allergic to vanilla, a few drops of almond extract will suffice.
The Final Flourish
Eggs bind the batter and add richness, while also contributing to the rise. The protein network created by the eggs traps air, giving the pancakes their signature fluffiness. If you’re vegan, replace the eggs with flaxseed or chia seeds mixed with water; they’ll provide structure but the texture will differ slightly.
Milk adds moisture and a subtle sweetness. I use whole milk for a richer taste, but skim or plant‑based milks work well too. The milk should be at room temperature to prevent curdling when added to the batter. If you prefer a thicker batter, reduce the milk by a quarter cup; if you want a runnier batter, add an extra tablespoon.
Butter or oil is the fat that keeps the pancakes from sticking and adds flavor. I use melted butter for its buttery aroma, but coconut oil gives a tropical twist. The fat also helps the pancakes develop a golden crust. A light drizzle of honey or maple syrup on top brings a sweet finish that complements the nutty base.
Everything's prepped? Good. Let's get into the real action.
The Method — Step by Step
- In a large bowl, whisk together 2 cups ragi flour, 1 cup all‑purpose flour, 1 tsp baking powder, 0.5 tsp baking soda, 0.5 tsp salt, 2 tbsp sugar, 1 tsp cardamom powder, and 1 tsp vanilla extract until the mixture is fine and free of clumps. The dry blend should look like a light, airy dust, a promise of the fluffy outcome. Keep this mixture aside while you prep the wet ingredients. This step is the foundation that will hold the entire structure together.
- In a separate bowl, beat 2 eggs, then add 1 3/4 cups milk, 1 tsp vanilla extract, and 2 tbsp melted butter. Whisk until the liquid is smooth and the butter is fully incorporated. The aroma of vanilla should start to tease your senses, signaling that the batter is ready. This wet mix will marry with the dry to create the perfect batter consistency.
- Pour the wet mixture into the dry ingredients, stirring gently with a wooden spoon. The goal is to combine without overmixing; lumps are acceptable and even welcome. When the batter is smooth, let it rest for 5 minutes; this allows the flour to hydrate fully. The rest period is a game‑changer that ensures every pancake rises evenly.
- Heat a non‑stick skillet over medium heat and brush lightly with oil or butter. Use a paper towel to wipe off excess fat, ensuring a non‑stick surface. The skillet should feel hot but not smoking; you’ll know it’s ready when a drop of water sizzles and evaporates instantly. A properly heated pan is crucial for that perfect golden crust.
- Ladle about 1/4 cup of batter onto the skillet for each pancake, forming a circle. Let it spread naturally; the edges should lift slightly when the batter starts to set. The first few seconds should produce a gentle sizzle, a sign of good heat. This is the moment of truth where the batter transforms into a golden disc.
- Cook for 2–3 minutes until bubbles form on the surface and the edges look firm. Flip carefully with a spatula and cook the other side for another 2 minutes. The pancake should be golden and airy. If the edges brown too quickly, lower the heat; if they stay pale, increase it slightly.
- Remove the pancake and place it on a plate lined with paper towels to absorb excess oil. Repeat with remaining batter, adjusting heat as needed. If the skillet gets too hot, lower the flame to avoid burning. The paper towels will keep the pancakes light and prevent them from becoming greasy.
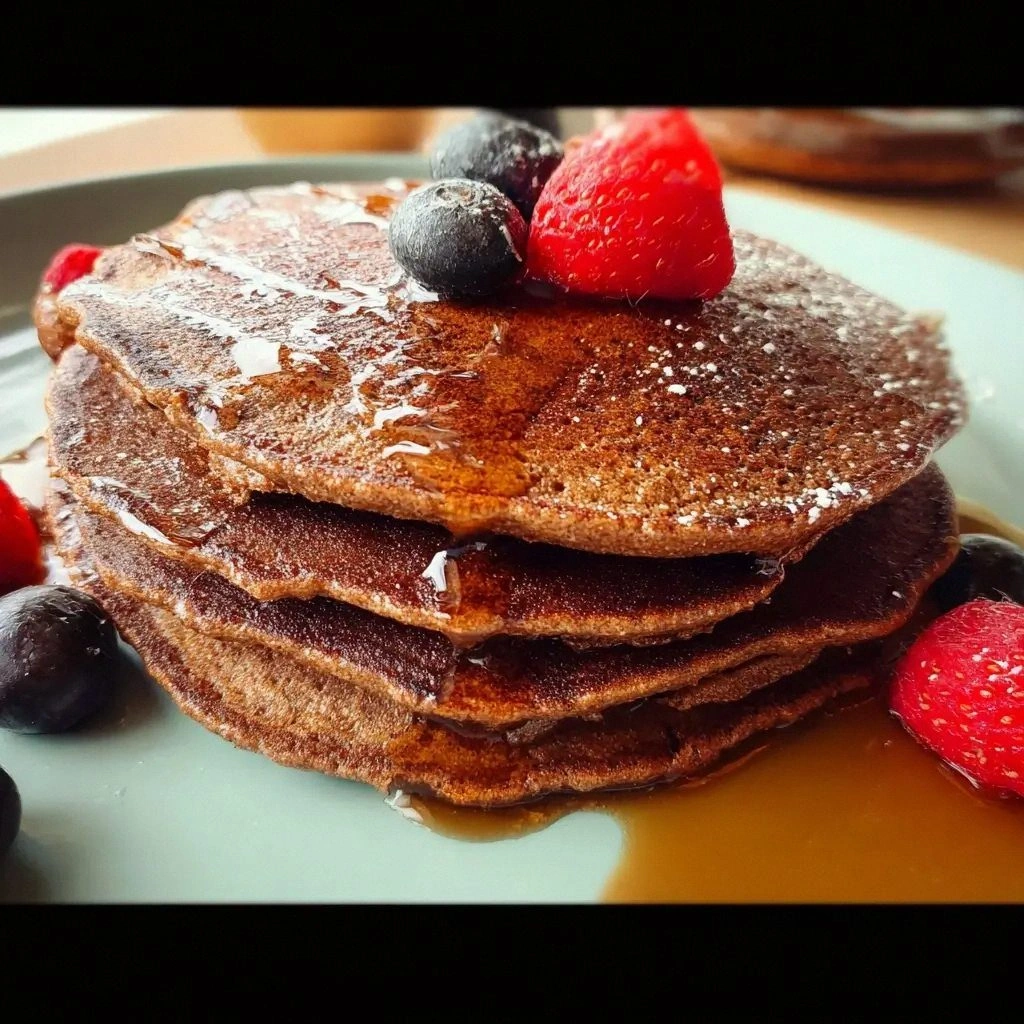
- Serve the pancakes warm, drizzled with honey or maple syrup, and topped with fresh berries or a sprinkle of coconut. The contrast of sweet syrup and nutty ragi makes each bite delightful. This is the moment of pure joy, where all the hard work pays off. You’ll find yourself reaching for a second stack almost immediately.
- For extra fluff, whisk a beaten egg into the batter before pouring; the protein helps trap air. Alternatively, fold in a handful of mashed banana for natural sweetness. Experiment and find your favorite tweak. These small additions can transform the pancake into a personalized masterpiece.
- Clean your skillet promptly to avoid sticking; a quick rinse with warm water is enough. Store any leftover batter in an airtight container for up to 24 hours. Fresh pancakes are best the same day, but the batter can be frozen for later use. Keeping the batter fresh ensures the pancakes remain light and fluffy.
That's it — you did it. But hold on, I've got a few more tricks that'll take this to another level. The secret is in the details, and I’ve got the inside scoop that will keep your pancakes fluffy and flavorful every single time.
Insider Tricks for Flawless Results
The Temperature Rule Nobody Follows
Many cooks assume that medium heat is always best, but the truth is that a slightly lower temperature allows the pancakes to cook evenly without burning the outside. I’ve found that setting the stove to 320°F (160°C) gives the pancakes a golden crust while keeping the inside tender. If your stove doesn’t have a precise temperature setting, test the heat by flicking a small drop of batter onto the pan; it should sizzle gently, not roar.
Why Your Nose Knows Best
When the batter hits the hot skillet, a subtle aroma of toasted flour and butter will begin to rise. Trust that scent; it indicates the batter has reached the right temperature. If the smell is weak, the pan is too cold; if it’s too strong and burnt, the heat is too high. Your nose is a reliable thermometer for pancakes.
The 5‑Minute Rest That Changes Everything
Resting the batter for five minutes is not just a suggestion; it’s a game‑changer that lets the flour fully absorb the liquid. During this period, the gluten strands relax, which prevents the pancakes from becoming chewy. I’ve tried skipping this step once, and the result was a dense, flat pancake that could not rise. That experience taught me the value of patience.
Use a Ladle for Even Pancakes
A ladle ensures each pancake is the same size and thickness, which leads to uniform cooking. If you pour batter by hand, you risk uneven pancakes that cook at different rates. A ladle also helps you control the flow of batter, preventing spills and messes on the stove.
Paper Towels Absorb Excess Oil
After flipping, place each pancake on a paper‑towel‑lined plate. The towel will soak up any excess oil, keeping the pancakes light and airy. This trick also keeps your plate clean and makes the pancakes easier to handle. I’ve found this simple step makes a noticeable difference in the final texture.
Creative Twists and Variations
This recipe is a playground. Here are some of my favorite ways to switch things up:
Spicy Chai Pancakes
Add a pinch of ground cinnamon, cardamom, and ginger to the batter. Drizzle with spiced chai syrup on top. The warm spices give the pancakes a comforting, aromatic flavor that’s perfect for a chilly morning.
Berry‑Burst Pancakes
Fold fresh blueberries or raspberries into the batter before cooking. Top with a dollop of Greek yogurt and a drizzle of honey. The berries burst with juice, adding a bright, fruity contrast to the nutty base.
Chocolate Chip Delight
Swirl in mini dark chocolate chips after the batter has rested. The chocolate melts slightly during cooking, creating pockets of gooey sweetness. This version is a hit with kids and adults alike.
Savory Herb Pancakes
Replace the vanilla with chopped fresh herbs like rosemary or thyme. Sprinkle the batter with grated Parmesan before cooking. Serve with a side of sautéed spinach for a savory twist that feels like a light brunch.
Coconut‑Infused Pancakes
Swap the milk for coconut milk and add shredded coconut to the batter. The coconut flavor complements the ragi’s earthiness. Finish with a drizzle of coconut syrup for a tropical touch.
Protein Power Pancakes
Add a scoop of vanilla protein powder to the dry mix. This boosts the protein content without altering the flavor significantly. It’s a great option for post‑workout breakfasts or a filling meal on the go.
Storing and Bringing It Back to Life
Fridge Storage
Store leftover pancakes in an airtight container in the refrigerator for up to 3 days. Place a sheet of parchment paper between layers to prevent sticking. Reheat in a toaster or microwave for 30 seconds, then finish in a hot skillet for a minute to restore crispness.
Freezer Friendly
Wrap pancakes individually in plastic wrap and place them in a freezer bag. They stay fresh for up to 2 months. When ready to eat, thaw at room temperature, then warm in a skillet. The pancakes remain fluffy and tasty after thawing.
Best Reheating Method
The secret to reheating is adding a tiny splash of water or milk before heating. This creates steam that rehydrates the batter, preventing the pancakes from drying out. Heat on medium for 1–2 minutes on each side, and enjoy the same delightful texture as fresh.