Picture this: I’m in the middle of a busy weeknight, the fridge is a chaotic mess, and the only thing I can think about is dessert. I stare at the box of chocolate chips, the pumpkin puree that’s been sitting there since last October, and a sudden craving for something warm, creamy, and indulgent hits me like a summer thunderstorm. I’ve tried the classic pumpkin cheesecake and the ordinary chocolate brownie, but neither feels complete—like they’re missing a secret handshake. That night, I dared myself to mash the two together, to create a swirl that would make my taste buds sing and my friends beg for seconds. I’m not joking when I say I ate half the batch before anyone else could even see the plate.
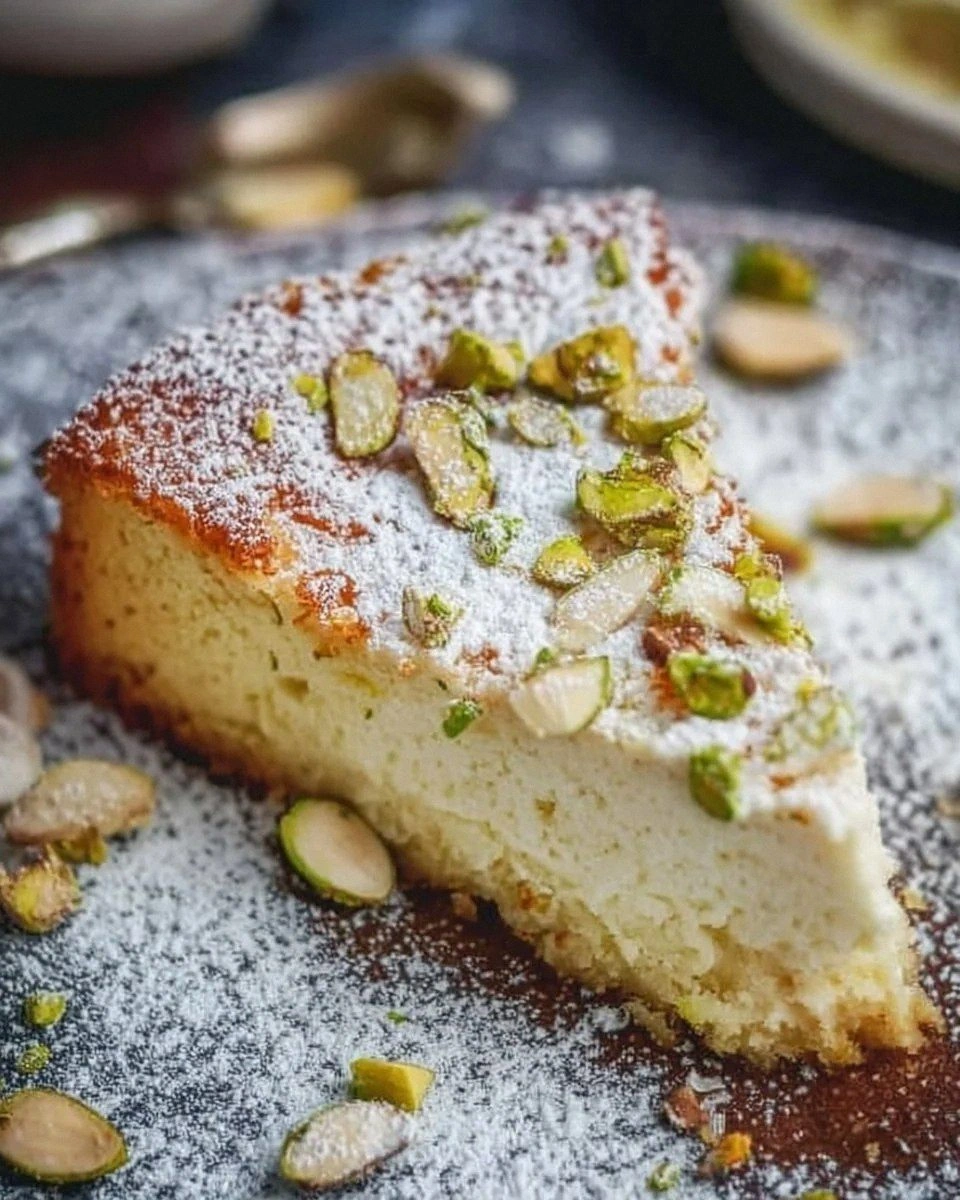
The first bite is an explosion: the chocolate’s dark, almost bitter depth clashes with the sweet, spiced pumpkin that melts into a silky center. The texture is a dream—moist, dense, and yet each crumb feels airy, like a cloud that never quite dissolves. The aroma that fills the kitchen is a comforting hug, the scent of vanilla, pumpkin spice, and chocolate that makes you forget the world outside the oven. It’s the kind of dessert that feels like a hug from your grandmother, but with a modern twist that makes it feel fresh and daring. If you’ve ever been disappointed by a pumpkin dessert that tastes like a pumpkin pie or a brownie that tastes like a chocolate bar, you’re not alone—and this recipe is the fix you’ve been waiting for.
What makes this recipe stand out is not just the combination of flavors, but the way each component is carefully balanced. I’ve spent countless hours tweaking the ratios, testing different brands of chocolate chips, and even experimenting with the type of pumpkin puree. The result is a dessert that’s rich enough to satisfy the sweet tooth, yet light enough to feel like a treat rather than a heavy meal. I dare you to taste this and not go back for seconds; the swirl will linger on your palate like a sweet after‑thought. And let’s be honest—if you’ve ever struggled to find the perfect fall dessert, you’re about to discover a game‑changer that will become your go‑to for every season that wants a touch of pumpkin.
Picture yourself pulling this out of the oven, the whole kitchen smelling incredible, the steam rising from the freshly baked batch like a cloud of autumn. The edges are crisp, the center is gooey, and the swirl of pumpkin and chocolate is a visual feast. The moment you cut into it, the chocolate and pumpkin mingle in a way that feels like a perfect marriage, each bite delivering a burst of flavor that’s both comforting and adventurous. I’ll be honest—my first attempt left me with a batch that was a little too dense, but the tweaks I made after that lesson were pure magic. Okay, ready for the game‑changer? Let me walk you through every single step—by the end, you’ll wonder how you ever made it any other way.
What Makes This Version Stand Out
- Taste: The combination of deep chocolate and spiced pumpkin creates a flavor profile that feels both familiar and entirely new. The chocolate chips melt into a velvety center while the pumpkin puree adds a subtle, earthy sweetness.
- Texture: The batter balances density and airy lightness, giving you a chewy crumb that’s still soft to the bite. The swirl ensures that each forkful delivers a contrasting mouthfeel.
- Simplicity: Despite the complex flavor, the recipe uses only ten ingredients and a single pan. You’ll be ready to bake in under an hour, no advanced techniques required.
- Uniqueness: Most pumpkin desserts are either pies or cakes; this recipe merges two beloved treats into one irresistible dessert.
- Crowd Reaction: Friends and family will call it “the best pumpkin dessert ever.” The visual swirl alone makes it Instagram‑worthy.
- Ingredient Quality: Using high‑quality chocolate chips and fresh pumpkin puree ensures that the flavors shine without any artificial additives.
- Cooking Method: Baking in a single pan with a quick swirl technique keeps the process straightforward while delivering maximum flavor.
- Make‑Ahead Potential: The brownies can be cooled, sliced, and stored, making them perfect for parties or a quick dessert on the go.
Inside the Ingredient List
The Flavor Base
Unsalted butter, granulated sugar, and eggs create the foundation of the batter. Butter melts into a silky coating that keeps the brownies moist, while the sugar caramelizes slightly for a subtle depth. Eggs bind everything together, giving structure and helping the chocolate chips melt into the batter. Skipping any of these would result in a flat, dry texture that’s hard to recover from.
The Texture Crew
All‑purpose flour, unsweetened cocoa powder, and a pinch of salt bring the right balance of density and lightness. The flour ensures the brownies have a firm crumb, while the cocoa powder introduces a rich chocolate undertone. Salt is crucial—it lifts the sweetness and sharpens the pumpkin’s natural flavor. If you’re gluten‑free, swap the flour for a 1:1 oat or almond flour blend; the texture will be slightly different but still delightful.
The Unexpected Star
Chocolate chips are more than just a garnish; they melt into pockets of gooey chocolate that contrast with the creamy pumpkin swirl. The chips also add a subtle crunch when you bite into them before they fully melt. If you prefer a smoother texture, use melted chocolate instead of chips, but keep the same amount for flavor intensity.
The Final Flourish
The cream cheese, pumpkin puree, egg yolk, vanilla, and pumpkin pie spice transform the brownie into a decadent cheesecake‑in‑a‑brownie. Cream cheese adds a tangy richness that balances the sweetness, while pumpkin puree brings a seasonal depth. The egg yolk enriches the batter, creating a silky finish. Vanilla and pumpkin pie spice tie all the flavors together, giving that unmistakable fall aroma.
Everything's prepped? Good. Let's get into the real action...
The Method — Step by Step
- Step 1: Preheat your oven to 350°F (175°C). Line a 9x13 inch baking pan with parchment paper, leaving a little overhang on the sides for easy removal. Melt the butter in a medium saucepan over low heat until it’s fully liquefied. Once melted, remove from heat and stir in the sugar until it dissolves, creating a smooth, glossy mixture. This step is crucial because a well‑mixed base ensures the brownies bake evenly and develop a nice crust.
- Step 2: Whisk the eggs and vanilla together in a small bowl. Add the egg mixture to the butter and sugar, beating until fully incorporated. The mixture should look light and airy, a sign that the eggs are properly blended. This is the moment of truth—if the mixture is too thick, the brownies will be dense; if too thin, they’ll spread too much.
- Step 3: In a separate bowl, sift the flour, cocoa powder, and salt together. Gradually fold this dry mixture into the wet batter, using a spatula to keep the batter light. The batter will look a bit lumpy at first, but keep stirring until it’s smooth. This step is where the magic happens; a well‑mixed batter ensures even chocolate distribution.
- Step 4: Gently fold in the chocolate chips, ensuring they’re evenly dispersed throughout the batter. The chips should be scattered, not clumped. The batter should feel slightly thick, like a thick pancake batter, but not runny.
- Step 5: In a separate bowl, combine the cream cheese, pumpkin puree, egg yolk, vanilla, and pumpkin pie spice. Whisk until smooth, then fold this mixture into the brownie batter. The batter will change color to a lighter, creamy hue where the pumpkin is present. This is where the cheesecake element truly begins to shine.
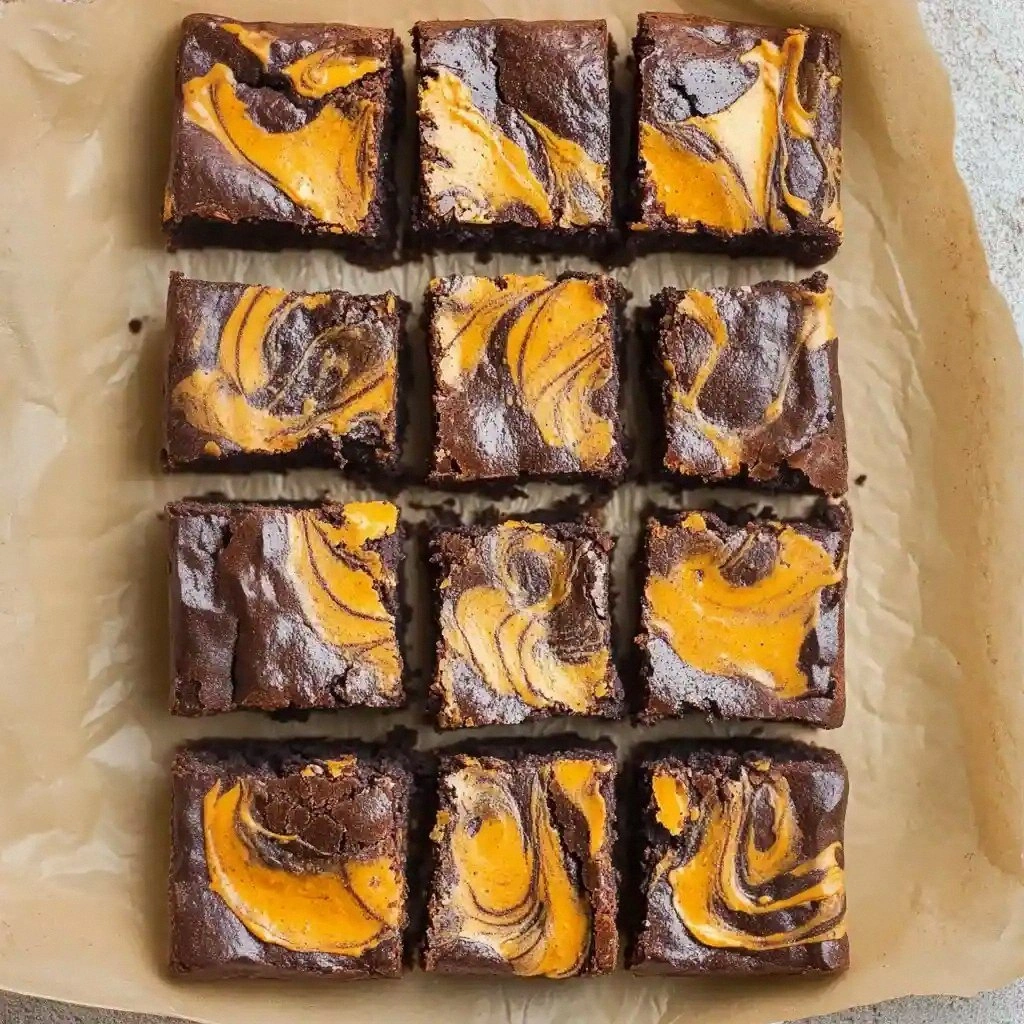
- Step 6: Pour half of the batter into the prepared pan and spread it evenly. Then, spoon the remaining batter on top and use a knife or a skewer to swirl them together, creating a marbled effect. The swirl should be visible but not too dramatic; you want pockets of both flavors. This is the part where your creativity can shine—if you like a more pronounced swirl, feel free to stir more vigorously.
- Step 7: Bake for 30 minutes, or until the edges are set and a toothpick inserted into the center comes out with a few moist crumbs. The center should still feel slightly gooey; you don’t want it overcooked. The aroma at this point will be heavenly, a mix of chocolate, pumpkin, and vanilla that will fill your kitchen.
- Step 8: Remove from the oven and let cool in the pan for 10 minutes. Then transfer to a wire rack to cool completely. Cutting the brownies while still warm can cause them to crumble, so patience is key.
- Step 9: Once cooled, slice into squares or rectangles. Serve as is, or top with a dusting of powdered sugar, a drizzle of caramel sauce, or a scoop of vanilla ice cream for an extra indulgent treat. Enjoy the moment of pure bliss.
That's it — you did it. But hold on, I've got a few more tricks that'll take this to another level. The next section will show you how to perfect every detail, from temperature control to rest time, ensuring that each bite is as perfect as the last.
Insider Tricks for Flawless Results
The Temperature Rule Nobody Follows
Many bakers think that a higher oven temperature will give a crispier crust, but with this recipe, a steady 350°F is essential. A lower temperature ensures the batter cooks evenly, allowing the chocolate and pumpkin to meld without burning. I once tried 375°F, and the brownies turned out with a burnt edge and a raw center. Stick to the temperature and trust the timer—your taste buds will thank you.
Why Your Nose Knows Best
The aroma of a baking dessert is a powerful indicator of doneness. When the brownies start to smell deeply caramelized, with hints of vanilla and pumpkin, it’s time to pull them out. If you’re unsure, give the center a gentle tap; it should feel firm but still give slightly under pressure.
The 5-Minute Rest That Changes Everything
Letting the brownies rest in the pan for 10 minutes before transferring them to a wire rack allows the heat to distribute evenly, preventing cracks and ensuring a smooth crumb. This short pause also lets the flavors settle, making the swirl more pronounced and the texture more cohesive.
The Swirl Technique That Wins Hearts
Using a skewer or a toothpick to create a subtle whirlpool effect is key to achieving that beautiful marbled look. The trick is to rotate the pan gently after the first swirl; this helps the pumpkin puree mix slightly with the chocolate, giving a consistent flavor in every bite. A dramatic swirl might look stunning but can result in uneven flavor distribution.
The Finish: A Dusting of Magic
A light dusting of powdered sugar or a drizzle of caramel sauce adds a finishing touch that elevates the dessert from good to unforgettable. The sugar adds a sweet contrast, while the caramel brings depth and a silky finish. Don’t be shy—your guests will love the extra sparkle.
Creative Twists and Variations
This recipe is a playground. Here are some of my favorite ways to switch things up:
Nutty Crunch
Add ½ cup chopped pecans or walnuts to the batter before baking. The nuts provide a crunchy texture that contrasts with the creamy brownie, and their natural sweetness complements the pumpkin. This variation is perfect for a holiday gathering.
Citrus Burst
Incorporate the zest of one orange into the batter. The citrus brightens the flavor profile, cutting through the richness and adding a fresh, bright note that pairs beautifully with pumpkin.
Mocha Madness
Replace half of the cocoa powder with instant espresso powder. The espresso adds depth and a subtle coffee flavor that elevates the chocolate, making the brownies feel more sophisticated.
Almond Joy
Swap the chocolate chips for almond pieces and add a splash of almond extract. The almond flavor harmonizes with the pumpkin and creates a dessert that feels like a cross between a brownie and an almond joy.
Chocolate Ganache Swirl
Instead of chocolate chips, melt ½ cup dark chocolate into a ganache and swirl it into the batter. The ganache will create a richer, silkier chocolate center that melts in your mouth.
Storing and Bringing It Back to Life
Fridge Storage
Cool the brownies completely, then wrap them tightly in plastic wrap and store in an airtight container at room temperature for up to 4 days. If you prefer a firmer texture, keep them in the fridge for up to a week.
Freezer Friendly
Place individual slices on a parchment‑lined tray and freeze until solid. Transfer the frozen slices to a freezer bag and store for up to 3 months. When ready to enjoy, let them thaw at room temperature for 30 minutes.
Best Reheating Method
To revive a slice, warm it in the microwave on medium for 15-20 seconds. Add a tiny splash of water before reheating to keep the brownie moist; the water steams, restoring the original texture and flavor. For a crispier top, finish under the broiler for a minute.