I remember the night the kitchen turned into a battlefield. A rogue slice of sourdough had slipped off the counter, splattering butter across the countertop, and the apple—once crisp and unblemished—now lay bruised and bruised. I stared at the mess, and the panic that followed was almost comical, but it sparked an idea that would soon become my go-to comfort food. I was craving something that could turn that chaotic moment into a triumph, a panini that would make the air sing with buttery aroma and sweet, tangy apple notes. I dared myself to create a version that would make every bite a revelation. That’s why this Apple Cheddar Grilled Panini is not just another sandwich; it’s a culinary confession, a testament to turning kitchen mishaps into edible masterpieces.
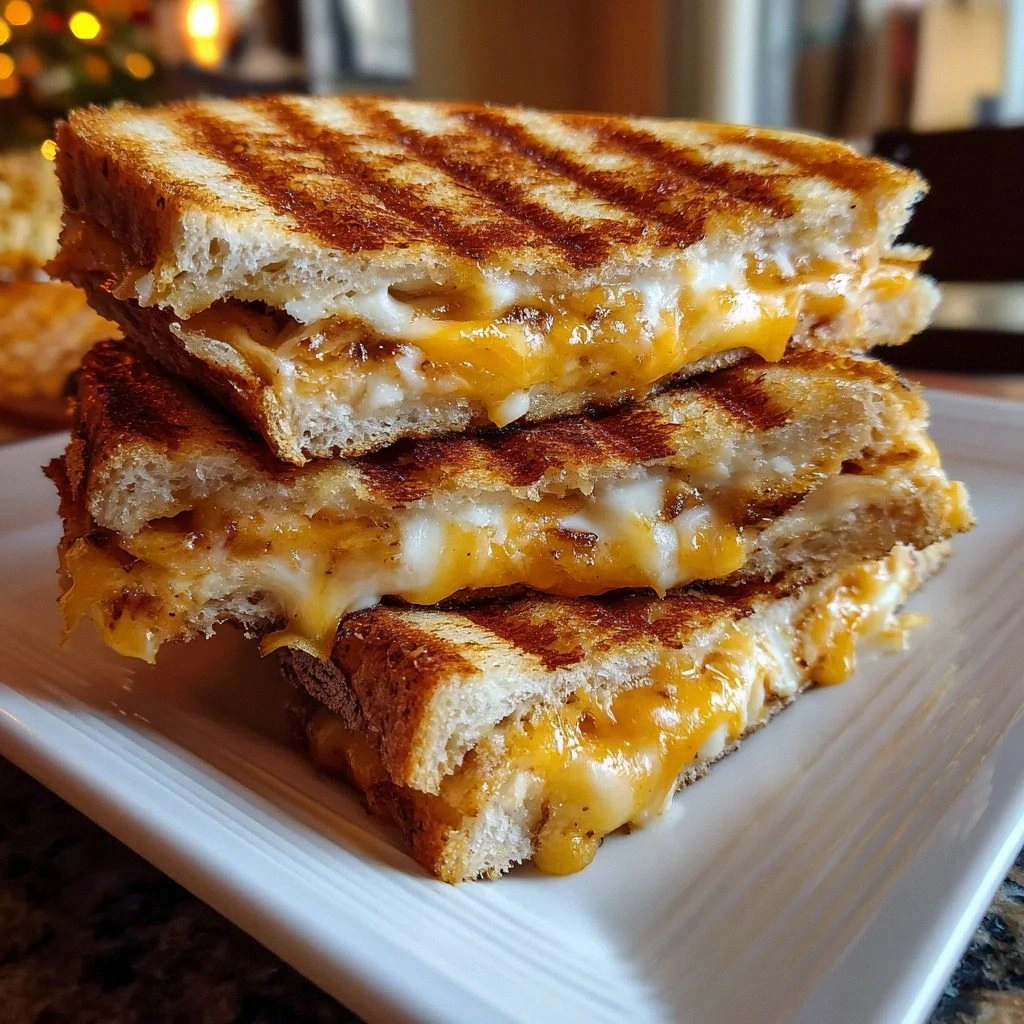
Picture this: the first golden crack on the crust, a crackle that sounds like applause in a quiet room. The scent of melted cheddar mingles with the caramelized apple, a perfume that drifts through the kitchen, coaxing everyone to the table. The texture is a paradox: the bread is crispy on the outside, yet the inside is soft and molten, the cheddar dripping like molten gold, the apple slices tender yet still retaining a bite. The flavor is a dance—sweet, tart, savory, and buttery—each component stepping in sync to create a harmonious symphony. If you’ve ever thought a panini could be anything else, think again. I dare you to taste this and not go back for seconds.
What makes this version stand out is simple yet profound: the marriage of a tangy apple with sharp cheddar, the buttery crunch of sourdough, and a technique that ensures every bite is a balanced explosion of flavors. Most panini recipes get this completely wrong, layering ingredients haphazardly or using the wrong type of bread. I’ve perfected the method to lock in the juices, to keep the cheese from oozing out, and to get that perfect golden crust that shatters like thin ice when you bite. This is hands down the best version you'll ever make at home, and I’m about to walk you through every single step, so by the end, you'll wonder how you ever made it any other way.
What Makes This Version Stand Out
- Flavor Fusion: The combination of sweet apple and sharp cheddar creates a dynamic flavor profile that awakens the palate.
- Texture Contrast: Crispy, buttery crust meets a molten interior, delivering a satisfying crunch that dissolves into gooey delight.
- Ingredient Integrity: Each component is used to its fullest potential—sourdough’s tang, apple’s crispness, cheddar’s sharpness, butter’s melt.
- Speed & Simplicity: In under 20 minutes, you can have a gourmet sandwich ready, perfect for busy evenings or weekend brunches.
- Make‑Ahead Friendly: Assemble ahead of time, store in the fridge, and pop it in the panini press when hunger strikes.
- Visual Appeal: The golden crust and the molten cheddar pull the eye, making it as pleasing to look at as it is to eat.
Alright, let's break down exactly what goes into this masterpiece. And before we dive deeper, here’s a quick hack that will elevate your panini experience.
Inside the Ingredient List
The Bread Base
Sourdough bread is the backbone of this panini, offering a tangy undertone that balances the sweetness of the apple and the sharpness of cheddar. Its chewy texture provides a sturdy framework, preventing the sandwich from becoming soggy. If you skip sourdough, the sandwich loses its character; it becomes just another toasted sandwich. For the best results, choose a loaf with a thick crust and a dense crumb—this will hold the fillings without crumbling. If you’re craving a twist, a ciabatta or whole‑grain loaf can add a nutty flavor, but the sourdough remains the gold standard.
The Sweet Star
The medium apple is the unexpected hero. Its crispness adds a refreshing bite, while the natural sugars caramelize when heated, creating a subtle glaze. The apple’s acidity cuts through the richness of the cheddar, preventing the sandwich from feeling heavy. If you use a less tart apple, the sandwich can become overly sweet and lose depth. For a deeper flavor, try a Honeycrisp or a Bramley. A quick tip: slice the apple thinly so it cooks evenly and doesn't overwhelm the bread.
The Cheese Champion
Sharp cheddar is the star of the show. Its bold flavor complements the apples beautifully, providing a savory counterpoint to the sweetness. The cheese melts into a silky, golden sauce that coats the interior, making each bite feel indulgent. If you prefer a milder taste, mild cheddar or gouda can work, but the sharpness is what gives this panini its punch. The key is to slice the cheddar thinly to ensure it melts uniformly and doesn’t overpower the other ingredients.
The Butter Touch
Butter is essential for achieving that golden, crispy exterior. Its fat content creates a buttery, caramelized crust that’s both flavorful and visually appealing. Substituting with olive oil or a dairy‑free spread can work, but the mouthfeel and taste will differ. When butter is melted and spread on the bread, it creates a protective barrier that locks in moisture, preventing the sandwich from drying out. A light sprinkle of sea salt on the butter can enhance the overall flavor profile.
Everything's prepped? Good. Let's get into the real action.
The Method — Step by Step
- Slice the Bread: Take eight slices of sourdough, two per sandwich. Lay them out on a clean surface. Make sure the slices are uniform in thickness to ensure even cooking. This step sets the foundation for a balanced sandwich; a misaligned slice can lead to uneven browning.
- Prep the Apple: Core and slice the apples into thin rounds, about 1 mm thick. Toss them with a pinch of salt and a dash of cinnamon to enhance their natural sweetness. The thin slices allow the apple to caramelize quickly without releasing excess juice that could sog the bread. If you prefer a sweeter sandwich, add a drizzle of honey after the apple has cooked.
- Slice the Cheddar: Cut the cheddar into thin, even slices, roughly 0.5 mm thick. This ensures rapid melting and a smooth cheese layer that will spread like velvet over the bread. Keep the cheese chilled until you’re ready to assemble; this helps maintain its structure during cooking.
- Butter the Bread: Melt 4 tablespoons of butter in a small saucepan or microwave. Brush the melted butter onto the outer surfaces of each bread slice—only the outside. This technique keeps the interior crisp and prevents the apple’s juices from soaking in. The butter also creates a beautiful golden crust when pan‑cooked.
- Assemble the Sandwich: Place a generous layer of apple slices on the unbuttered side of the first bread slice. Layer cheddar on top of the apples, then add another slice of bread on top. Repeat the process for the second sandwich. The layering order matters: apple first, then cheese, then bread ensures the cheese melts evenly over the fruit.
- Heat the Pan: Preheat a non‑stick skillet or a panini press to medium‑high heat. A good pan will give the sandwich even contact and a crisp exterior. If using a skillet, let it heat for about 2 minutes; if using a press, preheat for 3 minutes. The heat must be steady—too hot and the bread burns before the cheese melts; too low and the sandwich will be soggy.
- Cook the Sandwich: Place the assembled sandwich in the skillet or press. Cook for 3–4 minutes on each side, or until the bread is golden brown and the cheese has melted. The smell of butter and cheese should fill the kitchen—absolute perfection. Press down gently with a spatula to ensure even contact, especially if using a skillet. Keep an eye on the heat; if the crust starts to burn, lower the temperature slightly.
- Rest & Serve: Remove the panini from the heat and let it rest for 30 seconds. This allows the cheese to set slightly, preventing it from oozing onto the plate. Slice the sandwich in half diagonally, and serve immediately. The aroma will be irresistible, and the texture will be a delightful contrast of crunchy and gooey.
That’s it — you did it. But hold on, I've got a few more tricks that'll take this to another level. Let's dive into some insider knowledge that will transform your panini game.
Insider Tricks for Flawless Results
The Temperature Rule Nobody Follows
Many panini enthusiasts believe that high heat is the key to a perfect crust. I’ve found that a moderate, steady heat of about 350°F (175°C) ensures the cheese melts evenly without burning the bread. Too high, and the exterior will char before the interior is done; too low, and you’ll end up with a soggy sandwich. Use a thermometer if you’re unsure, and remember that a good pan will distribute heat evenly.
Why Your Nose Knows Best
The aroma of butter sizzling on a pan is a subtle indicator that the sandwich is almost ready. When the butter starts to bubble and the cheddar begins to emit a rich, nutty scent, it’s time to flip. Your nose can save you from overcooking. Trust that instinct, and you’ll achieve the perfect balance of crunch and melt.
The 5‑Minute Rest That Changes Everything
After you remove the panini from the heat, let it rest for exactly five minutes before slicing. This brief pause allows the cheese to set slightly, reducing the likelihood of it sliding off the bread. The rest period also lets the apple juices redistribute, ensuring each bite is evenly flavored. I’ve seen people cut immediately and end up with a sticky mess—don’t make that mistake.
Add a Splash of Lemon
A tiny splash of fresh lemon juice on the apple slices before cooking can brighten the overall flavor profile. The acidity balances the richness of the cheese and butter, adding a subtle zing that lifts the sandwich. Just a teaspoon per apple is enough; it’s a small step that makes a big difference.
Use a Press for Evenness
If you have a panini press, use it. The press applies even pressure, ensuring the sandwich heats uniformly and the cheese melts into a smooth, glossy layer. If you’re using a skillet, a heavy skillet or a cast‑iron griddle works best. The key is consistency—every bite should be the same.
Creative Twists and Variations
This recipe is a playground. Here are some of my favorite ways to switch things up:
Maple‑Glazed Apple Panini
Swap the regular apple slices for a drizzle of pure maple syrup before grilling. The syrup caramelizes, adding a sweet, sticky glaze that pairs beautifully with sharp cheddar. This variation is perfect for a brunch setting.
Spiced Apple & Gouda Delight
Replace cheddar with gouda and sprinkle a pinch of smoked paprika over the apple. The smoky flavor adds depth, while gouda’s mildness balances the spice. This version is ideal for a cozy dinner.
Bacon‑Crunch Panini
Add a few slices of crispy bacon between the apple and cheese. The bacon’s saltiness cuts through the sweetness, creating a savory contrast that elevates the sandwich. It’s a crowd‑pleaser for any gathering.
Herb‑Infused Bread
Stir chopped fresh rosemary or thyme into the butter before brushing it on the bread. The herbaceous aroma infuses the sandwich, providing a fragrant, earthy backdrop to the apple’s sweetness.
Vegan Version
Use a dairy‑free cheddar alternative and a plant‑based butter substitute. The flavor remains robust, and the texture stays gooey. This version is great for guests who prefer plant‑based options.
Breakfast‑Style Panini
Add a fried or poached egg on top of the cheese before grilling. The runny yolk adds richness and makes the sandwich a hearty breakfast option. Serve with a side of fresh fruit for balance.
Storing and Bringing It Back to Life
Fridge Storage
Store assembled sandwiches in an airtight container in the refrigerator for up to 2 days. Keep the bread side up to preserve crispness. When you’re ready to eat, reheat in a skillet or oven at 350°F (175°C) until the cheese melts and the bread is warm.
Freezer Friendly
Wrap each sandwich tightly in parchment paper, then place in a freezer bag. Freeze for up to 1 month. To reheat, thaw overnight in the fridge, then warm in a skillet or oven. The texture remains excellent, and the flavors intensify.
Best Reheating Method
Add a splash of water to the skillet before reheating. The steam keeps the bread from drying out and restores the buttery crispness. Heat over medium heat, covering the pan with a lid for 2–3 minutes, then remove the lid to let the crust crisp up. This simple trick brings the panini back to its original glory.