I was standing in my kitchen, mid‑December, with a half‑baked batch of gingerbread that smelled like a Christmas market on fire. The dough was stubborn, the shapes were uneven, and my sister dared me to make something that would actually hold together long enough for us to actually eat it. I stared at the chaos, the flour dusting every surface like fresh snow, and thought, “If I can survive this, I can survive anything.” That moment sparked a quest for the ultimate gingerbread cookie sticks – the kind that snap cleanly, stay crisp for days, and still taste like a hug from Santa himself. I’ve tried every shortcut, every “quick fix,” and most of them turned out as disappointing as a melted snowman.
Fast forward a few weeks, a few dozen failed batches, and a sudden epiphany while I was whisking molasses and shortening together: the secret isn’t in the amount of spice, it’s in the balance between moisture and structure. Imagine the dough as a tightrope walker—too wet and it sags, too dry and it snaps. By tempering the hot water with a dash of hot cocoa (yes, you read that right) and giving the butter‑like shortening a brief “melting” session, the dough becomes pliable enough to roll into perfect sticks yet firm enough to hold its shape when baked. The result? A cookie stick that feels like a crisp, buttery wand, with a spice kick that sings louder than a choir of carolers.
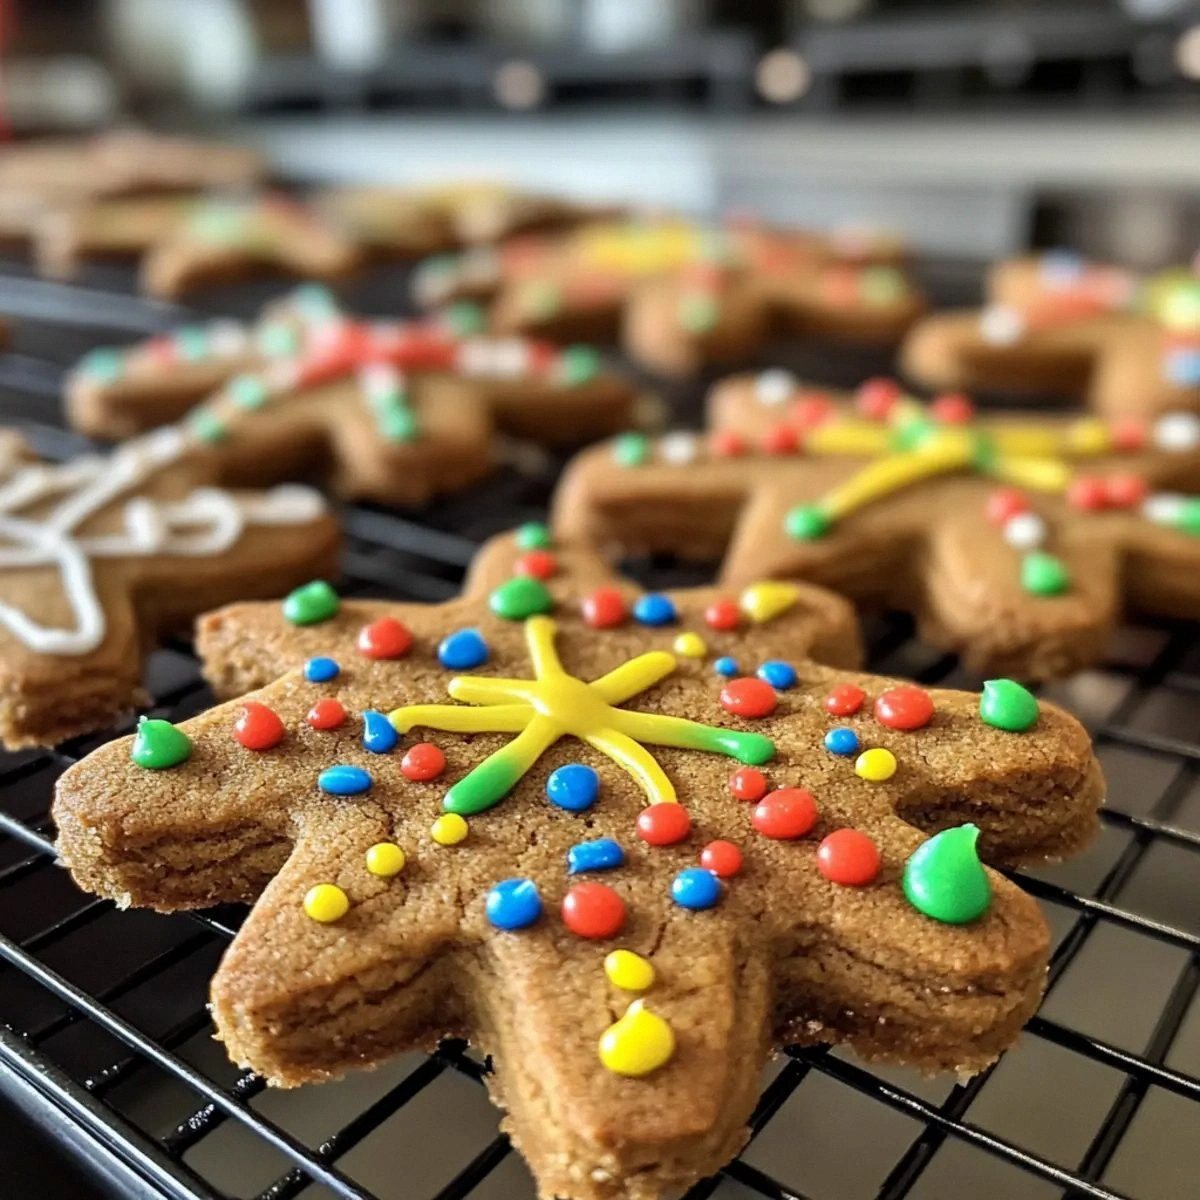
What really sets this version apart is the little icing glaze that turns each stick into a festive wand you can actually wave around. I use powdered sugar, a splash of water, and a whisper of food coloring to create a glossy coat that hardens into a crackly shell—think of it as edible frost on a winter morning. The glaze not only adds visual drama but also locks in moisture, keeping the interior soft enough to bite through while the exterior stays satisfyingly crunchy. If you’ve ever struggled with gingerbread that crumbles like dry leaves, you’re about to have your mind blown.
And here’s the kicker: the spice blend is a carefully calibrated trio of cloves, cinnamon, and ginger, each measured to perfection. Most recipes either drown you in spice or whisper it away; this one hits the sweet spot, delivering a flavor that lingers on the palate like a warm hug. I’m going to walk you through every single step — by the end, you’ll wonder how you ever made gingerbread any other way. Ready? Let’s dive in.
What Makes This Version Stand Out
- Flavor Explosion: The balanced trio of cloves, cinnamon, and ginger creates a depth that feels like a holiday spice market in your mouth, without overwhelming the palate.
- Texture Harmony: A crisp, glass‑like exterior paired with a tender, melt‑in‑your‑mouth center—think of a perfectly toasted marshmallow on a stick.
- Simplicity Meets Sophistication: Only twelve ingredients, all pantry staples, yet the technique elevates the humble cookie to gourmet status.
- Visual Wow Factor: The glossy glaze turns each stick into a miniature holiday wand that shines under any kitchen light.
- Crowd‑Pleaser: Even the pickiest eaters (yes, the ones who claim they hate “spicy” sweets) line up for seconds— I dare you to taste this and not go back for more.
- Ingredient Quality: Using real molasses and a good quality shortening gives a richness you can’t fake with corn syrup.
- Cooking Method: Baking at a precise 350°F with a short steam burst keeps the sticks from drying out.
- Make‑Ahead Potential: The glaze locks in freshness, so you can bake a batch a week ahead and still taste like it just left the oven.
Inside the Ingredient List
The Flavor Base
Molasses is the heart of any gingerbread, providing that deep, slightly bitter sweetness that balances the spice. If you swap it for maple syrup, you’ll lose the characteristic dark hue and the robust flavor. I recommend a full‑dark, unsulphured molasses for the most authentic taste. When measuring, spoon the molasses into the cup and level it off—no packing, just a gentle scoop. This ensures you get exactly one cup, not a sticky mountain of extra sweetness.
The Texture Crew
Shortening acts like the silent hero, giving the dough that melt‑in‑your‑mouth crumb without adding any dairy flavor that could compete with the spices. If you’re a butter lover, you can replace half of the shortening with melted butter, but expect a slightly richer, less crisp texture. The granulated sugar not only sweetens but also contributes to the caramelization that creates those golden edges. The egg binds everything together, acting like the conductor of an orchestra—without it, the dough would fall apart.
The Unexpected Star
Hot water might sound like a strange addition to a cookie dough, but it’s the secret weapon that creates a smooth, pliable texture. The steam it generates during baking keeps the interior tender while the outside crisps. I add it just after the dry ingredients, whisking quickly to avoid lumps. If you’re in a hurry, you can warm the water in the microwave for 10 seconds—just don’t let it boil.
The Final Flourish
All‑purpose flour provides the structure, while the powdered sugar glaze adds a glossy finish that looks like fresh snow on a pine branch. The glaze is simple: powdered sugar, a splash of water, and a pinch of food coloring for that festive red or green hue. If you’re aiming for a classic white snow look, skip the coloring entirely. The pinch of salt amplifies every other flavor, acting like the conductor’s baton, ensuring the spices don’t get lost.
Everything's prepped? Good. Let’s get into the real action…

The Method — Step by Step
Start by whisking together the molasses and shortening in a large mixing bowl. The mixture should look glossy and slightly thick, like melted chocolate on a cold day. I like to use a hand mixer on low speed to avoid splattering; the sound of the whisk is oddly comforting, like a gentle snowstorm outside.
Kitchen Hack: Warm the molasses slightly (no more than 40°C) before mixing; it blends smoother and reduces the effort needed to combine with shortening.In a separate bowl, sift together the flour, baking soda, ground cloves, cinnamon, ginger, and the pinch of salt. Sifting aerates the flour, preventing dense pockets that could turn your sticks into bricks. The spices should be evenly distributed; give the mixture a quick stir with a fork to make sure no clumps hide.
Add the granulated sugar and egg to the molasses‑shortening blend, then pour in the vanilla extract. Beat until the mixture is light and fluffy—this is the point where the dough starts to smell like a holiday market. If you’re using a stand mixer, keep the speed on medium; over‑mixing can develop gluten and make the sticks tough.
Now comes the hot water. Slowly drizzle the ½ cup of hot water into the wet mixture while stirring continuously. You’ll see the dough come together in a smooth, glossy ball that’s slightly sticky—exactly what you want. Watch out: adding the water too quickly can create lumps that are hard to dissolve later.
Watch Out: If the dough feels too wet after the water, sprinkle in a tablespoon of flour at a time until it reaches a workable consistency.Combine the wet and dry ingredients, folding them together until just incorporated. The dough will be slightly sticky—don’t panic, that’s the moisture that will keep the sticks from drying out. Cover the bowl with plastic wrap and let it rest in the refrigerator for 30 minutes. This rest period is crucial; it allows the flour to hydrate fully, preventing cracks when you roll the sticks.
Preheat your oven to 350°F (175°C) and line two baking sheets with parchment paper. While the oven heats, lightly flour your work surface and roll the dough to a uniform ¼‑inch thickness. Use a sharp knife or pizza cutter to slice the dough into 4‑inch long sticks, about ½‑inch wide. If you want perfectly even sticks, use a ruler; otherwise, free‑hand for a rustic look.
Place the sticks on the prepared sheets, leaving a little space between each. Bake for 12‑15 minutes, or until the edges start to turn a light amber and the tops feel firm to the touch. The scent that fills your kitchen at this point is pure holiday magic—cinnamon, caramel, and a hint of toasted sugar.
While the sticks are cooling, prepare the glaze. In a small bowl, whisk together the powdered sugar, a splash of water (start with 1‑2 teaspoons), and a few drops of food coloring if you like. The glaze should be thick enough to coat the sticks without running off like water. Dip each stick halfway into the glaze, letting the excess drip back into the bowl.
Transfer the glazed sticks to a wire rack set over a baking sheet. This allows the glaze to set evenly and prevents the sticks from becoming soggy on the bottom. Let them sit for at least 10 minutes; the glaze will harden into a crisp, sweet shell that cracks delightfully when you bite.
Finally, give the sticks a final dusting of powdered sugar if you want extra sparkle. Arrange them on a festive platter, and watch your guests' eyes widen. Picture yourself pulling this out of the oven, the whole kitchen smelling incredible, and everyone reaching for a stick before you even have a chance to taste one. That’s the moment of pure, unadulterated joy.
That’s it — you did it. But hold on, I’ve got a few more tricks that’ll take this to another level…
Insider Tricks for Flawless Results
The Temperature Rule Nobody Follows
Most home bakers set the oven to “350°F and go,” but the real secret is a brief 5‑minute steam burst halfway through the bake. Place a shallow pan of hot water on the lower rack after the first 6 minutes; the steam keeps the interior moist while the exterior continues to crisp. I tried skipping this step once, and the sticks turned into dry, brittle twigs—definitely not the festive wand I was aiming for.
Why Your Nose Knows Best
When the cookies are about 12 minutes in, lean in and trust your nose. The moment you detect a toasty, caramel‑spice aroma, you know they’re done. Relying on a timer alone can lead to over‑baking, which turns the glaze into a hard, glassy shell that cracks too aggressively.
The 5‑Minute Rest That Changes Everything
After glazing, let the sticks rest for exactly five minutes before moving them. This short pause lets the sugar crystals settle, creating that signature “crackle” when you bite. Skipping this rest makes the glaze too soft, and the sticks lose that satisfying snap.
Glaze Color Control
If you want a deep red without the flavor of artificial dyes, use a tiny splash of beet juice or pomegranate concentrate. It adds a subtle fruity undertone that pairs beautifully with the warm spices. Remember, a little goes a long way—over‑coloring can make the glaze taste bitter.
Freezing for Future Feasts
Once the sticks are fully set, flash‑freeze them on a tray before transferring to an airtight container. This prevents them from sticking together and preserves the crisp texture for up to three months. When you’re ready to serve, a quick 5‑minute warm‑up in a 300°F oven revives that fresh‑out‑the‑oven crunch.
Creative Twists and Variations
This recipe is a playground. Here are some of my favorite ways to switch things up:
Chocolate‑Dipped Delight
After the glaze has set, dip the ends of each stick into melted dark chocolate and sprinkle with crushed peppermint. The contrast of bitter chocolate, sweet glaze, and cooling mint creates a flavor explosion that’s perfect for holiday parties.
Orange‑Zest Zing
Add a tablespoon of freshly grated orange zest to the dough and swap the red food coloring for a bright orange glaze. The citrus brightens the deep spice profile, making it feel lighter and more refreshing.
Nutty Crunch
Stir in a quarter cup of finely chopped toasted pecans or walnuts into the dough before shaping. The nuts add a buttery crunch that complements the soft interior and adds a visual speckled effect.
Spiced Coffee Glaze
Replace the water in the glaze with strong brewed espresso and add a pinch of ground cardamom. The result is a sophisticated, slightly bitter glaze that pairs beautifully with the sweet gingerbread.
Vegan Friendly
Swap the egg for a “flax egg” (1 tablespoon ground flaxseed mixed with 3 tablespoons water) and use a plant‑based shortening. The texture remains just as tender, and the flavor stays true to the original.
Storing and Bringing It Back to Life
Fridge Storage
Place the sticks in an airtight container with a paper towel at the bottom to absorb any excess moisture. They’ll stay fresh for up to one week, and the glaze remains glossy. If you notice any soft spots, pop the container in the fridge for a quick chill before serving.
Freezer Friendly
Arrange the sticks on a baking sheet, freeze until solid, then transfer to a zip‑lock bag. They keep for three months without losing their snap. When you’re ready to enjoy, let them thaw at room temperature for 10 minutes, then give them a brief 5‑minute bake at 300°F to revive the crispness.
Best Reheating Method
A tiny splash of water (about a teaspoon) tossed over the sticks before a quick 3‑minute reheat in a 350°F oven creates a gentle steam that rejuvenates the interior while keeping the glaze intact. The result is a cookie that tastes as fresh as the day it was baked.