I still remember the first time I tried to make Greek chicken taquitos. It was a disaster of epic proportions. The filling leaked everywhere, the tortillas cracked like dry desert earth, and my kitchen looked like a feta cheese crime scene. But here's the thing — one bite of that mangled mess, and I knew I was onto something magical. The bright lemon, the punchy oregano, the way the crispy shell shattered to reveal that herby, chicken-packed interior... I was hooked.
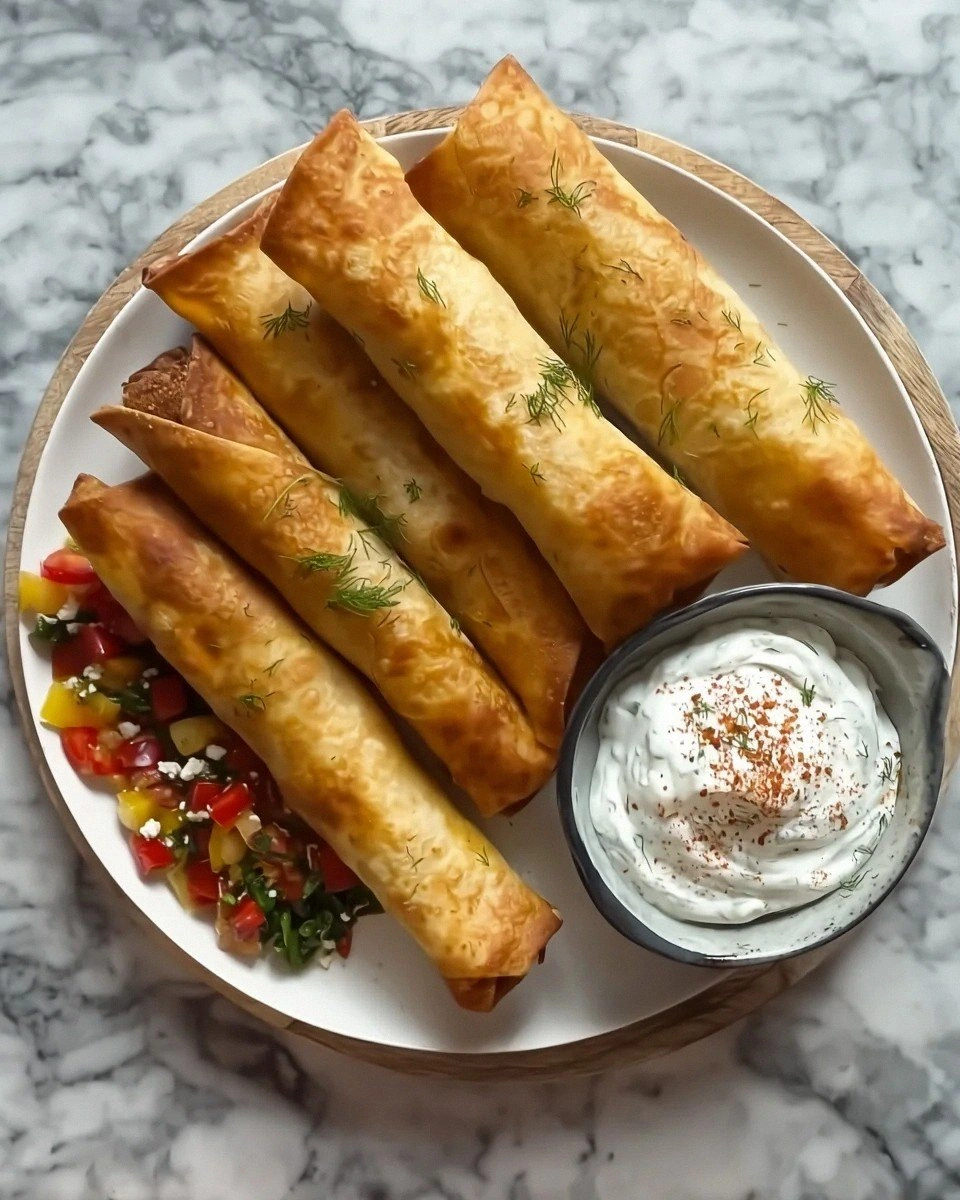
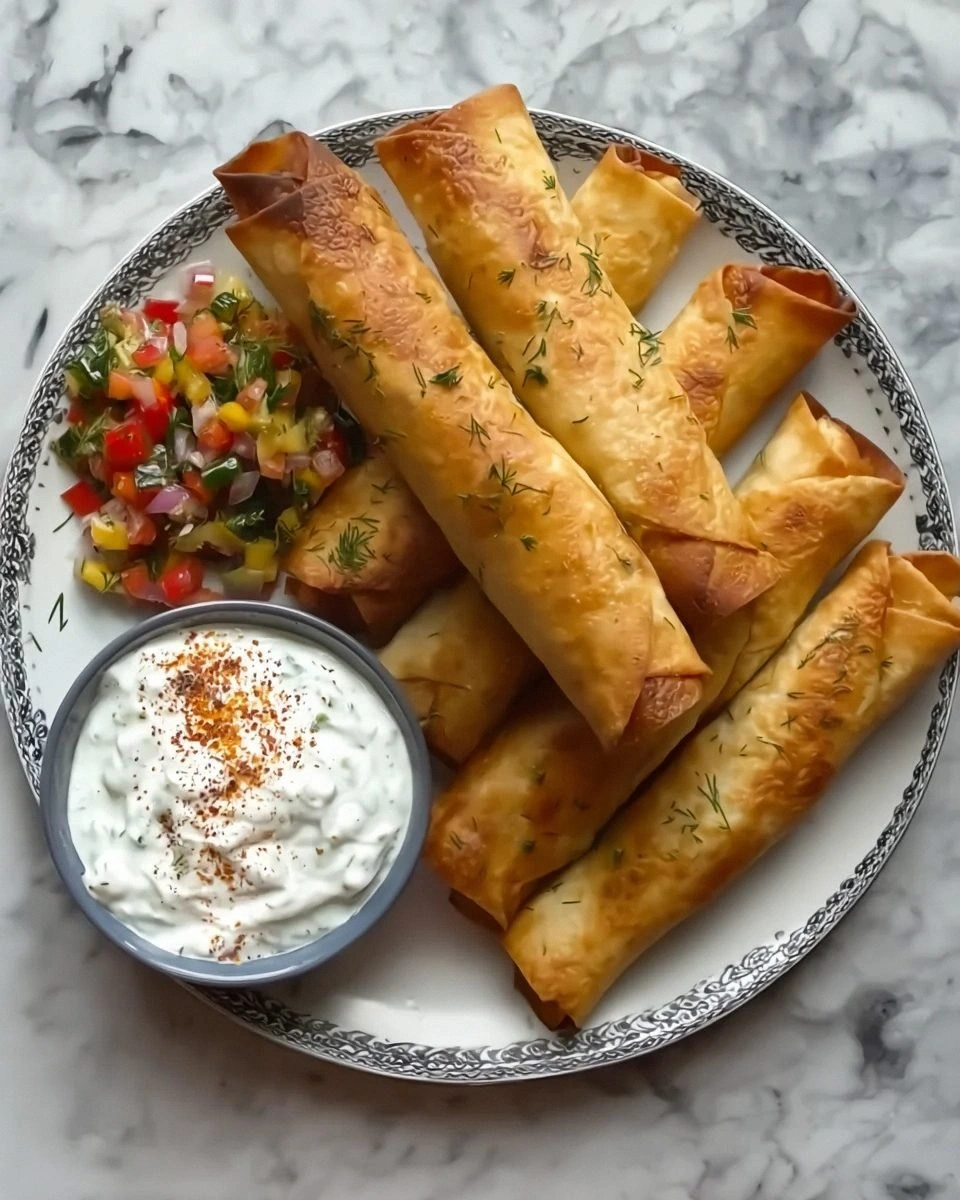
Fast forward through about seventeen attempts (and one very patient roommate who graciously taste-tested every batch), and I've cracked the code. These aren't just any taquitos — they're the love child of a Greek taverna and a Mexican street food stand, wrapped up in a package that makes your kitchen smell like a Mediterranean dream. Picture this: golden, blistered tortillas stuffed with chicken that's been dancing with lemon, garlic, and herbs, paired with a cool tzatziki that cuts through all that crispy richness.
What makes this version different? Well, I've figured out the secret to keeping those tortillas from turning into sad, cracked wheels. And the filling? It's not just seasoned chicken — it's a flavor bomb that tastes like summer in Santorini. The best part? You can make a double batch and freeze half for those nights when you need something spectacular but only have twenty minutes and a growling stomach to work with.
The real game-changer here is a technique I stumbled on accidentally when I was too lazy to dirty another pan. Instead of mixing everything in a bowl, I build the filling right in the skillet, letting the chicken soak up all those gorgeous pan juices. Trust me on this one — once you try it, you'll wonder why anyone makes them any other way. Let me walk you through every single step — by the end, you'll wonder how you ever made it any other way.
What Makes This Version Stand Out
Crispy-Outside-Tender-Inside: These taquitos have the most incredible textural contrast. The tortillas turn into these golden, shatteringly crisp cylinders that give way to juicy, herby chicken inside. It's like biting through autumn leaves into a Mediterranean garden.
One-Pan Wonder: Everything from the chicken filling to the final roll happens in one skillet. Less dishes, more time for the important things — like eating all the taquitos before anyone else gets to them.
Freezer Hero: Make a massive batch, freeze them on a tray, then bag them up. When that 3 PM snack attack hits, you've got restaurant-quality taquitos that go from frozen to fabulous in under fifteen minutes.
Flavor Layering Genius: We're not just dumping spices on chicken and calling it a day. Each ingredient is added at the perfect moment to maximize its potential. The result? Depth that tastes like it took hours, not minutes.
Crack-Proof Rolling Method: Forget everything you know about rolling taquitos. My method (born from many, many failures) ensures zero cracks, zero leaks, and perfect little spirals every single time.
Party MVP: These disappear faster than free concert tickets. I brought them to a potluck once and literally had to hide a few in my purse for the drive home. Yes, I'm that person.
Weeknight Friendly: From fridge to table in forty-five minutes, with most of that being hands-off oven time. If you've got leftover chicken, you can cut that time in half.
Alright, let's break down exactly what goes into this masterpiece...
Inside the Ingredient List
The Flavor Base
The chicken is obviously the star here, but not just any chicken will do. I use boneless thighs because they stay juicy even if you accidentally overcook them (and let's be honest, that's happened to all of us). If you're team breast, I won't judge, but promise me you'll cook them gently and pull them while they're still slightly pink — they'll finish cooking in the oven.
The lemon is non-negotiable. We're using both zest and juice here, because why settle for one-dimensional when you can have citrus that hits from two angles? The zest gives you those aromatic oils that make your kitchen smell like a Mediterranean grove, while the juice provides that bright acidity that makes your taste buds do a happy dance.
Garlic lovers, rejoice — we're using a whole head. Yes, you heard that right. But here's the trick: we add it at different stages. Some goes in early to mellow and sweeten, some goes in at the end for that fresh, punchy hit. It's like garlic's greatest hits album.
The Texture Crew
Feta cheese is where most recipes go wrong. They dump in a mountain of feta, and suddenly you've got a soggy, salty mess. We're using just enough to give you those creamy pockets that contrast beautifully with the crispy tortilla. The secret? Buy it in brine, not pre-crumbled. The brine version stays creamy and doesn't turn gritty when heated.
Fresh herbs make all the difference here. Dried oregano is fine in a pinch, but fresh oregano has this almost floral quality that transports you straight to a Greek hillside. And don't even get me started on fresh dill — it's like springtime in herb form. If you can't find fresh, grow some on your windowsill. Trust me, your future self will thank you.
The red onion serves double duty. Half gets sautéed until sweet and jammy, becoming the backbone of our filling. The other half stays raw, adding that sharp bite that cuts through all the richness. It's like having two different onions working in perfect harmony.
The Unexpected Star
Here's where I lose some people, but stay with me — we're adding a touch of honey. Not enough to make it sweet, just enough to round out the edges and make everything taste more like itself. It's like the bass player in a band — you don't necessarily notice it's there, but you'd miss it if it was gone.
Sun-dried tomatoes are my secret weapon. They bring this intense umami punch that makes people ask "what's in these?" in the best possible way. Get the ones packed in oil, not the dry ones that taste like tomato-flavored cardboard. And save that oil — it's liquid gold for sautéing.
The Final Flourish
The tortillas matter more than you'd think. I've tried every kind under the sun, and corn tortillas give you that authentic taquito experience, but flour tortillas are more forgiving for beginners. If you're using corn (which I recommend), look for ones that say "handmade style" — they're usually thicker and less likely to tear.
Olive oil is our cooking fat of choice, but not just any olive oil. Use a good Greek olive oil if you can find it — it has this grassy, peppery quality that plays beautifully with our herbs. Save your fancy finishing oil for drizzling at the end.
Everything's prepped? Good. Let's get into the real action...
The Method — Step by Step
- Start with a cold skillet — yes, you heard that right. Add your chicken thighs, salt, pepper, and half your oregano. Turn the heat to medium and let it go. This cold-start method ensures the chicken releases all its juices, creating the most incredible flavor base. As it heats, the chicken will slowly come up to temperature, staying tender while building this gorgeous fond on the bottom of the pan.
- Once the chicken is cooked through (about 12-15 minutes), pull it out and let it rest. Don't you dare rinse that pan — those brown bits are liquid gold. Add your onions and let them hang out in all that chickeny goodness. They'll slowly caramelize, picking up every last bit of flavor. The smell at this point? Like someone bottled a Greek grandmother's kitchen.
- While the onions work their magic, shred your chicken. Use two forks, or if you're feeling fancy, those bear claw things. The chicken should be so tender that it practically falls apart. Don't over-shred — you want some nice chunks in there for texture. Think rustic, not baby food.
- Back to the pan — add your garlic and let it perfume everything for about 30 seconds. Add the sun-dried tomatoes, half your dill, and a good glug of that tomato oil. Stir, stir, stir, letting everything get to know each other. The pan should look like a party you want to be invited to.
- Off the heat, this is where the magic happens. Add your shredded chicken back in, along with the lemon zest, juice, honey, and most of your feta. Stir gently — you want those feta pockets to stay intact. Taste and adjust. It should make you want to face-plant right into the pan. Resist. Or don't. I won't tell.
- Now for the rolling — this is where most people panic, but you've got this. Warm your tortillas one by one in a dry skillet. They should be pliable and steamy. Place about 2 tablespoons of filling in a line across the bottom third, then roll tightly. Don't overfill — I know it's tempting, but these aren't burritos. Think cigar, not baseball bat.
- As you roll, place them seam-side down on a plate. They'll hold together better this way. If you're making a big batch, cover with a damp towel so they don't dry out. Nothing worse than a cracked taquito — it's like a broken promise in food form.
- Heat your oil to 350°F — use a thermometer here, guessing is for people who like greasy taquitos. Fry in batches, don't crowd the pan. They should sizzle immediately but not furiously. Too hot and the outside burns before the inside heats through. Too cool and they'll absorb oil like a sponge. About 2-3 minutes per side until golden and crispy.
- Drain on a wire rack set over a baking sheet. Don't use paper towels — they'll steam and lose their crisp. Sprinkle with salt while they're still hot. Then try to wait five minutes before eating one. I dare you. Double dare you.
That's it — you did it. But hold on, I've got a few more tricks that'll take this to another level...
Insider Tricks for Flawless Results
The Temperature Rule Nobody Follows
Your oil temperature is everything. Too low and your taquitos become oil-soaked sponges. Too high and you've got burnt outsides with cold insides. The magic number is 350°F, and I mean exactly 350°F. Use a thermometer, not your finger. I've tried the "flick water in the oil" method — it's about as reliable as weather forecasts from a groundhog.
Here's the pro move: maintain the temperature by adding taquitos in small batches. Each one drops the oil temperature, so give it time to recover between batches. It's like taking your oil to the gym — it needs recovery time to perform at its best. And for the love of all things crispy, don't stack them while they're hot. Steam is the enemy of crunch.
Why Your Nose Knows Best
Your nose is the best kitchen timer you have. When the taquitos are almost ready, your kitchen will fill with this incredible aroma — toasty corn, fragrant herbs, and something that smells suspiciously like a Greek island vacation. That's your cue to start checking for doneness. They should be golden, not brown. Brown means you've gone too far, my friend.
Another nose trick: if you smell the oil getting funky or starting to smoke, your oil is breaking down. Time for fresh oil. Yes, it's a pain, but so are taquitos that taste like they were fried in a garage. Your future self (and your guests) will thank you for this attention to detail.
The 5-Minute Rest That Changes Everything
I know, I know — hot taquitos are calling your name. But give them five minutes on that wire rack. This isn't just about not burning your tongue (though that's a nice bonus). The rest time lets the filling settle, the exterior crisp up even more, and the flavors meld into this perfect harmony. It's like letting a good wine breathe, but for taquitos.
During this rest, something magical happens. The residual heat continues to cook the very center, ensuring every bite is perfectly hot. The exterior develops this slight sheen that makes them look like they came from a professional kitchen. Plus, it gives you time to make the tzatziki, pour a drink, or just bask in the glory of what you've created.
Creative Twists and Variations
This recipe is a playground. Here are some of my favorite ways to switch things up:
The Mediterranean Vacation
Swap the chicken for lamb seasoned with rosemary and mint. Add some chopped olives and capers to the filling, and finish with a drizzle of pomegranate molasses. It tastes like you teleported to a Greek island, minus the expensive plane ticket. The lamb brings this rich, gamey flavor that plays beautifully with the bright herbs.
The Vegetarian Plot Twist
Replace chicken with roasted cauliflower that's been tossed in the same spice blend. The cauliflower gets these crispy edges that mimic the texture of well-browned meat. Add some chickpeas for protein, and don't skimp on the feta. Even my carnivore friends request these. The key is getting the cauliflower really caramelized — think golden brown, not sad and pale.
The Spicy Greek
Add a chopped fresh chili to the onion base, and swap half the feta for halloumi. The halloumi gets all melty and slightly squeaky in the best possible way. Serve with a harissa-spiked yogurt instead of tzatziki. It's like your taquitos went on spring break to Mykonos and came back with stories.
The Breakfast of Champions
Stuff them with scrambled eggs, spinach, and a touch of feta. They're like breakfast burritos' sophisticated cousin who studied abroad. Make them smaller for brunch parties — people lose their minds over breakfast taquitos. Add some crispy bacon if you're feeling indulgent. I won't tell your cardiologist.
The Seafood Sensation
Shrimp works beautifully here. Just cook them until barely pink, chop them up, and fold them into the filling with some fresh dill and lemon. It's like the best parts of a Greek island dinner wrapped in a crispy shell. Don't overcook the shrimp — they'll finish in the fryer and stay perfectly tender.
Storing and Bringing It Back to Life
Fridge Storage
Store cooked taquitos in an airtight container with paper towels between layers. They'll keep for up to four days, though honestly, they've never lasted more than two in my house. The paper towels absorb any excess moisture that could make them soggy. Don't just throw them in a container all willy-nilly — treat them with the respect they deserve.
Freezer Friendly
Freeze them before frying for the best results. Place them on a tray, freeze until solid, then transfer to freezer bags. They'll keep for three months, though I doubt they'll last that long. When you're ready to eat, fry them straight from frozen — just add an extra minute or two to the cooking time. It's like having a Greek restaurant in your freezer.
If you've already fried them, let them cool completely before freezing. Reheat in a 400°F oven for 10-12 minutes. They won't be quite as crispy as fresh, but they'll be pretty darn close. Much better than the microwave, which turns them into sad, chewy shadows of their former glory.
Best Reheating Method
The oven is your friend here. Preheat to 400°F, place taquitos on a wire rack set over a baking sheet, and heat for 8-10 minutes. They'll emerge nearly as crispy as day one. For extra insurance, spray them lightly with oil before reheating. It's like a mini spa day for your taquitos.
Avoid the microwave unless you enjoy disappointment. If you must use it (say, at work with limited options), wrap them in a slightly damp paper towel and microwave for 30-45 seconds. They won't be crispy, but they'll be edible. Then again, sometimes edible is good enough when you're desperate.