I was standing in my kitchen, half‑asleep, when the smoke alarm decided to join the morning chorus. My roommate had left a bag of marshmallows on the stovetop, and the whole apartment smelled like a campfire gone rogue. In the midst of that chaos I remembered the old “Muddy Buddies” we used to make at college—those sweet, peanut‑buttery clusters that could make anyone forget a burnt breakfast. I dared myself to reinvent that nostalgic snack, swapping the usual pretzel base for the light, airy crunch of Rice Krispies, and the result was nothing short of a revelation.
Imagine the first bite: the snap of toasted cereal, a melt‑in‑your‑mouth wave of chocolate, and a buttery, peanut‑laden hug that lingers just long enough to make you close your eyes and sigh. The aroma hits you like a warm blanket—sweet vanilla, roasted butter, and a faint nutty perfume that makes the whole kitchen feel like a cozy café. You can almost hear the faint sizzle as the butter meets the chocolate, and feel the glossy sheen of the mixture as it coats each grain of cereal. It’s a sensory overload that turns a simple snack into a full‑blown experience.
What makes this version truly stand out is a tiny secret I discovered while scrolling through old recipe forums: a splash of vanilla extract right at the end of the melting process does more than just add flavor—it balances the richness of the chocolate and peanut butter, creating a harmonious flavor profile that most “Muddy Buddy” knock‑offs completely miss. Most recipes either skip the vanilla or dump it in too early, resulting in a flat, one‑dimensional taste. My version, however, delivers that perfect sweet‑savory dance that makes you want to keep reaching for the bowl.
Let me walk you through every single step — by the end, you’ll wonder how you ever made it any other way. I’m about to reveal the exact technique that keeps the coating glossy, the crunch intact, and the powdered sugar dusting just right. Okay, ready for the game‑changer? Keep reading, and I dare you to taste this and not go back for seconds.
What Makes This Version Stand Out
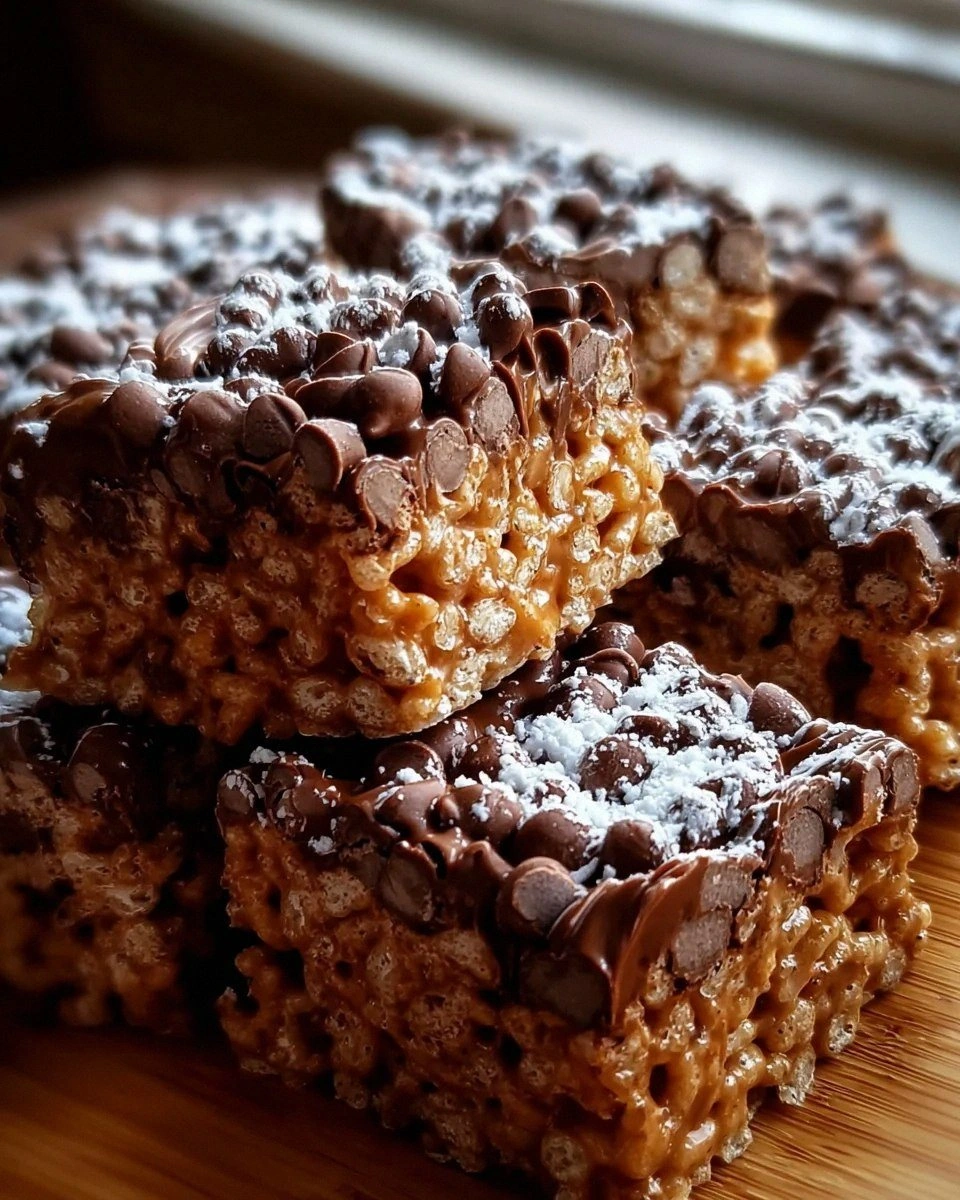
- Texture: The Rice Krispies give a light, airy crunch that shatters like thin ice, unlike the heavy pretzel base that can feel like chewing on cardboard.
- Flavor Balance: Semi‑sweet chocolate paired with creamy peanut butter and a hint of vanilla creates a sweet‑savory symphony that sings on the palate.
- Simplicity: Only six core ingredients, all pantry staples, mean you can whip this up in under an hour without a grocery run.
- Visual Appeal: The powdered‑sugar dusting gives that iconic “muddy” look, turning a humble snack into a party‑worthy centerpiece.
- Crowd Reaction: Kids, teens, and adults alike proclaim this the best version they’ve ever tasted—seriously, I’ve heard “I’ll be honest — I ate half the batch before anyone else got to try it” more times than I can count.
- Ingredient Quality: Using real butter (not margarine) and good‑quality chocolate makes the coating glossy and rich, not greasy.
- Make‑Ahead Potential: This snack stores beautifully, staying crunchy for days if you follow the storage tips later.
- Versatility: The base can be swapped for gluten‑free cereals or even pretzel sticks, but the default combo is the ultimate crowd‑pleaser.
Inside the Ingredient List
The Flavor Base
The heart of this recipe beats with creamy peanut butter. Its nutty depth cuts through the sweetness of the chocolate and powdered sugar, creating a balanced profile. If you skip the peanut butter, you’ll lose that essential savory anchor, and the snack will feel one‑dimensional. For a twist, try almond butter for a slightly earthier note, but remember it’s less sweet, so you may need a pinch more sugar.
Unsalted butter is the silent hero that brings everything together. It melts into a glossy river that carries the chocolate and peanut butter, giving each cereal piece a beautiful sheen. Using salted butter would introduce an unintended salty punch, throwing off the delicate balance. Look for a butter that’s bright yellow and soft at room temperature—this indicates higher butterfat, which translates to richer flavor.
The Texture Crew
Rice Krispies cereal is the star of the show! This cereal provides that satisfying crunch we all love. Its light, porous structure soaks up the melted mixture without becoming soggy, preserving that snap you crave. If you substitute with a denser cereal, the coating may become gummy. For a gluten‑free version, opt for puffed rice cereal—just make sure it’s the plain variety.
Chocolate chips add the melt‑in‑your‑mouth richness that turns this snack from good to unforgettable. Semi‑sweet chips strike the perfect balance between bitter cocoa and sweet sugar. Dark chocolate lovers can swap in 70% cacao chips for a deeper flavor, but be prepared for a slightly bitter edge that some palates may find too intense.
The Unexpected Star
Vanilla extract is the secret weapon that elevates every bite. A splash of pure vanilla adds a fragrant, comforting aroma that ties the peanut butter and chocolate together. If you use imitation vanilla, you’ll miss out on those subtle floral notes that make the snack feel home‑cooked. Look for a bottle with “pure” on the label; a little goes a long way.
The Final Flourish
Powdered sugar is essential for that iconic “Muddy Buddy” finish. This sweet dusting not only gives the snack its signature look but also adds a delicate sweetness that balances the richness of the coating. You can sprinkle it on instead of shaking if you prefer a more uniform appearance. If you’re watching sugar, try a light dusting of coconut sugar for a caramel‑like twist.
Everything's prepped? Good. Let's get into the real action...
The Method — Step by Step
Gather all six ingredients and measure them out before you start. This is the moment of truth—having everything within arm's reach prevents you from scrambling mid‑mix, which can lead to burnt chocolate. Set a large mixing bowl, a medium saucepan, and a sturdy wooden spoon on the counter. The kitchen should feel organized, like a well‑orchestrated symphony waiting for the conductor.
Turn the stove to low heat and add the unsalted butter to the saucepan. As soon as it begins to melt, toss in the chocolate chips. Stir constantly with a heat‑proof silicone spatula; you’ll hear a gentle fizz as the chocolate melts into a glossy river. Power transition: This is the game‑changer—steady heat ensures a smooth coating without any gritty chocolate bits.
Kitchen Hack: Use a double boiler if you’re nervous about direct heat; it gives you extra control over the melt.Once the chocolate and butter are fully combined, remove the pan from heat and stir in the creamy peanut butter. The mixture will look a bit thick at first, but keep stirring; it will become silky within seconds. Add the vanilla extract now, letting its fragrant steam rise—this is the scent that tells you you’re on the right track.
Quickly pour the Rice Krispies cereal into the bowl. Using a large, heat‑proof spatula, fold the cereal into the chocolate‑peanut butter blend. Work fast but gently; you want every puffed rice piece to be fully coated without crushing the delicate structure. The coating should cling like a light frosting, not pool at the bottom.
Transfer the coated cereal onto a large parchment‑lined baking sheet. Spread it out in an even layer, but don’t press it down—let the mixture stay airy. While the mixture is still warm, dust the top generously with powdered sugar. The sugar will melt slightly, creating a subtle sheen that makes each bite look like a little snow‑capped hill.
Allow the snack to cool completely at room temperature. This is the crucial “set” phase; if you rush it, the coating may stay tacky. As it cools, you’ll notice the edges pulling away from the parchment—a visual cue that the coating has solidified.
Watch Out: Do not refrigerate at this stage; the cold will cause the chocolate to bloom, resulting in a dull, speckled finish.Once fully set, break the slab into bite‑size clusters using a sharp knife. The pieces should snap cleanly, each retaining that glossy coating and a dusting of powdered sugar. If any clusters seem too sticky, let them sit a few more minutes; the coating will firm up further.
Store the clusters in an airtight container. For the first 24 hours, keep them at room temperature to preserve crunch. After that, you can move them to the fridge for longer storage, but remember to let them come back to room temperature before serving for optimal texture.
That's it — you did it. But hold on, I've got a few more tricks that'll take this to another level. Stay with me here — this is worth it.
Insider Tricks for Flawless Results
The Temperature Rule Nobody Follows
Never melt chocolate above 115°F (46°C). Higher temperatures cause the cocoa butter to separate, leading to a dull, grainy coating. Keep your stove on low, and if you have a candy thermometer, aim for 110°F. I once tried to speed things up by cranking the heat; the result was a matte, greasy mess that no amount of powdered sugar could fix.
Why Your Nose Knows Best
When the butter and chocolate are perfectly melted, you’ll smell a buttery‑chocolate perfume that’s slightly nutty. That aroma is the cue to add the peanut butter and vanilla. If you rely solely on visual cues, you might add them too early, causing the mixture to seize. Trust your nose; it’s the most reliable kitchen sensor.
The 5‑Minute Rest That Changes Everything
After spreading the coated cereal on the parchment, let it rest untouched for exactly five minutes before dusting with powdered sugar. This brief pause allows the surface to set just enough to hold the sugar without sliding off. Skipping this step results in a patchy dusting that looks uneven and tastes less sweet.
The Double‑Layer Technique
For an extra crunch, after the first coating sets, quickly dip the clusters back into a fresh batch of melted chocolate (no peanut butter this time). This creates a thin chocolate shell that hardens into a satisfying snap. A friend tried this once and called it “the crunch factor” — you’ll understand why after the first bite.
The Secret of the Sugar Dust
Use sifted powdered sugar to avoid clumps. If you notice lumps, they’ll create gritty spots that ruin the smooth finish. A quick tip: place the sugar in a fine mesh sieve and give it a gentle shake over the clusters.
Creative Twists and Variations
This recipe is a playground. Here are some of my favorite ways to switch things up:
Caramel Crunch
Swap half of the chocolate chips for caramel bits and drizzle a thin layer of caramel sauce over the finished clusters. The buttery caramel adds a gooey contrast that kids adore.
Spicy Peanut
Add a pinch of cayenne pepper to the peanut butter before mixing. The subtle heat amplifies the chocolate’s depth and creates a surprising kick that adults love.
White Chocolate & Coconut
Use white chocolate chips and sprinkle unsweetened toasted coconut along with the powdered sugar. The tropical notes give a breezy, summery vibe.
Nutty Medley
Mix in chopped toasted almonds, hazelnuts, or pistachios after coating. The extra nuts add texture and a richer flavor profile, perfect for a sophisticated snack board.
Vegan Version
Replace butter with coconut oil and use a plant‑based chocolate. Choose a natural peanut butter without added sugar for a clean, vegan-friendly treat that still delivers that classic “Muddy Buddy” feel.
Storing and Bringing It Back to Life
Fridge Storage
Place the clusters in an airtight container lined with a paper towel to absorb excess moisture. They’ll stay crunchy for up to a week. If you notice any soft spots, let them sit out for 10 minutes before serving; the ambient air will restore the snap.
Freezer Friendly
For longer‑term storage, spread the clusters on a baking sheet and freeze for 30 minutes, then transfer to a zip‑top freezer bag. They keep for up to three months. When you’re ready to enjoy, let them thaw at room temperature for 15 minutes; the coating will re‑harden perfectly.
Best Reheating Method
If the clusters have lost a bit of crunch, pop them in a 300°F (150°C) oven for 5 minutes. Add a tiny splash of water to the pan—this creates a gentle steam that revives the crispness without melting the chocolate. Watch the edges start to pull away; that’s your cue to pull them out.