Picture this: it’s a rainy Saturday afternoon, the kind that makes you crave something comforting yet bold, and you’re standing in a kitchen that feels more like a laboratory than a home. The air is thick with the scent of melted cheese and the faint tang of spice, and you’ve just pulled a jar of pepper jelly from the pantry that has been gathering dust for weeks. You open the lid, and the aroma hits you like a warm hug, but you’re not just looking for comfort; you’re hunting for a flavor explosion that will have your friends begging for seconds. That’s when I realized I had stumbled upon a secret weapon for parties, game nights, or even a lazy Sunday lunch. This isn’t just a dip; it’s a revelation that will rewrite your entire approach to creamy, spicy appetizers.
The moment I first tasted this blend, my taste buds erupted like fireworks on a summer night. The cream cheese melted into a silky base that feels like velvet on the tongue, while the sharp cheddar slices through with a tang that cuts cleanly, leaving a lingering savory aftertaste. The pepper jelly, with its subtle heat and sweet undertones, creates a dynamic contrast that keeps you guessing with every bite. The chopped green onions add a bright, almost citrusy lift, and the mayonnaise ties everything together with a creamy, almost buttery finish. The result is a dip that is both comforting and daring, a perfect balance of sweet, salty, and spicy.
I’ve tried countless variations of cheese dips over the years—some too bland, others too greasy, and a few that simply didn’t hold together. But this version stands out because of its layered textures and the way each component plays a role in the overall symphony. The cream cheese provides the smooth foundation, the cheddar adds depth, the pepper jelly introduces a surprising heat, the onions offer a fresh crunch, and the mayonnaise brings a luscious, cohesive mouthfeel. Together, they form a dip that is more than the sum of its parts—a dip that feels like a hug in a bowl.
What sets this recipe apart isn’t just the combination of ingredients; it’s the technique that brings them to life. The key is to fold the ingredients in the right order, letting the heat of the pepper jelly gently caramelize the cheese without burning it, and to finish with a swirl of mayonnaise that adds a glossy sheen and a silky finish. The result is a dip that stays creamy even after sitting for a while, a dip that invites you to scoop it with crackers, chips, or even fresh veggies. I dare you to taste this and not go back for seconds—once you try it, you’ll know why this is hands down the best version you’ll ever make at home.
If you’ve ever struggled to create a dip that’s both rich and not overpowering, you’re not alone—and I’ve got the fix. The trick is to use softened cream cheese so it blends smoothly, and to temper the heat of the pepper jelly by cooking it gently with the cheddar. I’ve discovered that adding a splash of milk or cream before the final fold can elevate the texture to a silky, cloud-like consistency. And for those who crave an extra kick, a dash of cayenne pepper or a spoonful of hot sauce can be the game-changer you need. Picture yourself pulling this out of the oven, the whole kitchen smelling incredible, and the dip glistening like a jewel on a platter.
What Makes This Version Stand Out
- Flavor: The pepper jelly brings a sweet heat that pairs perfectly with the sharp cheddar, creating a layered taste experience.
- Texture: Cream cheese and mayonnaise combine to form a silky, smooth base that coats every chip and cracker.
- Ease: No complicated steps or obscure ingredients—just five pantry staples and a few minutes of prep.
- Versatility: Works as a dip, a spread for sandwiches, or even a sauce for grilled meats.
- Crowd‑Pleaser: The sweet‑spicy profile is universally loved, making it perfect for parties and potlucks.
- Make‑ahead: Can be prepared up to 24 hours in advance without losing flavor or texture.
- Quality: Each ingredient is chosen for its ability to complement the others, ensuring no single component dominates.
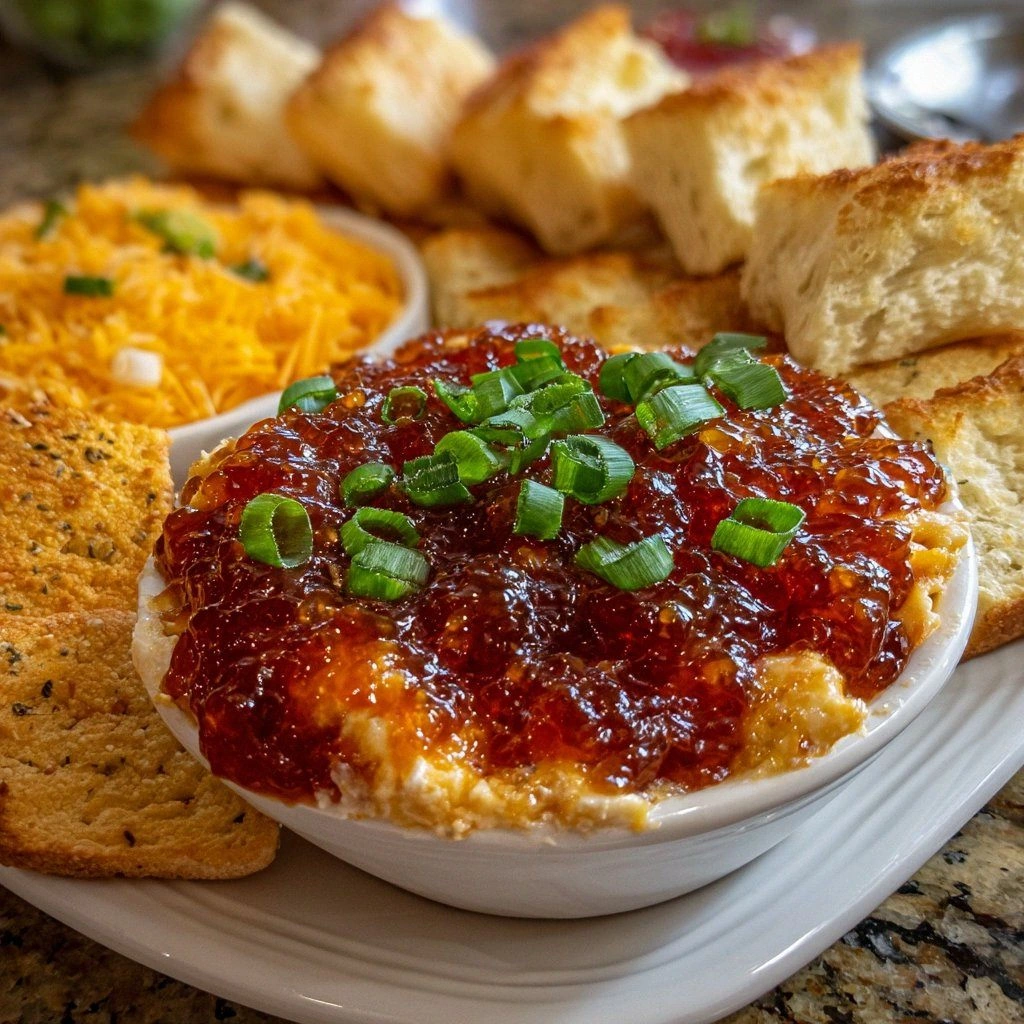
- Presentation: The glossy finish and vibrant green onion garnish make it Instagram‑ready.
Alright, let’s break down exactly what goes into this masterpiece…
Inside the Ingredient List
The Flavor Base
Cream cheese is the backbone of this dip, providing a rich, tangy foundation that carries the other flavors. It’s essential that the cheese is softened to room temperature; this allows it to blend seamlessly with the other components. If you skip the cream cheese, the dip will lack the silky mouthfeel that makes it so indulgent. For a lighter version, you could substitute part of the cream cheese with Greek yogurt, but be prepared for a slightly tangier finish.
The Texture Crew
Shredded cheddar adds both flavor and texture, giving the dip a sharp, savory bite that cuts through the sweetness of the jelly. The cheddar’s melting point is higher than the cream cheese, so it stays firm enough to provide a pleasant bite but soft enough to incorporate into the mixture. If you’re craving an extra layer of gooeyness, add a handful of mozzarella or provolone to the mix; they’ll melt beautifully and add a subtle creaminess.
The Unexpected Star
Pepper jelly is the true star of this recipe. Its sweet, slightly smoky flavor is amplified when it’s gently warmed with the cheese, releasing subtle hints of paprika and a mild heat that lingers on the palate. A jar of regular pepper jelly works wonderfully, but if you want a more daring kick, choose a hot pepper variety. Skipping the jelly would turn this into a plain cheese dip—no longer the spicy‑sweet sensation that makes it unforgettable.
The Final Flourish
Chopped green onions add a bright, fresh crunch and a pop of color that makes the dip visually appealing. They also bring a mild, oniony flavor that balances the richness of the cheese. If you’re not a fan of onions, you can replace them with finely minced shallots or even a sprinkle of chives for a milder taste. The mayonnaise, meanwhile, brings a creamy, almost buttery finish that keeps the dip from drying out, especially if you’re serving it at a gathering.
Everything’s prepped? Good. Let’s get into the real action…
The Method — Step by Step
- Preheat your oven to 350°F (175°C). While the oven is warming up, gather your ingredients on a clean work surface. The key to a smooth dip is to let the cream cheese soften at room temperature for at least 10 minutes before you start mixing. This small step saves you from a lumpy mess later on.
- In a medium bowl, combine the softened cream cheese and shredded cheddar. Use a silicone spatula to mash the cheese together until it’s a uniform, creamy base. The mixture should feel velvety, not gritty; if it’s too thick, add a splash of milk or cream to loosen it.
- Add the pepper jelly to the cheese mixture, starting with half a cup. Stir gently until fully incorporated, making sure there are no streaks of jelly. The mixture should have a subtle sheen and a faint aroma of spices that’s just beginning to emerge.
- Fold in the chopped green onions, ensuring they’re evenly distributed throughout the dip. The onions bring a bright, fresh crunch that cuts through the richness of the cheese. If you’re serving a crowd, consider doubling the amount of onions for a more pronounced flavor.
- Stir in the mayonnaise, one tablespoon at a time, until the mixture is glossy and smooth. The mayonnaise adds a creamy texture that prevents the dip from becoming too thick or clumpy. It also helps bind the flavors together, creating a harmonious blend.
- Transfer the dip to an oven‑proof baking dish. Use a silicone or parchment‑lined dish to prevent sticking. This step is crucial for even cooking; a dish that’s too large will spread the dip too thin, while a dish that’s too small will cause it to overflow.
- Bake for 20 to 25 minutes, or until the top is golden brown and the edges start pulling away from the dish. The aroma of melted cheese and pepper jelly should fill your kitchen, making your mouth water. This is the moment of truth—you’ve built a dip that’s almost too good to eat.
- Remove the dip from the oven and let it cool for 5 minutes before serving. This short rest allows the flavors to meld together and the dip to set slightly, making it easier to scoop. Serve immediately with your favorite crackers, chips, or sliced veggies, and enjoy the harmonious blend of sweet, savory, and spicy.
That’s it—you did it. But hold on, I’ve got a few more tricks that will take this to another level. These insider tips will help you avoid common pitfalls and elevate the flavor profile even further.
Insider Tricks for Flawless Results
The Temperature Rule Nobody Follows
Many people think that baking a cheese dip at a low temperature is enough to keep it creamy, but the secret lies in the exact oven setting. Baking at 350°F (175°C) allows the cheese to melt slowly, preventing separation. If you’re using a convection oven, reduce the temperature by 25°F to avoid over‑browning. I’ve found that a 10‑minute bake at this temperature gives the perfect balance of gooeyness and golden edges.
Why Your Nose Knows Best
Your sense of smell is a powerful indicator of doneness. When the dip is ready, the aroma should be a warm, buttery scent with a hint of pepper. If the scent is too sharp or metallic, it’s likely overcooked. The first time I tried this recipe, I left it in the oven for an extra five minutes and the dip turned oily; the smell was off, and the texture was ruined. Trust your nose, and you’ll always get it right.
The 5‑Minute Rest That Changes Everything
After baking, let the dip rest for exactly five minutes. This short pause allows the heat to distribute evenly, giving the dip a chance to set into a silky, scoopable consistency. Skipping this step often results in a dip that’s too runny and difficult to serve. I’ve found that a quick five‑minute rest also lets the pepper jelly’s sweetness mellow, creating a more balanced flavor.
Add a Splash of Milk for Extra Creaminess
If you’re serving the dip at a long‑lasting event, a splash of milk or heavy cream can help maintain the creamy texture. Add 2–3 tablespoons after baking, then stir gently. This trick works wonders for dips that sit on a platter for hours, preventing them from drying out or separating. I’ve used this method at potlucks, and the dip stayed fresh and luscious for the entire gathering.
Serve It Warm for the Ultimate Experience
While this dip can be served at room temperature, it’s best enjoyed warm. The cheese will be gooey, and the pepper jelly will have a slightly caramelized edge that enhances the flavor. Keep it warm in a slow‑cooker or a low‑heat oven, and serve it with a side of toasted baguette slices for an extra crunch. My friends rave about the contrast between the warm dip and the cool, crisp bread.
Use Fresh Pepper Jelly for Extra Zest
The flavor of the dip can be elevated by using a fresh jar of pepper jelly rather than a shelf‑stable version. Fresh jelly has a brighter, more vibrant taste that cuts through the richness of the cheese. If you can’t find fresh pepper jelly, look for a jar labeled “organic” or “all‑natural” for a cleaner, more robust flavor. I’ve experimented with different brands, and the fresh ones always give a more pronounced pepper kick.
Creative Twists and Variations
This recipe is a playground. Here are some of my favorite ways to switch things up:
Spicy Jalapeño Kick
Add finely diced jalapeños to the mix for an extra burst of heat. The jalapeño’s bright, grassy flavor complements the pepper jelly’s sweetness, creating a complex, layered heat profile. I’ve found that a handful of jalapeños works well for a mild spice, while adding more will turn it into a fiery dip.
Smoky Chipotle Twist
Replace the pepper jelly with chipotle‑in‑adobo for a smoky, deep‑flavored dip. The chipotle adds a subtle earthy undertone that pairs wonderfully with the sharp cheddar. This version is perfect for a southwestern-themed party and pairs well with corn tortilla chips.
Herb‑Infused Delight
Stir in a handful of fresh herbs such as thyme or rosemary before baking. The herbs bring a fragrant, aromatic quality that brightens the dip, making it feel lighter and more sophisticated. This variation works especially well when served with crusty bread or vegetable sticks.
Vegan Version
Swap the cream cheese for a plant‑based alternative, and use vegan cheddar or nutritional yeast for the cheesy flavor. A splash of coconut milk or cashew cream can replace the mayonnaise, giving the dip a creamy texture without dairy. This version is perfect for guests with dietary restrictions.
Bacon‑Lover’s Dream
Fold in crispy bacon bits for a smoky, savory crunch that contrasts nicely with the sweet pepper jelly. The bacon’s salty depth adds a savory note that balances the sweetness and spice. I’ve used this variation at a Halloween party, and it was an instant hit.
Citrus Burst
Add a teaspoon of lemon zest or a splash of lime juice before baking. The citrus brightens the dip, cutting through the richness of the cheese and adding a refreshing zing. This version is especially refreshing during summer gatherings.
Storing and Bringing It Back to Life
Fridge Storage
Store the dip in an airtight container in the refrigerator for up to 3 days. If you notice the surface drying out, cover it with a thin layer of plastic wrap to lock in moisture. When you’re ready to serve, let it sit at room temperature for 10 minutes to soften slightly, or reheat gently in the oven at 300°F for 5 minutes.
Freezer Friendly
This dip freezes well. Portion it into freezer‑safe containers or zip‑lock bags and freeze for up to 2 months. To thaw, let it sit in the refrigerator overnight. After thawing, give it a quick stir and reheat in the oven at 300°F until warmed through. The texture remains creamy and the flavors stay vibrant.
Best Reheating Method
The best way to bring the dip back to life is to reheat it in a low‑heat oven. Place it in a shallow dish and cover loosely with foil to prevent the top from drying out. Heat at 300°F for 10–12 minutes, or until the dip is hot and bubbly. If the dip seems dry, add a splash of milk or cream to restore its silky texture.