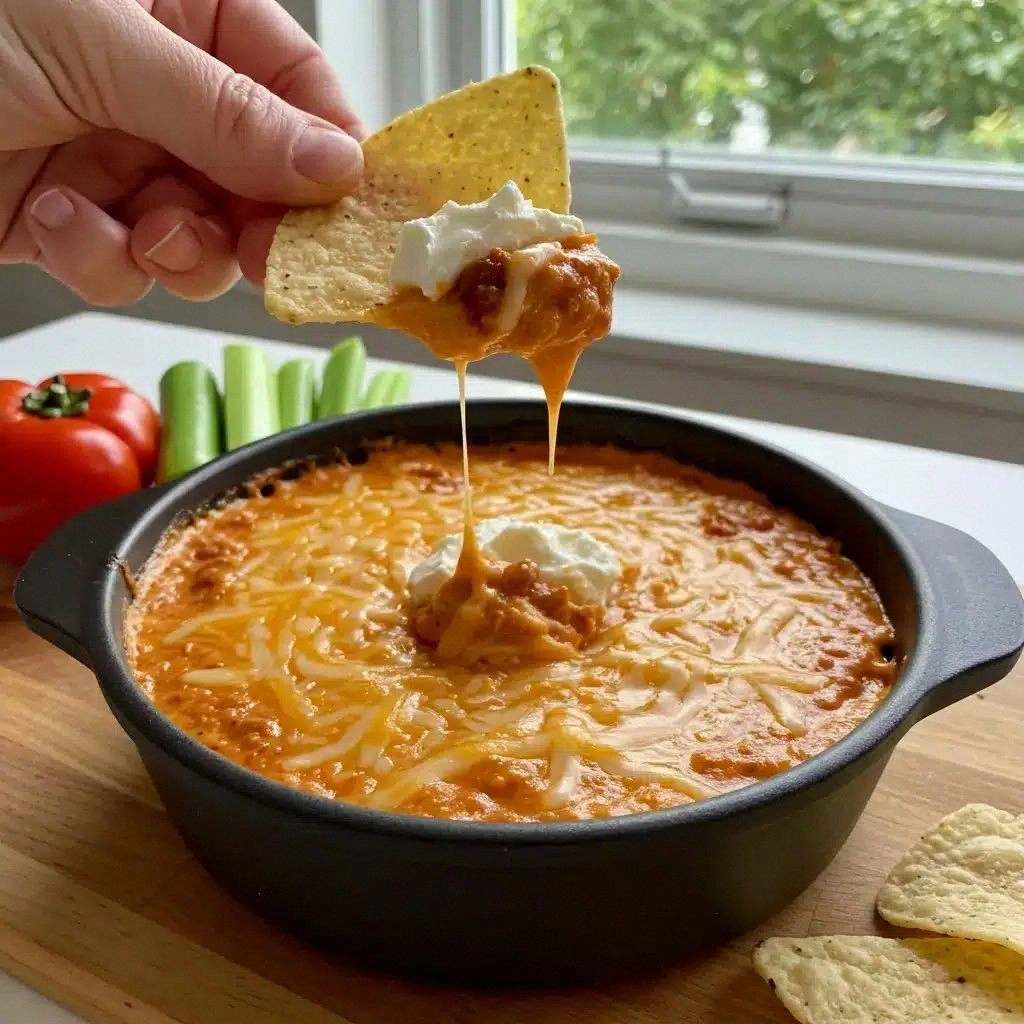
Picture this: a bowl of bubbling red chili, a mountain of shredded cheddar, and a swirl of creamy sour cream, all coming together in a single pot. The aroma that fills the air is a heady blend of smoky, spicy, and tangy notes, a sensory symphony that makes your nose twitch and your mouth water. The texture is a perfect balance—velvety smoothness from the sour cream, chunky bursts from the chili, and a melty, gooey cheese blanket that clings to every bite. The sound? A gentle hiss as the mixture simmers, a satisfying crackle when the cheese melts into a golden, bubbly surface. And the taste? It’s like a hug in a bowl—comfortingly hot, slightly tangy, with a smoky kick that lingers on your palate.
What sets this version apart from every other chili cheese dip you've tried is the sheer simplicity that doesn’t compromise flavor. No endless lists of spices, no time-consuming prep—just three pantry staples that, when combined, produce a dip that feels gourmet. The secret is in the technique: a slow, low simmer that allows the chili to thicken, the cheese to melt into silky ribbons, and the sour cream to fold in without curdling. I dare you to taste this and not go back for seconds; the first bite will have you begging for more. If you’ve ever struggled with bland dips that taste like they’ve been sitting in a bowl for days, you’re not alone—this recipe is the fix you’ve been waiting for.
Most people think chili cheese dip is just another party snack, but I’ve discovered that a few tweaks can elevate it from ordinary to unforgettable. The key lies in the ratio of ingredients, the heat control, and the finishing touch of a quick flourish. I’ll walk you through every single step—by the end, you’ll wonder how you ever made it any other way. Picture yourself pulling this out of the oven, the whole kitchen smelling incredible, and your guests reaching for the bowl like it’s a rare treasure. This isn’t just a dip; it’s a moment of culinary triumph.
Now that you’re hooked on the idea, let’s dive into what makes this version stand out. I’ll give you the lowdown on why this dip will become your go-to, and then we’ll break down each component so you can tweak it to your taste.
What Makes This Version Stand Out
- Flavor: The chili’s smoky depth is amplified by the sharp cheddar, while the sour cream adds a subtle tang that balances heat.
- Texture: The cheese melts into silky ribbons, the chili stays chunky, and the sour cream gives a creamy finish that coats the tongue.
- Simplicity: Three ingredients, one pot, and a handful of kitchen tools—no fancy gadgets or obscure spices.
- Speed: From prep to plating, the entire process takes less than 45 minutes, making it perfect for spontaneous gatherings.
- Versatility: Works as a dip, a topping, or a side—add it to tacos, serve over nachos, or drizzle over grilled meats.
- Crowd-pleaser: The combination of heat, cheese, and cream is a universal hit that gets people lining up for the last bite.
- Ingredient Quality: Using high-quality chili and real cheddar ensures flavor integrity; avoid processed substitutes.
- Make‑Ahead Friendly: Chill in the fridge for up to 24 hours; it reheats beautifully with a splash of milk.
Alright, let’s break down exactly what goes into this masterpiece. But first, a quick kitchen hack that will save you time and keep your hands clean.
Inside the Ingredient List
The Flavor Base
The canned chili is the heart of this dip. It brings a rich, smoky flavor that anchors the dish. If you prefer a milder taste, opt for a low-sodium or no-sugar-added variety, but keep the heat level consistent. Skipping the chili would turn the dip into a plain cheese-sour cream concoction—no fun.
The Texture Crew
Shredded cheddar cheese provides the gooey, melty texture that makes every spoonful a delight. Choose a sharp cheddar for a punchier bite, or a mild cheddar for a smoother finish. If you’re a dairy-free fan, a vegan cheddar substitute works, but the melt might differ slightly. Remember, the cheese should be at room temperature before adding to avoid clumping.
The Unexpected Star
Sour cream is the secret weapon that adds creaminess and a subtle tang. It balances the chili’s heat and keeps the mixture from becoming too thick. If you can’t find sour cream, Greek yogurt is an excellent alternative—just stir in a splash of milk to thin it out. Don’t skip this step; without it, the dip would be dry and clumpy.
The Final Flourish
A pinch of smoked paprika or a dash of cayenne pepper can elevate the flavor profile, but it’s optional. If you prefer a classic taste, leave it out. Adding a sprinkle of fresh cilantro at the end gives a bright, herbal contrast. Keep the garnish simple—just enough to add color without overpowering the dip.
Everything’s prepped? Good. Let’s get into the real action.
The Method — Step by Step
- Begin by pouring the entire can of chili into a medium saucepan. Heat over medium heat, stirring occasionally, until the chili starts to bubble gently. This step is crucial for releasing the chili’s full flavor; do not rush it. The aroma should start to fill the kitchen, signaling that the chili is warming up.
- Add the shredded cheddar cheese to the pot, stirring until it begins to melt and mingle with the chili. The cheese should start forming soft, golden strands that cling to the sides of the pan. Keep the heat low to prevent the cheese from burning or clumping. This slow melt ensures a silky texture.
- Once the cheese is fully melted, reduce the heat to low and let the mixture simmer for about 5 minutes. Stir occasionally to maintain an even consistency. The dip should thicken slightly, becoming a luscious, cohesive blend of chili and cheese.
- Turn off the heat and allow the dip to rest for a minute. This brief pause lets the flavors settle, creating a richer taste profile. The mixture will still be hot enough to enjoy immediately, but it will also hold its shape better when served.
- Fold in the sour cream, whisking gently until the mixture is smooth and uniform. The sour cream should be at room temperature to prevent curdling. This step adds a creamy, tangy layer that balances the chili’s heat and the cheese’s richness.
- Return the pot to the stove on very low heat for another 2 minutes. Keep the pot covered to trap heat and moisture. The dip should emit a savory steam, indicating that the flavors are fully integrated.
- Taste the dip and adjust seasoning if needed. A pinch of salt or a dash of black pepper can enhance the overall flavor. Remember, the chili already contains salt, so use it sparingly.
- Transfer the dip to a serving bowl. Sprinkle a pinch of smoked paprika or a dash of cayenne pepper for an extra kick. Garnish with fresh cilantro if desired. This final touch adds color and a fresh herbal note.
- Serve immediately with tortilla chips, crackers, or sliced bread. The dip should be hot and bubbling, with a glossy sheen that invites dipping. If you’re serving at a party, keep the bowl in a preheated oven or a slow cooker set to low to maintain heat.
- Enjoy the first bite—your taste buds should feel a warm, comforting wave of flavor. The combination of heat, cheese, and cream is a sensory experience that’s hard to resist. If you’re watching, keep an eye on the dip; a sudden flare-up can happen if the heat is too high.
That’s it—you did it. But hold on, I’ve got a few more tricks that will take this dip to another level. These insider tips will help you perfect the texture, keep the dip warm longer, and avoid common pitfalls.
Insider Tricks for Flawless Results
The Temperature Rule Nobody Follows
Maintaining a low, steady heat is the secret to a silky dip. High heat can cause the cheese to seize and the sour cream to curdle. Keep the flame on the lowest setting and cover the pot to trap steam. I’ve seen dips that look great but turn out rubbery when overheated; avoid that.
Why Your Nose Knows Best
Before you taste, let the dip sit for a minute. The aroma will intensify, giving you a better sense of the flavor balance. If it smells too sharp, give it another minute; the heat will mellow. Trust your nose—it’s a better judge than taste buds.
The 5-Minute Rest That Changes Everything
Letting the dip rest after removing from heat allows the flavors to meld. It also reduces the risk of a sudden temperature drop that can cause the cheese to separate. This simple pause can mean the difference between a smooth dip and a lumpy mess.
The Quick Reheat Trick
If you need to reheat, add a splash of milk or a small dollop of sour cream before warming. This prevents the dip from drying out. Heat gently on low, stirring occasionally. A quick reheat keeps the dip creamy and delicious.
The Garnish Game
A sprinkle of fresh herbs or a dash of smoked paprika can elevate the visual appeal and flavor. Keep the garnish light so it doesn’t overpower the dip. I like to add a drizzle of hot sauce for those who love extra heat.
The Keep-Heat Strategy
For parties, place the dip in a preheated oven at 200°F or a slow cooker set to low. This keeps it warm without overcooking. A heat-retaining dish works well; avoid metal bowls that can conduct heat too quickly.
Creative Twists and Variations
This recipe is a playground. Here are some of my favorite ways to switch things up:
Mexican Street Twist
Swap the cheddar for pepper jack and add a splash of lime juice. Sprinkle chopped cilantro and diced jalapeños for an extra kick. This version feels like a fresh street taco, but in dip form.
Vegan Delight
Use a plant-based cheddar and coconut cream instead of sour cream. The dip will still be creamy, with a slightly nutty undertone. It’s a great option for guests with dairy restrictions.
Breakfast Bonanza
Serve the dip with toasted English muffins or bagels. Add a fried egg on top for a savory breakfast twist. The chili’s heat pairs surprisingly well with the richness of the egg.
Smoky BBQ Version
Incorporate a tablespoon of BBQ sauce into the chili before adding cheese. The smoky sweetness complements the dip’s heat. Pair it with grilled chicken or ribs for a hearty meal.
Mediterranean Remix
Replace the cheddar with feta and stir in chopped kalamata olives. Add a squeeze of lemon for brightness. This variation gives the dip a briny, tangy twist.
Dessert Dip?
For a playful dessert, drizzle the dip over cinnamon sugar churros. The sweet, spicy combo is a crowd-pleaser at parties. It’s an unexpected but delightful way to end a meal.
Storing and Bringing It Back to Life
Fridge Storage
Cool the dip completely before covering it with an airtight lid or plastic wrap. Store in the refrigerator for up to 24 hours. When ready to serve, let it sit at room temperature for 10 minutes to soften.
Freezer Friendly
Divide the dip into individual portions in freezer-safe containers. Freeze for up to 3 months. Thaw overnight in the fridge and reheat gently on low heat with a splash of milk to restore creaminess.
Best Reheating Method
Place the dip in a saucepan over low heat, stirring constantly. Add a tablespoon of milk or a dollop of sour cream to keep it silky. The dip should be heated until steaming, not boiling.