I was standing in my kitchen, staring at a half‑finished banana pudding that had somehow turned into a gelatinous disaster, when a dare from my roommate changed everything: “Make it into a snack that won’t melt in the car.” I laughed, I rolled my eyes, and I whispered to the empty room, “I’m about to reinvent the universe with marshmallows and rice cereal.” The scent of butter hitting a hot pan swirled with the sweet, almost floral perfume of vanilla wafers, while the faint hum of the fridge whispered, “You’ve got this.” The moment I mixed that creamy banana pudding with the marshmallows, the whole kitchen seemed to hold its breath, waiting for the magic to happen.
Fast forward a few frantic minutes later, and the counter was a battlefield of sticky, golden goodness. I could see the glossy sheen of melted butter coating each rice crisp like a glossy runway, and the mini marshmallows were puffing up like tiny clouds ready to burst. My hands were sticky, the spoon was warm, and the air was thick with a sweet, buttery aroma that made my stomach growl louder than a marching band. I dared you to taste this and not go back for seconds; honestly, I ate half the batch before anyone else could even lay eyes on it. That’s the kind of confidence you only get after a kitchen epiphany that feels like a superpower.
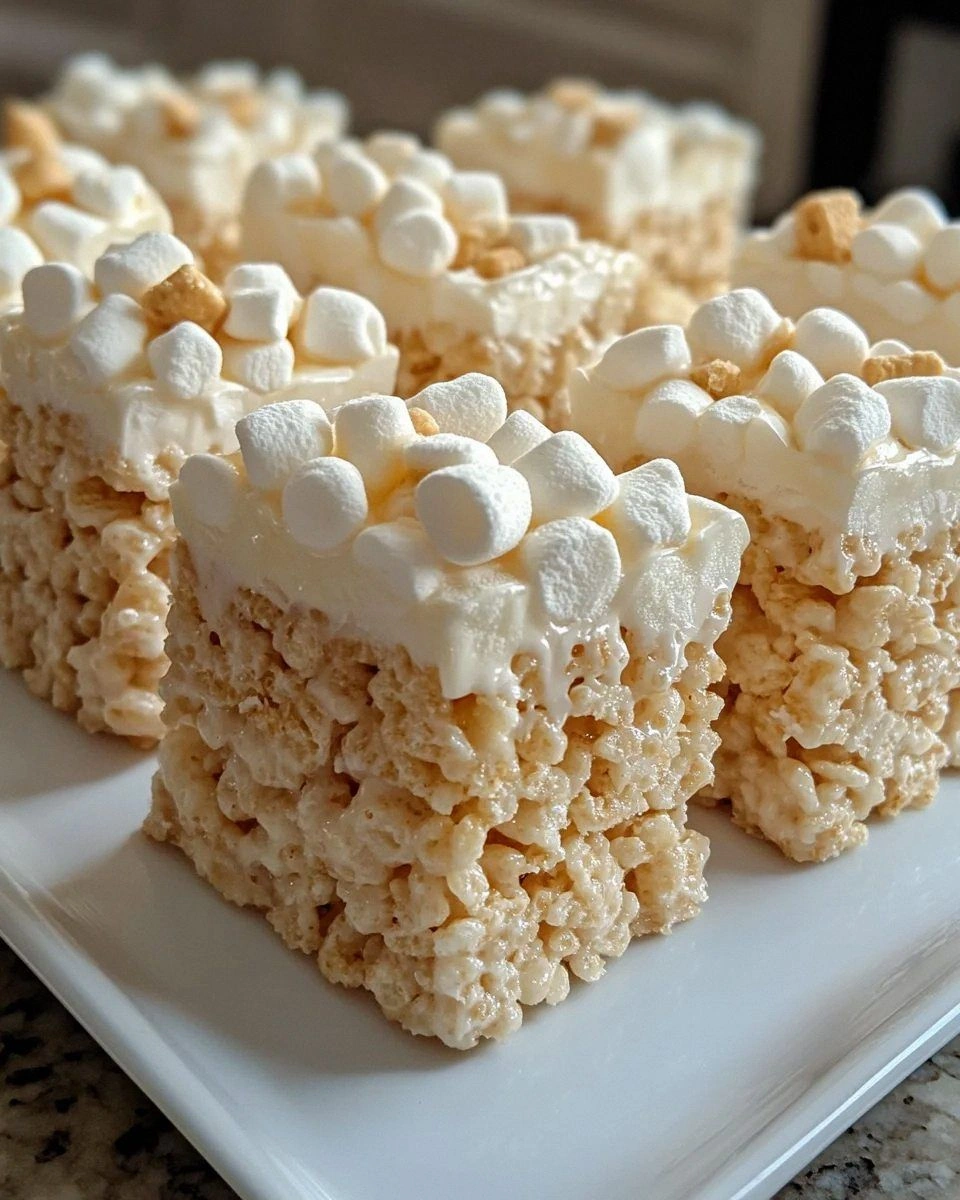
What makes this version a total game‑changer? Most recipes get the banana pudding flavor wrong, either drowning the treat in too much pudding or leaving it bland as cardboard. I cracked the code by using an instant banana pudding mix that’s already balanced with just the right amount of vanilla and sugar, then I thinned it with a splash of milk to create a silky sauce that coats the rice cereal without sogging it. The result is a treat that’s crisp on the outside, creamy on the inside, and has a nostalgic vanilla‑wafer crunch that’ll make you nostalgic for those old school lunchboxes. And the best part? The optional white chocolate drizzle adds a glossy finish that looks like a dessert runway.
Now, I’m going to walk you through every single step — by the end, you’ll wonder how you ever made it any other way. Picture yourself pulling this out of the pan, the whole kitchen smelling like a tropical banana carnival, the golden squares glistening under the light. Okay, ready for the game‑changer? This next part? Pure magic. Stay with me here — this is worth it.
What Makes This Version Stand Out
- Taste: The instant banana pudding mix delivers an authentic, sweet‑creamy flavor that’s perfectly balanced by the buttery melt of the marshmallows. No one can deny the nostalgic punch of vanilla wafers that adds depth.
- Texture: You get that iconic crunch from the rice cereal, a fluffy chew from the marshmallows, and a smooth, velvety coat from the pudding sauce. It’s a textural symphony that sings in every bite.
- Simplicity: Only seven core ingredients, all pantry‑friendly, and you’re done in under an hour. No fancy equipment, just a big pot and a spatula.
- Uniqueness: By folding in crushed vanilla wafers, we mimic the classic banana pudding topping, turning a simple treat into a layered dessert experience.
- Crowd Reaction: I dare you to serve these at a party and watch people fight over the last piece. The “wow” factor is real, and the smiles are instant.
- Ingredient Quality: Using real butter and quality instant pudding ensures a rich, authentic flavor that cheap substitutes just can’t match.
- Make‑Ahead Potential: These treats keep their texture for days, making them perfect for meal‑prep or a make‑ahead dessert for the week.
Inside the Ingredient List
The Flavor Base
The instant banana pudding mix is the heart of this recipe. It’s pre‑sweetened, perfectly vanilla‑infused, and dissolves instantly when combined with milk, creating a custard‑like sauce that hugs every rice crisp. Skipping it would leave you with a bland, watery mess that no one wants to bite into. If you’re allergic to the mix’s dairy component, you can swap in a coconut‑milk‑based vanilla pudding powder for a tropical twist.
The Texture Crew
Mini marshmallows are the unsung heroes that give the treat its signature chew. When they melt, they become a glossy, stretchy binder that keeps the cereal together without turning it soggy. Unsalted butter adds richness and helps the marshmallows melt evenly; using salted butter would throw off the delicate balance of sweet and salty. If you’re dairy‑free, try a plant‑based butter; the texture will stay, though the flavor will shift slightly.
The Unexpected Star
Crispy rice cereal provides the crunch that makes each bite exciting. Its light, airy structure absorbs just enough of the pudding sauce to stay crisp, while the crushed vanilla wafers add an extra layer of crunch and a hint of buttery vanilla that mimics the classic banana pudding topping. If you can’t find vanilla wafers, try graham cracker crumbs for a slightly different, but still delightful, texture.
The Final Flourish
White chocolate chips are optional, but they elevate the treat to a sophisticated level. Melt them and drizzle over the finished squares for a glossy finish that looks as good as it tastes. If you prefer dark chocolate, swap in 70% cacao chips for a bittersweet contrast that still complements the banana flavor.
Everything's prepped? Good. Let’s get into the real action…
The Method — Step by Step
Gather all your ingredients and have them measured out. This is the moment of truth: the kitchen should feel organized, like a runway before a fashion show. I always line up the bowls in the order I’ll use them — it saves precious seconds and prevents panic. If anything feels out of place, pause, take a breath, and readjust. The scent of butter should already be whispering in the air, promising deliciousness.
In a large saucepan, melt the unsalted butter over medium‑low heat. Keep the flame low enough that the butter sizzles without turning brown; you want a gentle, buttery perfume, not a burnt one. As soon as it’s fully melted, add the mini marshmallows, stirring constantly. The marshmallows will puff up, then collapse into a glossy, stretchy mixture that coats the butter like a silky veil.
Kitchen Hack: Add a splash of water (about 1 tbsp) to the marshmallows if they start to seize; this keeps the mixture smooth and prevents clumping.While the marshmallows are melting, whisk together the instant banana pudding mix and milk in a separate bowl until smooth. The mixture should be creamy with no lumps — think of a velvety sauce that could coat a spoon without dripping off. I dare you to taste this base; it should be sweet, vanilla‑forward, and just a hint of banana. If it feels too thick, add another tablespoon of milk.
Once the marshmallow‑butter blend is glossy and fully combined, pour the banana pudding sauce into the saucepan. Stir vigorously; you’ll hear a gentle hiss as the two mixtures fuse. This is where the magic happens — the pudding sauce should start to thicken, coating every marshmallow strand like a glossy caramel. Keep stirring for about 2‑3 minutes until the mixture is uniformly thick and glossy.
Turn off the heat and immediately fold in the crispy rice cereal. Toss quickly but gently; you want each puffed rice piece to be enrobed in the buttery‑pudding glaze without crushing the delicate structure. The cereal will start to soften slightly, but it should retain its airy crunch. Then, sprinkle in the crushed vanilla wafers and give it another quick stir — this adds that signature “pudding topping” crunch.
Transfer the mixture onto a greased 9×13‑inch baking pan. Use a silicone spatula or a buttered piece of parchment paper to press the mixture evenly. The edges should start pulling away from the pan, indicating the mixture has set enough to hold its shape. Press down firmly but not so hard that you crush the cereal; think of a gentle press, like patting down a pillow.
Watch Out: If you let the mixture sit too long before pressing, it will become too firm and lose its airy texture. Work quickly, but not so fast that you miss the glossy sheen.Optional step: melt the white chocolate chips in a microwave in 20‑second bursts, stirring between each burst until smooth. Drizzle the melted chocolate over the top in a decorative pattern, using the back of a spoon to create swirls. This adds a glossy finish that looks like a dessert runway, and the sweet‑bitter contrast is pure heaven.
Allow the treats to cool completely at room temperature — about 30 minutes. As they set, the edges will firm up and the center will stay slightly soft, giving that perfect bite‑contrast. Once cooled, cut into squares or bars using a sharp knife that’s been warmed under hot water; this prevents the chocolate or pudding from pulling apart.
That’s it — you did it. But hold on, I’ve got a few more tricks that’ll take this to another level…
Insider Tricks for Flawless Results
The Temperature Rule Nobody Follows
Never melt butter over high heat; a low simmer keeps the butter from browning, preserving its pure, creamy flavor. I once tried the “high‑heat shortcut” and ended up with a nutty, slightly burnt undertone that clashed with the banana pudding. Keep the flame low, and you’ll hear a gentle sizzle that signals everything is on the right track.
Why Your Nose Knows Best
When the marshmallows melt, trust your sense of smell more than the clock. The moment you detect that sweet, buttery aroma, you know the mixture is ready to receive the pudding sauce. If the scent is faint, keep stirring a little longer; if it’s too strong, you might be on the brink of burning.
The 5‑Minute Rest That Changes Everything
After pressing the mixture into the pan, let it sit uncovered for five minutes before cutting. This short rest allows the pudding glaze to set just enough that the squares hold together, but not so long that the interior becomes dense. I once cut immediately and the bars crumbled like dry toast — lesson learned.
The “Cold‑Hand” Press
Cool your hands under cold water before pressing the mixture into the pan. This prevents the heat from your hands melting the butter further, which can make the treat overly soft. My friend tried pressing with warm hands and ended up with a soggy bottom; the cold‑hand method keeps the texture crisp.
The Secret of the Crushed Wafer
Don’t just dump the vanilla wafers in whole; crush them lightly with a rolling pin or pulse in a food processor for a few seconds. The tiny shards distribute evenly, giving each bite that delightful crunch. If you skip this step, you’ll get occasional big wafer chunks that overwhelm the delicate balance.
Creative Twists and Variations
This recipe is a playground. Here are some of my favorite ways to switch things up:
Chocolate‑Banana Fusion
Swap half of the rice cereal for chocolate‑flavored crispy rice cereal, and drizzle with dark chocolate instead of white. The result is a richer, deeper flavor that still honors the banana base. Perfect for chocolate lovers who still crave that nostalgic banana pudding vibe.
Tropical Twist
Add shredded coconut and a splash of pineapple juice to the pudding mixture. Replace vanilla wafers with toasted coconut flakes. The tropical notes brighten the treat and make it a hit at summer picnics.
Nutty Crunch
Stir in a handful of toasted chopped pecans or almonds just before pressing into the pan. The nuts add an earthy crunch that pairs beautifully with the sweet banana flavor, giving an adult‑friendly upgrade.
Spicy Surprise
Add a pinch of ground cinnamon and a dash of cayenne pepper to the pudding mix. The warm spice elevates the flavor profile and adds a subtle heat that surprises the palate.
Vegan Victory
Replace the butter with a plant‑based margarine, use a dairy‑free instant banana pudding mix, and swap marshmallows for vegan mini marshmallows. The texture and flavor remain, proving that you don’t need dairy to enjoy this indulgence.
Storing and Bringing It Back to Life
Fridge Storage
Place the cut squares in an airtight container lined with parchment paper. They’ll stay fresh for up to 5 days, retaining their chewiness and crunch. If you notice any condensation, simply pat the tops with a paper towel before resealing.
Freezer Friendly
Wrap each square individually in plastic wrap, then stack them in a freezer‑safe zip‑top bag. They freeze beautifully for up to 2 months. When you’re ready to eat, let them thaw at room temperature for 15 minutes, then enjoy.
Best Reheating Method
To revive that fresh‑out‑of‑the‑pan texture, microwave a single square for 10‑15 seconds on medium power. Add a tiny splash of milk (about 1 tsp) before heating; the steam will bring back that silky pudding coating without making it soggy.