The first time I made this Chocolate Raspberry Mousse Cake, I burned the chocolate sponge so badly that the smoke alarm serenaded my entire apartment building. There I stood, waving a dish towel like a maniac, while my neighbor banged on the door asking if I needed the fire department. But here's the thing — even that charcoal-flavored disaster couldn't stop me from chasing this particular dragon. I'd tasted the perfect version at a tiny patisserie in Lyon, where the mousse was so airy it practically floated off the fork, and the raspberry layer hit that magical balance between tart and sweet that makes your taste buds do a happy dance.
Fast forward through three more failed attempts, two grocery store meltdowns, and one incident involving a hand mixer and a ceiling fan (don't ask), and I finally cracked the code. This isn't just another chocolate raspberry cake — this is the one that made my notoriously critical mother-in-law close her eyes and sigh audibly. The same woman who once told me my lemon bars tasted like furniture polish actually asked for seconds. That's when you know you've stumbled onto something special.
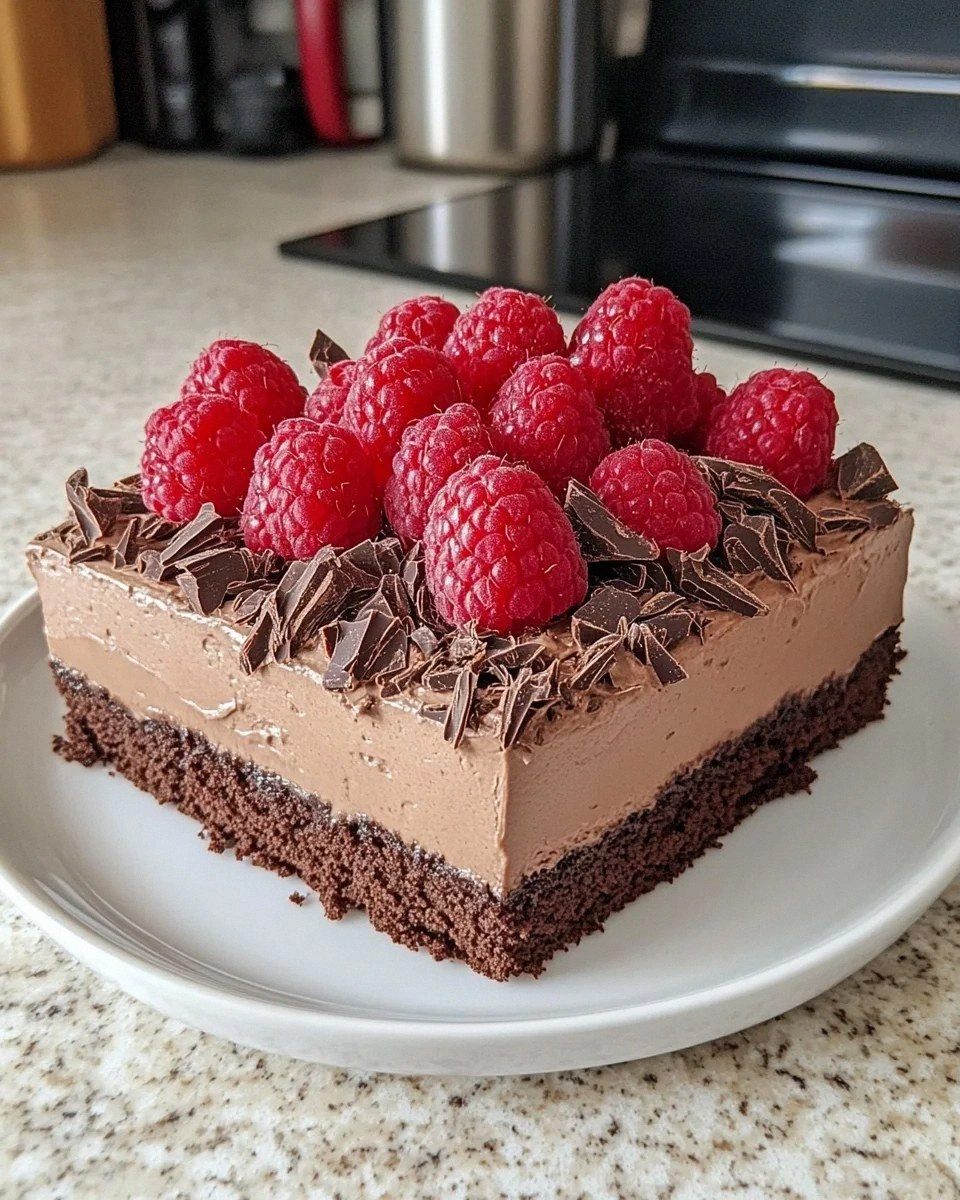
What makes this version different? It's all about the contrast — the deep, almost bitter chocolate sponge that acts like a sophisticated older sibling to the bright, cheeky raspberry mousse that practically giggles on your tongue. The sponge is sturdy enough to hold its own against the mousse without getting soggy, but tender enough to melt away like a chocolate whisper. And the raspberry layer? We're not talking about that artificial-tasting, neon-pink nonsense. This is pure berry intensity, like someone captured summer in a bowl and folded it into clouds.
Picture yourself pulling this out of the fridge, the glossy top catching the light like a jewel. You slice through those distinct layers, and the knife glides through like it's cutting butter. The first bite hits you with that dark chocolate depth, then the raspberry bursts through like a flavor firework, and finally they dance together in perfect harmony. I dare you to taste this and not go back for seconds. Actually, I dare you to stop at seconds. Let me walk you through every single step — by the end, you'll wonder how you ever made it any other way.
What Makes This Version Stand Out
Flavor Bomb: Most recipes play it safe with mild cocoa and barely-there berry flavor. We're using 75% dark chocolate and real raspberry puree that punches you in the taste buds in the best possible way. It's like the difference between a whispered apology and a heartfelt declaration of love — both communicate, but only one leaves you breathless.
Texture Paradise: The sponge stays miraculously moist for days thanks to a secret technique involving hot coffee (trust me, you won't taste it, but it works magic). The mousse achieves that impossible balance between airy and rich, like eating a chocolate cloud that's been to finishing school.
Foolproof Method: I've stripped away all the pastry chef intimidation tactics. No water baths, no tempering eggs, no standing on one foot while stirring clockwise under a full moon. Just straightforward techniques that work every single time, even when you're half-watching Netflix.
Make-Ahead Magic: This cake actually improves overnight, making it the perfect dinner party weapon. Make it Friday, serve it Saturday, and bask in the glory while your guests assume you spent all day slaving away. The flavors meld and deepen, creating something even more spectacular than the sum of its parts.
Crowd Psychology: There's something about those distinct layers that makes people lose their minds. I've seen grown adults take photos before eating, like they're documenting a crime scene. The contrast between sophisticated dark chocolate and playful raspberry makes everyone feel fancy, even if you're serving it on paper plates.
Ingredient Integrity: No artificial flavors, no food coloring, no shortcuts that sacrifice taste for convenience. Just real butter, real chocolate, real raspberries. You can taste the honesty in every bite, and somehow that makes it even more delicious.
Flexibility Factor: Want individual servings? Use ramekins. Need it gluten-free? Swap the flour for almond meal. Prefer milk chocolate? Adjust the sugar accordingly. This recipe is your canvas, and you're the artist with chocolate stains on your apron.
Inside the Ingredient List
The Flavor Base
The chocolate sponge starts with eggs that need to be genuinely room temperature — not "I took them out ten minutes ago" temperature. These little protein powerhouses are going to do the heavy lifting, creating structure without making the cake taste like an omelet. The brown sugar isn't just for sweetness; it brings molasses notes that make the chocolate taste more chocolatey, like adding bass notes to a song. Granulated sugar provides the structure we need for that perfect crumb, while vanilla extract is the supporting actor that makes the star performer shine brighter.
Here's where most recipes go wrong — they use cocoa powder like an afterthought. We're treating it like the VIP it is, sifting it with flour and baking powder to ensure no bitter lumps crash the party. The espresso powder is my secret weapon; it doesn't make the cake taste like coffee, but it amplifies the chocolate flavor like turning up the contrast on a photo. It's the difference between a good chocolate cake and a "holy cow, what is this sorcery?" chocolate cake.
The Texture Crew
Plain flour provides the scaffolding, but we're keeping it minimal to avoid a cake that could double as a doorstop. The baking powder gives us lift without making the sponge so airy it can't support the mousse. Salt isn't just for savory dishes — it's the flavor conductor that makes everything sing in harmony. Dark chocolate at 75% cacao content hits that sweet spot where it's intense enough to stand up to raspberries but not so bitter that it makes your face pucker like you just bit into a lemon.
The raspberry mousse starts with powdered gelatin, which sounds scary but is basically flavorless magic powder that turns liquid into velvet. Fresh lemon juice brightens the raspberry flavor without making it taste like cleaning product — we're talking two teaspoons, not two tablespoons. The raspberries themselves need to be the ripest, most fragrant specimens you can find. If they don't smell like summer, keep looking. Frozen works in a pinch, but fresh will give you that je ne sais quoi that makes people ask for your secret.
The Unexpected Star
Cold double cream is going to transform into the lightest, most luxurious mousse you've ever tasted. The key is keeping everything cold — warm cream whips up like a lazy teenager on a Sunday morning. We're using the full-fat stuff because this is not the time for diet shortcuts. This is the time for living your best life, one spoonful at a time.
The decoration raspberries should be the prettiest ones in the punnet — they're going to be wearing nothing but a dusting of powdered sugar, so they need to look their best. Dark chocolate shavings add that final touch of elegance, like the perfect accessory to an already stunning outfit. Pro tip: use a vegetable peeler on a chocolate bar that's slightly warm from being in your pocket. It creates curls that look like they came from a fancy pastry shop.
The Final Flourish
Everything else is just supporting players — a pinch of salt here, a teaspoon of vanilla there. But don't skip them, because they're the difference between a cake that's merely good and one that makes people close their eyes and swear softly under their breath. I'll be honest — I ate half the batch before anyone else got to try it. Quality control, I told myself, but really I just couldn't resist.
Everything's prepped? Good. Let's get into the real action...
The Method — Step by Step
- Start by preheating your oven to 350°F (175°C), but here's the thing — don't trust your oven dial. Most ovens lie like a teenager about curfew. Get an oven thermometer and prepare to be shocked by how far off yours probably is. While it's heating, line an 8-inch springform pan with parchment paper, making sure to cut a circle for the bottom and a strip for the sides. This cake will stick like gossip if you skip this step, and you'll be scraping chocolate casualties off the pan while cursing my name.
- Now for the sponge: In a stand mixer (or with a hand mixer if you're feeling ambitious), beat those room-temperature eggs with both sugars for a full 5-7 minutes. This isn't negotiable. The mixture should triple in volume and turn the color of pale gold, like morning sunlight. When you lift the beaters, the ribbon should sit on top for a few seconds before disappearing — that's how you know you've achieved the structure that'll make your cake rise like a champion. Add the vanilla and beat for another 30 seconds to combine.
- While the eggs are doing their thing, sift together the flour, cocoa powder, baking powder, espresso powder, and salt three times. Yes, three. I know it seems obsessive, but cocoa powder is clumpier than a kindergarten art project, and those lumps will ruin your cake's texture. Sifting also aerates everything, which helps maintain the lift from those beautifully whipped eggs.
- Here's where things get delicate: Fold the dry ingredients into the egg mixture using a large rubber spatula. Cut down through the center, scrape along the bottom, and fold over the top. Rotate the bowl a quarter turn and repeat. This should take about 20 folds — any more and you'll deflate the eggs, any less and you'll have flour pockets that taste like sadness. The batter should look like chocolate clouds.
- Drizzle in that melted (but not hot!) dark chocolate and fold just until you see chocolate streaks disappear. The batter will deflate slightly — that's normal and expected. Pour it into your prepared pan and smooth the top with an offset spatula. Give the pan a gentle tap on the counter to release any large air bubbles that could create craters in your finished cake.
- Bake for 18-22 minutes, but start checking at 15. The cake is done when it's puffed, springy to the touch, and a toothpick inserted in the center comes out with just a few moist crumbs. It should smell like chocolate heaven and make you contemplate face-planting directly into the pan. Let it cool completely in the pan on a wire rack — this is crucial for the texture, so don't rush it with the fridge unless you want a cake that could double as a doorstop.
- While the cake cools, make the mousse: Sprinkle the gelatin over the lemon juice in a small bowl and let it bloom for 5 minutes. It'll look like weird jelly, but that's exactly what you want. Meanwhile, puree 300g of the raspberries with the sugar until smooth — save the remaining 100g for later. Push this through a fine-mesh sieve to remove the seeds, unless you enjoy dental flossing while eating dessert.
- Warm the bloomed gelatin in the microwave for 10-15 seconds until liquid. Whisk this into the raspberry puree immediately — timing matters here because gelatin waits for no one. Let this mixture cool to room temperature, stirring occasionally. If it's too warm, it'll melt your cream later. Too cold, and it'll set up like Jell-O shots at a college party.
- In a chilled bowl with chilled beaters, whip the cold cream to soft peaks — when you lift the beaters, peaks should form and then gently fold over. Don't go to stiff peaks or your mousse will be grainy. Fold the raspberry mixture into the cream using the same gentle technique as before. You should see beautiful pink streaks that make you want to grab a spoon and abandon the whole cake concept.
- Press the remaining 100g raspberries through the sieve into the mousse for little pops of intense flavor. Spread this cloud-like mixture over the completely cooled sponge, smoothing the top like you're icing the world's most delicious cloud. Refrigerate for at least 4 hours or overnight — this is when the magic happens as the mousse sets up and the flavors meld into something transcendent.
That's it — you did it. But hold on, I've got a few more tricks that'll take this to another level...
Insider Tricks for Flawless Results
The Temperature Rule Nobody Follows
Everything needs to be the right temperature, and I mean everything. Cold cream whips better, room-temperature eggs whip higher, and slightly warm chocolate folds in without seizing. If your kitchen is hot, stick your mixing bowl in the freezer for 10 minutes before whipping cream. If it's cold, warm your eggs in a bowl of warm water. Temperature is the difference between a mousse that stands tall and proud versus one that slumps like a disappointed parent.
Why Your Nose Knows Best
When the cake is baking, your kitchen should smell like chocolate and sugar with a hint of vanilla. If you smell something toasty or nutty, it's probably done. If you smell burning, you've gone too far and need to start over (been there, done that, bought the t-shirt). Your nose is a better timer than any gadget, so trust it. That sizzle when it hits the pan? Absolute perfection.
The 5-Minute Rest That Changes Everything
After you fold in the chocolate, let the batter rest for exactly 5 minutes before pouring it into the pan. This allows the flour to hydrate and the chocolate to set slightly, creating a more stable structure. A friend tried skipping this step once — let's just say it didn't end well. The cake rose like a soufflé then collapsed like my 401k during a recession.
The Garnish Game-Changer
Those chocolate shavings aren't just for looks — they add textural contrast and intensify the chocolate flavor. Use a vegetable peeler on a slightly warm chocolate bar, holding it over a piece of parchment. The warmth from your hand will soften the chocolate just enough to create perfect curls. If the chocolate is too cold, you'll get dust. Too warm, and you'll get chocolate smears that look like modern art.
The Serving Secret
Use a hot knife to cut perfect slices. Dip your knife in hot water, wipe it dry, and slice in one smooth motion. The heat melts through the mousse cleanly, giving you Instagram-worthy layers instead of a mangled mess. Clean the knife between each cut — yes, it's extra work, but so is taking photos of ugly cake slices and pretending you're proud of them.
Creative Twists and Variations
This recipe is a playground. Here are some of my favorite ways to switch things up:
The White Chocolate Rebel
Swap the dark chocolate for good-quality white chocolate and add passion fruit puree to the mousse instead of raspberries. The tropical tang against the sweet white chocolate creates a sunset-colored dream that tastes like vacation. Add some toasted coconut on top and watch people lose their minds.
The Coffee Lover's Dream
Add two tablespoons of instant espresso powder to the sponge and fold coffee liqueur into the mousse. Top with chocolate-covered espresso beans for a cake that'll keep you buzzing long after dessert. It's like tiramisu and this cake had a beautiful, caffeinated baby.
The Berry Medley Masterpiece
Use a mix of raspberries, blackberries, and strawberries in the mousse. The different berries bring different notes — raspberry for brightness, blackberry for depth, strawberry for sweetness. It's like a berry choir where every voice matters.
The Mint Chocolate Marvel
Add a teaspoon of peppermint extract to the mousse and use crushed candy canes on top. Perfect for winter holidays or any time you want your dessert to taste like a Thin Mint cookie grew up and got sophisticated. If you've ever struggled with mint desserts tasting like toothpaste, you're not alone — and I've got the fix: use fresh mint leaves steeped in the cream instead of extract.
The Salted Caramel Twist
Drizzle homemade salted caramel between the sponge and mousse layers. The salt enhances both the chocolate and raspberry flavors while the caramel adds a buttery richness that makes this feel like a million-dollar dessert. It's over-the-top in the best possible way.
The Tropical Escape
Use mango puree in the mousse and add lime zest to the sponge. Top with toasted coconut flakes and a few passion fruit seeds for crunch. It's like a beach vacation in cake form, and it'll transport you somewhere sunny even in the depths of winter.
Storing and Bringing It Back to Life
Fridge Storage
This cake keeps beautifully in the fridge for up to 5 days, covered loosely with plastic wrap. Don't seal it completely or the mousse will weep like it's watching a sad movie. The flavors actually improve after the first day as everything melds together into something even more magical. Store it on a cake stand or plate, not in the springform pan, to prevent condensation from making the base soggy.
Freezer Friendly
You can freeze individual slices for up to 2 months. Wrap each slice in plastic wrap, then foil, and store in a freezer bag. Thaw overnight in the fridge, not on the counter, or the mousse will separate and look like it's having an identity crisis. The texture won't be quite as perfect as fresh, but it's still better than most bakery cakes.
Best Reheating Method
You don't reheat this cake — you serve it chilled. But if your fridge runs cold and the mousse seems too firm, let it sit at room temperature for 15-20 minutes before serving. This allows the flavors to bloom and the texture to soften to that perfect mousse consistency. Add a tiny splash of water to the knife before slicing if it's too firm — it steams back to perfection.