I was standing in my kitchen, staring at a pile of pickle spears that had been sitting in the fridge for weeks, when my friend dared me to turn them into something that would make her taste buds do a double backflip. The moment I sliced one open, the sharp, tangy aroma hit me like a slap of citrus on a hot summer day, and I knew I had to elevate that humble snack into a crispy, crunch‑laden masterpiece. I had tried the usual battered versions before, but they always ended up soggy or too greasy, and I was tired of that disappointment. Tonight, I’m about to show you a method that will turn those ordinary spears into a crunchy, flavorful sensation that will have everyone begging for seconds. The secret? A simple coating that crisps up in the air fryer like a golden sunrise, and a dash of bold spices that cut through the brine and add depth.
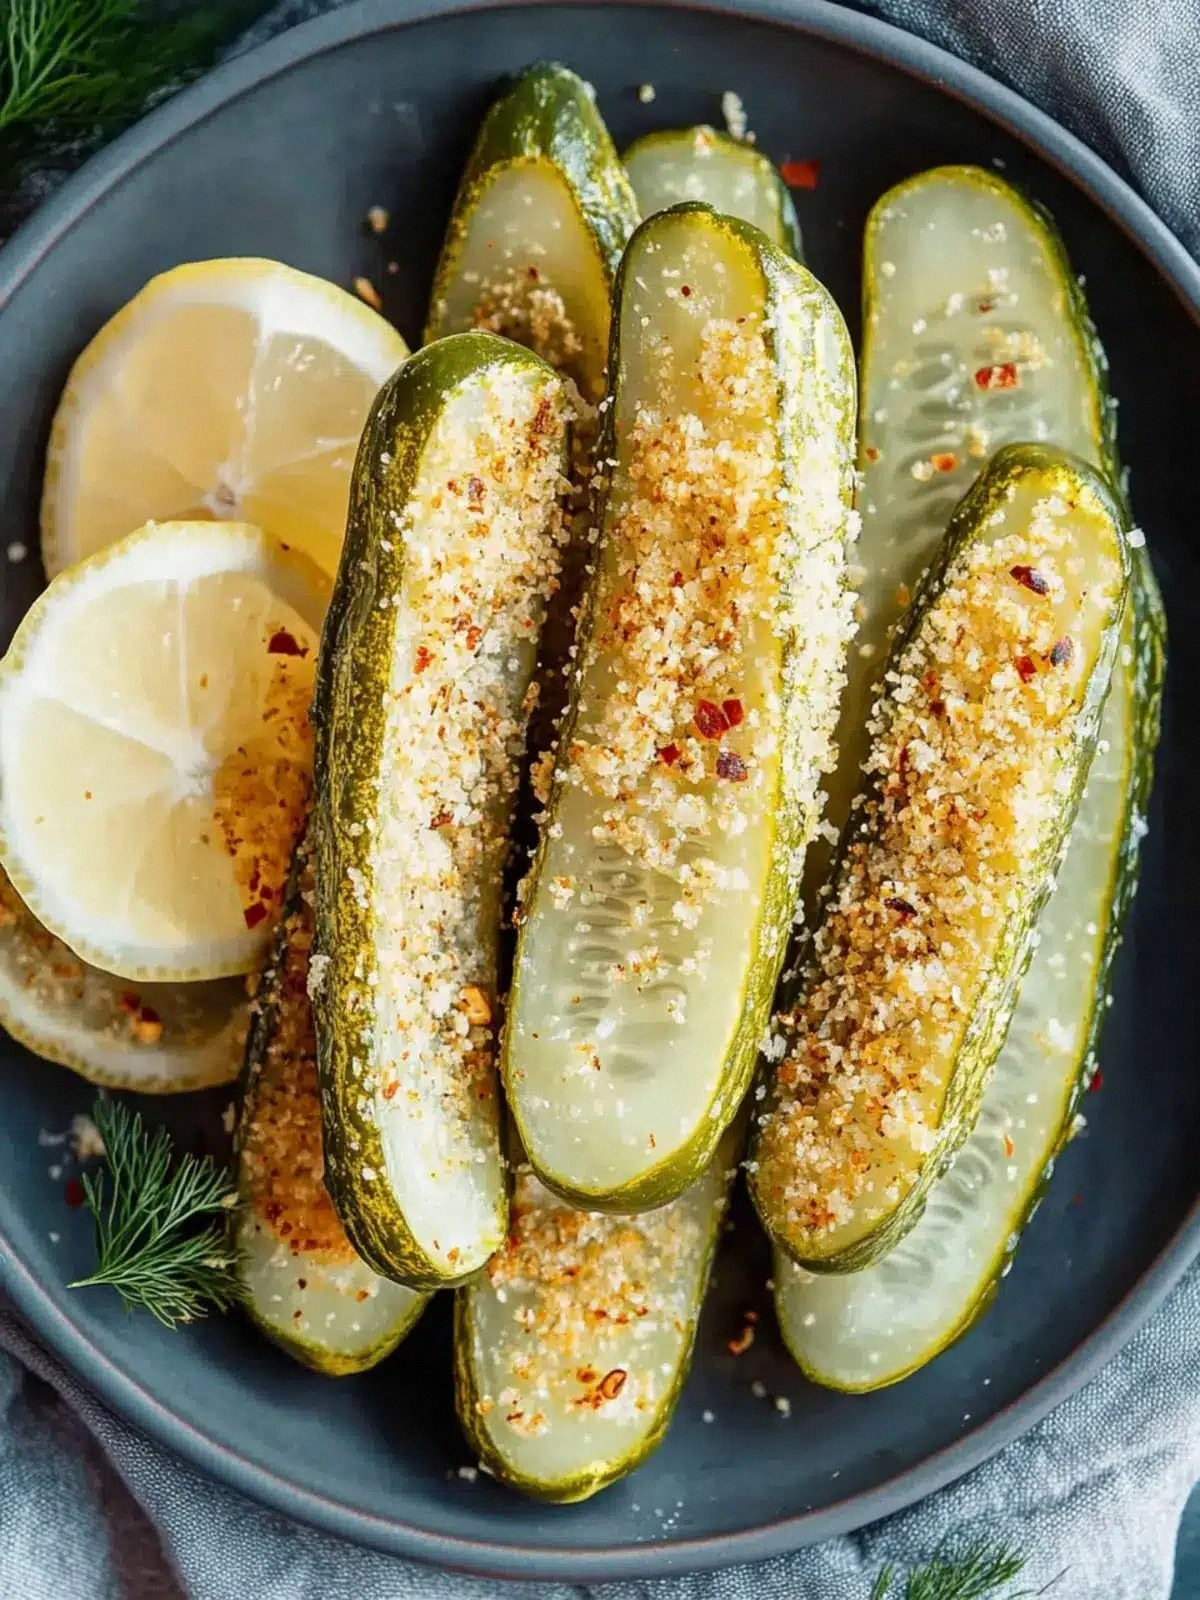
Picture yourself pulling a basket of bright green spears from the air fryer, the steam curling up like a fragrant cloud, each piece shimmering with a golden crust that crackles when you bite into it. The first bite delivers that satisfying crunch, followed by a burst of tang, and then a subtle warmth from the paprika and garlic powder. That moment when the sound of the crunch echoes in the kitchen, and you realize you’ve created something that feels both indulgent and wholesome. It’s the kind of snack that turns a casual gathering into a flavor party, and I’m going to walk you through every single step so you can replicate this magic at home.
If you’ve ever been disappointed by soggy or bland pickle spears, you’re not alone. Most recipes get this completely wrong, focusing on the batter alone and neglecting the coating that makes the texture unforgettable. I’ll be honest — I ate half the batch before anyone else got a chance to try it, and I couldn’t stop myself. But now, with this version, you’ll experience a crisp that shatters like thin ice, followed by a savory punch that lingers. And I dare you to taste this and not go back for seconds. This is hands down the best version you’ll ever make at home, and it’s so simple that even a beginner can master it.
The best part is that you can prep the spears ahead of time, store them in the fridge, and pop them into the air fryer whenever you need a quick, satisfying snack. The flavors meld together over time, and the coating stays crisp until the last bite. Picture yourself pulling this out of the oven, the whole kitchen smelling incredible, and knowing you’ve got a crowd‑pleaser ready in minutes. Okay, ready for the game‑changer? Let’s dive into the details.
What Makes This Version Stand Out
Flavor: The blend of garlic powder, paprika, and black pepper creates a depth that cuts through the brine and gives the spears a savory profile that’s more complex than a plain breadcrumb coating.
Crispiness: The combination of all‑purpose flour and panko breadcrumbs ensures a light, airy crunch that doesn’t turn soggy, even if you let them sit for a bit before frying.
Texture: The flour creates a fine, dry surface that the panko adheres to, resulting in a uniform coating that’s crisp on the outside and tender on the inside.
Ingredient Quality: Using fresh, high‑quality pickles with a good crunch guarantees that the base of the dish is already a treat, so the coating only adds to the experience.
Time Efficiency: The entire process takes less than 45 minutes from prep to finish, making it a go‑to snack for busy evenings.
Make‑Ahead Potential: You can bread the spears ahead of time and refrigerate them, then simply pop them into the air fryer when you’re ready to eat.
Portability: The finished spears hold up well in a sealed container, making them ideal for picnics, road trips, or lunchboxes.
Audience Appeal: Whether it’s a party or a quiet night, these spears are a crowd‑pleaser that satisfies both kids and adults with their crunchy texture and bold flavors.
Alright, let's break down exactly what goes into this masterpiece…
Inside the Ingredient List
The Flavor Base
The 1 teaspoon of garlic powder is the backbone of this recipe; it infuses the coating with a subtle yet unmistakable garlicky aroma that lingers on the palate. If you skip it, the spears will taste flat and the paprika will be the only seasoning you get. For a fresher punch, you can replace garlic powder with finely minced fresh garlic, but be careful not to add too much moisture. The garlic powder also helps the flour adhere better, giving you a more uniform crust.
The Texture Crew
The 1 cup of all‑purpose flour acts as a binding agent, creating a dry surface that the panko can cling to. Without it, the panko would simply fall off during frying. If you’re looking for a gluten‑free version, swap the flour for a 1:1 blend of rice flour and cornstarch, but keep the same quantity. The 1 cup of panko breadcrumbs are the star of the show; they provide that signature light, airy crunch that shatters delightfully.
The Unexpected Star
The 1 teaspoon of paprika adds a smoky warmth that balances the acidity of the pickles. It also gives the spears a vibrant, appetizing color. If you prefer a milder flavor, try smoked paprika for a subtle smoky note, or use sweet paprika for a slightly sweeter finish. The paprika’s color also makes the dish visually appealing, turning a simple snack into a showstopper.
The Final Flourish
The 1 teaspoon of ground black pepper and 1 teaspoon of salt are the finishing touches that elevate the entire flavor profile. They provide a savory backbone that keeps the spears from tasting overly sweet or briny. If you’re watching sodium, reduce the salt to ½ teaspoon and increase the pepper to 1½ teaspoons for a balanced flavor. The pepper also adds a subtle heat that enhances the overall taste experience.
Everything's prepped? Good. Let's get into the real action...
The Method — Step by Step
- Start by washing the pickle spears under cold water to remove any excess brine, then pat them dry with a clean towel. The drier the spears, the better the coating will stick. If you notice any sliminess, give them an extra rinse. This step is crucial for achieving that perfect crunch.
- In a shallow dish, combine the all‑purpose flour, garlic powder, paprika, ground black pepper, and salt. Whisk until the spices are evenly distributed. The uniformity of the spice mix ensures each spear receives a balanced flavor. Keep this mixture on standby while you prepare the coating.
- Separate the large eggs into a second shallow dish. Beat them lightly with a fork until the yolks and whites are well blended. The eggs act as a glue that holds the flour and panko together, creating a cohesive coating.
- Place the panko breadcrumbs in a third shallow dish. The panko will give the spears that signature airy crunch. If you want an extra crunch, mix in a tablespoon of cornmeal for a subtle texture difference.
- Take each pickle spear and coat it first in the flour mixture, tapping off any excess. Then dip it into the beaten eggs, allowing any excess to drip back into the dish. Finally, roll it in the panko breadcrumbs, pressing gently to ensure the crumbs adhere firmly. This triple‑layer process is what makes the spears so irresistibly crunchy.
- Preheat your air fryer to 400°F (200°C) for about 5 minutes. A properly heated air fryer ensures even cooking and a crisp exterior. While it’s heating, arrange the coated spears in a single layer in the basket, leaving space between each piece for air circulation.
- Cook the spears for 12 minutes, then flip them over and continue cooking for another 8 minutes. The total cooking time is 20 minutes, but you should check for doneness at the 12‑minute mark. The spears should be golden brown and the coating should be crisp.
- Remove the spears from the air fryer and let them rest on a wire rack for 2 minutes. This brief rest allows the steam to escape, keeping the crust crisp. If you’re serving immediately, the spears will still be hot and perfectly crunchy.
- Serve with your favorite dipping sauce—ranch, honey mustard, or a spicy aioli. The sauce adds another layer of flavor that complements the tangy, savory spears. For a healthier option, serve with a homemade Greek yogurt dip.
- Enjoy while they’re still warm, and watch the crowd go wild. The combination of crunch, tang, and spice will have everyone reaching for more. Remember to keep a napkin handy; the spears can be a bit messy but absolutely worth it.
Insider Tricks for Flawless Results
The Temperature Rule Nobody Follows
Many people think a lower temperature is safer, but a higher heat of 400°F is essential for crisping the panko. The higher temperature creates a rapid Maillard reaction that gives the spears that golden, caramelized crust. If you’re using a smaller air fryer, lower the temperature by 25°F and increase the cooking time by 2 minutes to maintain crispness.
Why Your Nose Knows Best
The aroma of the spears as they cook is a reliable indicator of doneness. When the smell turns nutty and slightly sweet, you know the panko is caramelizing. If you smell a faint, stale scent, give them a few more minutes. Trusting your nose saves you from overcooking or undercooking.
The 5‑Minute Rest That Changes Everything
Letting the spears rest on a wire rack for 5 minutes after cooking allows the steam to escape, preventing a soggy bottom. It also lets the coating set, making it easier to handle. I’ve found that a short rest makes the spears more stable when served on a platter.
Keep Them Crunchy Longer
If you’re preparing them in advance, store the coated spears in an airtight container in the fridge. When you’re ready to serve, pop them back into the air fryer for 2–3 minutes to refresh the crispness. This trick keeps the texture fresh without overcooking.
Serve With a Dip That Pops
A tangy yogurt dip with a splash of lemon juice enhances the brine flavor without overpowering it. Alternatively, a spicy sriracha mayo adds heat that balances the sweetness of the pickles. Experiment with different dips to find your favorite match.
Use a Food Processor for Even Coating
If you have a food processor, pulse the panko with the spices to create a finer mixture. This ensures an even coating and a smoother crunch. It’s a small step that can elevate the final texture.
Creative Twists and Variations
This recipe is a playground. Here are some of my favorite ways to switch things up:
Spicy Jalapeño Spears
Add a diced jalapeño to the flour mixture for a fiery kick. The heat pairs beautifully with the tangy pickle base, creating a flavor explosion that’s perfect for game nights.
Herb‑Infused Spears
Incorporate dried oregano and thyme into the spice blend for a Mediterranean twist. The herbs add earthiness that complements the crisp coating.
Cheesy Crunch
Sprinkle grated Parmesan cheese into the panko before coating. The cheese melts slightly during cooking, adding a savory umami layer to the crunch.
Asian‑Inspired Spears
Swap the paprika for a dash of five‑spice powder and add a splash of soy sauce to the egg wash. The result is a sweet‑savory, umami‑rich snack that feels like a sushi roll.
Gluten‑Free Version
Use a gluten‑free flour blend and gluten‑free panko breadcrumbs. The texture remains crisp, and the flavor profile stays intact, making it safe for those with dietary restrictions.
Sweet & Tangy Spears
Drizzle a light honey glaze over the spears after air frying. The honey caramelizes slightly, providing a sweet counterbalance to the brine.
Storing and Bringing It Back to Life
Fridge Storage
Store cooked spears in an airtight container in the refrigerator for up to 3 days. Keep them on a paper towel to absorb excess moisture and maintain crispness. When you’re ready to eat, reheat in a toaster oven at 350°F for 5 minutes.
Freezer Friendly
To freeze, place the spears on a parchment‑lined tray and freeze until solid. Transfer to a freezer bag and store for up to 2 months. Thaw overnight in the fridge, then air fry at 400°F for 10 minutes to revive the crunch.
Best Reheating Method
The quickest way to bring back the crispness is to reheat in the air fryer at 400°F for 5 minutes. Add a tiny splash of water to the bottom of the basket before heating to create steam that softens the coating just enough without making it soggy.