I was standing in my kitchen, half‑asleep, when my roommate tossed a half‑eaten bag of tortilla chips onto the counter and shouted, “You ever make something that actually makes these disappear?” I laughed, but the challenge lingered like a stubborn aroma of cumin in the air. My mind raced through every failed attempt at crispy Mexican‑style snacks—soggy, over‑spiced, or just plain boring. Then, in a flash of inspiration, I remembered the secret I’d learned from a street vendor in Oaxaca: the perfect balance of a juicy beef filling wrapped in a tortilla that shatters like thin ice when you bite it. That memory sparked a culinary fire so fierce I could hear the sizzle in my head before I even turned on the stove.
Picture this: a pan hot enough to make a whisper of oil hiss, the scent of ground beef browning mingling with the earthy perfume of cumin and chili powder, and the faint crackle of onions caramelizing like sweet fireworks. The kitchen fills with a golden glow, the kind that makes you feel like you’re about to unveil a masterpiece rather than just a snack. The texture of the beef—soft yet firm—gets a buttery hug from melted cheese, while the tortilla, once soft, transforms into a crunchy vessel that holds everything together without surrendering its crisp. Your senses are doing a salsa, and you’re already dreaming of the first bite.
Most taquito recipes out there treat the tortilla as an afterthought, frying it until it’s either too greasy or too brittle. They forget that the real hero is the filling, and that the secret to an unforgettable crunch is a quick, high‑heat fry that seals the edges before they have a chance to sog. This version flips the script: I’m using a two‑step cooking method that first cooks the beef to perfection, then gives the assembled roll a flash fry that locks in moisture and creates a shell that sings with every bite. The result? A taquito that’s crisp on the outside, juicy on the inside, and downright addictive.
And here’s the kicker: I’m throwing in a surprise ingredient that most cooks overlook—a splash of lime juice right before frying, which adds a bright zing that cuts through the richness and makes the crust practically glow. I dare you to taste this and not go back for seconds. Let me walk you through every single step — by the end, you’ll wonder how you ever made it any other way.
What Makes This Version Stand Out
- Flavor Explosion: The blend of cumin, chili powder, and a hint of lime creates a layered taste that dances on the palate, far beyond the one‑dimensional spice mixes you find in most recipes.
- Crunch Factor: A rapid, high‑heat fry locks in juices while forming a crust that shatters like thin ice, giving you that satisfying snap with every bite.
- Simplicity: Fewer steps, fewer ingredients, and no fancy equipment—just a skillet, a spatula, and a dash of confidence.
- Unique Twist: The secret splash of lime juice before the final fry adds a bright acidity that most recipes completely miss.
- Crowd‑Pleaser: Whether it’s a game night, a taco Tuesday, or a last‑minute party, these taquitos vanish from the plate faster than you can say “¡Más!”
- Ingredient Quality: Using fresh, high‑quality ground beef and real shredded cheese makes the filling rich without being greasy.
- Cooking Method: The two‑stage cooking (pre‑cook the filling, then flash‑fry) guarantees consistent results every single time.
- Make‑Ahead Friendly: You can prep the filling and assemble the rolls up to a day ahead, then fry them fresh for that unbeatable crunch.
Inside the Ingredient List
The Flavor Base
Ground beef is the heart of this dish, providing that deep, meaty richness you crave in any comfort food. I recommend 80/20 lean‑to‑fat ratio; the little extra fat keeps the filling moist and flavorful. If you skip the beef, you’ll lose the umami backbone, and the taquito will feel hollow, like a party without music. For a leaner version, substitute ground turkey but add a tablespoon of olive oil to compensate for lost juiciness.
The Texture Crew
Tortillas—whether corn for that authentic bite or flour for a softer chew—are the vessel that transforms the filling into a handheld marvel. Corn tortillas give you a rustic crunch, while flour tortillas hug the beef a bit more, making them easier to roll. If you use store‑bought tortillas that are too dry, a quick steam over a pot of simmering water for 15 seconds revives their flexibility. The cheese, preferably a sharp cheddar or a melty Monterey Jack, binds the beef together and adds a creamy contrast to the crispy exterior.
The Unexpected Star
Spices are where the magic truly happens. Cumin brings an earthy warmth, chili powder adds a smoky heat, and garlic powder offers a subtle aromatic depth. Skipping any of these will flatten the flavor profile, leaving you with a bland bite that feels like reheated leftovers. Feel free to crank up the heat with a pinch of cayenne if you love fire, or add smoked paprika for a deeper, wood‑smoked nuance.
The Final Flourish
Onion provides a sweet, caramelized backdrop that balances the spices, while a splash of lime juice right before the final fry lifts the entire dish with a citrusy zing. Oil, used for frying, should be a high‑smoke‑point variety like canola or peanut; using butter will burn before the crust forms, ruining the crunch. If you’re watching calories, you can shallow‑fry with just enough oil to coat the pan, but expect a slightly less uniform crisp.
Everything's prepped? Good. Let's get into the real action...
The Method — Step by Step
First, heat a large skillet over medium‑high heat and add a drizzle of oil. Toss in the chopped onion and let it soften for about two minutes, listening for that gentle sizzle that signals the start of flavor development. Once the onion is translucent, add the ground beef, breaking it up with a wooden spoon. Cook until the beef is browned, about 6‑8 minutes, and the edges begin to caramelize, releasing a deep, savory aroma that fills the kitchen.
Kitchen Hack: Sprinkle a pinch of salt while the beef browns; it draws out moisture, helping the meat develop a richer crust.When the beef is nicely browned, stir in the cumin, chili powder, and garlic powder, letting the spices toast for about 30 seconds. This brief toasting releases the essential oils, turning the mixture a deeper, more vibrant hue. Then, fold in the shredded cheese, allowing it to melt into the meat, creating a cohesive, creamy filling that will hold together when rolled.
Now, turn off the heat and add a generous squeeze of fresh lime juice—about one tablespoon for four servings. The acidity brightens the flavors and prevents the filling from feeling heavy. Let the mixture cool slightly; this is crucial because if the filling is too hot, the tortillas will steam and become soggy.
While the filling cools, warm the tortillas. Stack them on a plate, cover with a damp kitchen towel, and microwave for 30‑45 seconds. This steam‑softens them just enough to roll without tearing. If you notice any cracks, a quick dip in warm water (the same ice‑water hack from earlier) will rescue them.
Place about two tablespoons of the beef‑cheese mixture near the center of each tortilla. Fold the sides in, then roll tightly, sealing the edge with a dab of water. The tighter you roll, the less chance of the filling spilling out during the fry. This step feels like a mini‑origami session, and trust me, the more precise you are, the better the final crunch.
Heat a deep skillet or a Dutch oven with enough oil to reach a depth of about one inch. Aim for a temperature of 350°F (175°C); you can test it by dropping a tiny piece of tortilla—if it bubbles and rises to the surface within a few seconds, you’re golden. Carefully slide a few taquitos into the oil, making sure not to overcrowd the pan.
Watch Out: If the oil temperature drops below 300°F, the taquitos will absorb oil and become greasy rather than crisp.Fry the taquitos for 2‑3 minutes per side, or until the tortillas turn a deep golden‑brown and start to puff. You’ll hear a satisfying crackle—“That sizzle when it hits the pan? Absolute perfection.” Flip them gently with tongs; the crust should be firm enough to hold its shape without breaking.
Using a slotted spoon, transfer the fried taquitos onto a paper‑towel‑lined plate to drain excess oil. While they’re still hot, sprinkle a pinch of extra salt or a dash of smoked paprika for an added flavor punch. Let them rest for a minute; this brief pause allows the interior steam to settle, keeping the center juicy.
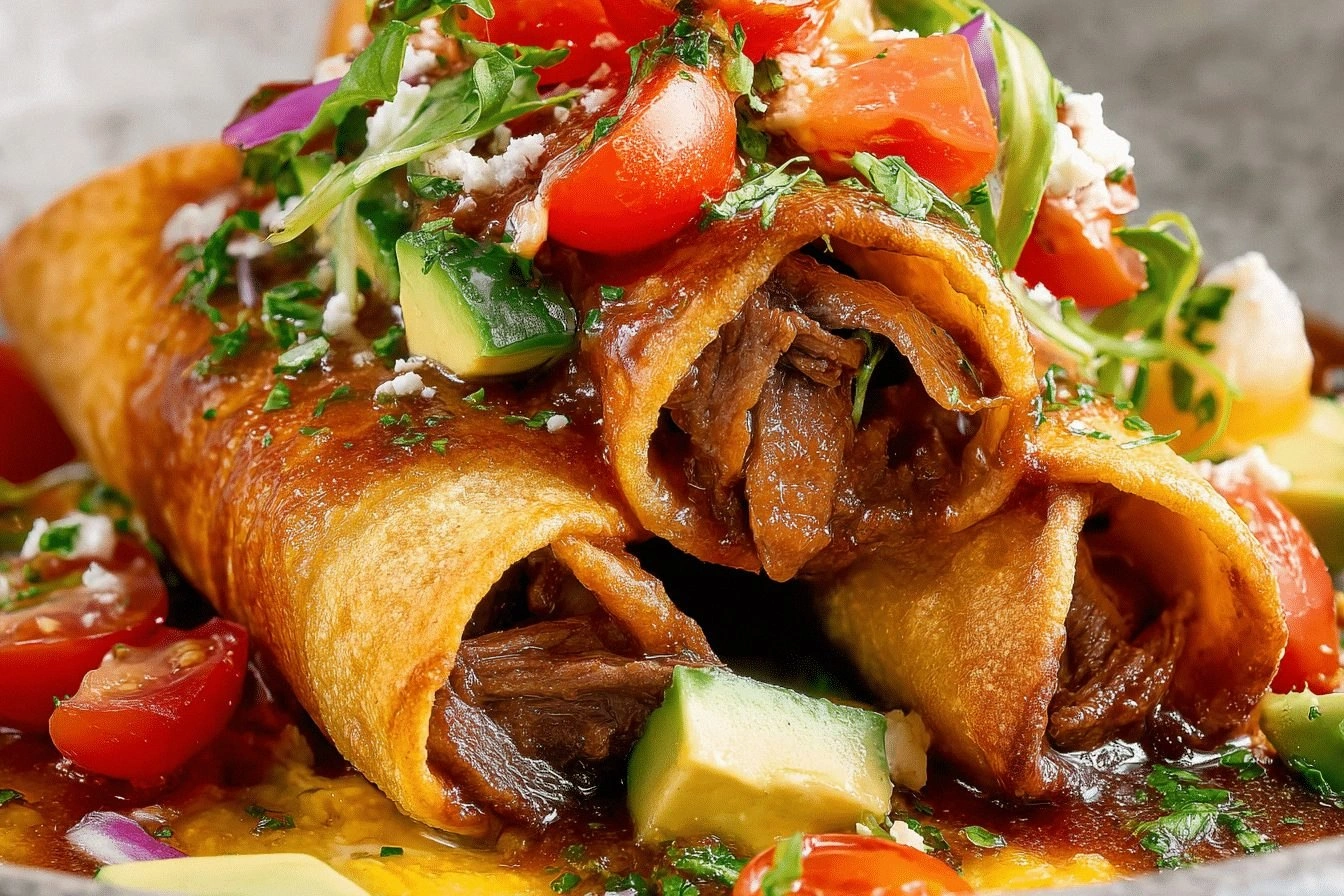
Serve immediately with your favorite dips—creamy avocado salsa, tangy tomatillo salsa, or a simple squeeze of lime. The contrast between the crunchy exterior and the molten interior is what makes these taquitos unforgettable. Picture yourself pulling this out of the pan, the whole kitchen smelling incredible, and the first bite delivering a burst of savory, cheesy, slightly citrusy goodness.
That’s it — you did it. But hold on, I’ve got a few more tricks that’ll take this to another level, from perfect plating to secret garnish ideas that will make your guests think you spent hours in a professional kitchen.
Insider Tricks for Flawless Results
The Temperature Rule Nobody Follows
Most home cooks fry at “medium” and hope for the best, but the real secret is a steady 350°F oil temperature. Use a candy thermometer or the wooden spoon test to maintain consistency. If the oil is too cool, the tortilla soaks up oil and loses its crunch; too hot, and the exterior burns before the interior heats through. I once tried a “high‑heat only” approach and ended up with blackened shells—trust me, that’s a no‑go.
Why Your Nose Knows Best
Your sense of smell is a more reliable indicator than a timer. When the beef hits that deep, caramelized scent and the oil starts to emit a faint, nutty aroma, you’re at the perfect moment to add the lime splash. This aromatic cue tells you the flavors have melded, and the acidity will cut through the richness just right.
The 5‑Minute Rest That Changes Everything
After frying, let the taquitos rest on a wire rack for five minutes instead of a paper towel. This allows excess oil to drip away while the steam inside redistributes, keeping the interior moist. A friend once skipped this step and complained that the inside was dry; a quick rest solved that issue instantly.
The Secret Garnish That Elevates
A sprinkle of finely chopped fresh cilantro and a drizzle of crema right before serving adds a fresh, cooling contrast to the heat. The green specks look like tiny confetti, turning a simple snack into a visual celebration. If you want extra tang, a dash of pickled red onion does wonders.
Batch‑Prep Like a Pro
You can assemble all the taquitos a day ahead, cover them tightly with plastic wrap, and refrigerate. When you’re ready to serve, simply fry them straight from the fridge; the cooler interior helps the crust stay crisp longer. I’ve used this method for game nights, and the results are consistently stellar.
Creative Twists and Variations
This recipe is a playground. Here are some of my favorite ways to switch things up:
Cheesy Jalapeño Blast
Add finely diced jalapeños to the beef mixture and increase the cheese by half a cup. The heat from the peppers pairs with the meltiness of the cheese, creating a fiery, gooey core that will make spice lovers swoon.
Southwest Black Bean
Swap half the ground beef for black beans, mashed slightly. This not only stretches the recipe but adds a hearty, earthy texture. Top with a dollop of chipotle mayo for a smoky finish.
Breakfast Taquito
Replace the cheese with scrambled eggs and crumbled breakfast sausage, then drizzle with a little hot sauce. Serve with salsa verde for a brunch twist that’s perfect for lazy weekends.
Sweet‑And‑Savory
Incorporate a spoonful of pineapple chunks into the filling and finish with a drizzle of honey‑lime glaze after frying. The sweet fruit balances the savory spices, creating a tropical surprise.
Vegan Version
Use plant‑based ground “beef” and vegan cheese, and fry in coconut oil for a subtle coconut note. The texture stays satisfying, and the flavor profile remains bold.
Storing and Bringing It Back to Life
Fridge Storage
Place cooled, unfried taquitos in an airtight container with a paper towel layer to absorb moisture. They’ll keep for up to three days. When ready, reheat in a hot skillet with a splash of oil for 2‑3 minutes per side to restore crispness.
Freezer Friendly
Freeze assembled, unfried taquitos on a parchment‑lined tray until solid, then transfer to a freezer bag. They’ll stay fresh for up to two months. Fry directly from frozen—just add an extra 30 seconds to the cooking time.
Best Reheating Method
For leftovers, the oven or air fryer reigns supreme. Preheat to 375°F, arrange taquitos on a wire rack, and heat for 8‑10 minutes, turning halfway. Add a tiny splash of water to the pan before reheating on the stove; the steam revives the interior while the exterior stays crunchy.