Last weekend I was in the middle of a fierce debate with my roommate about whether we should order pizza or try something daring for dinner. I tossed a bag of frozen chicken nuggets into the trash, grabbed a pack of chicken thighs, and thought, “What if I could turn these humble pieces into a street‑food masterpiece that would make even the most stubborn pizza lover surrender?” The kitchen quickly turned into a battlefield of sizzling oil, aromatic spices, and a soundtrack of frantic chopping—my own version of a culinary warzone. The moment the first piece of chicken hit the hot pan, that unmistakable crackle echoed like applause, and I knew I was onto something legendary.
Imagine the scent of coconut milk and curry powder dancing together, the sharp bite of ginger and garlic cutting through the richness, and the sweet heat of Thai chili sauce whispering promises of flavor fireworks. The chicken, after a quick dip in a creamy coconut‑infused brine, emerges with a crust that’s crispier than a fresh‑baked baguette and softer than a cloud. Each bite is a symphony: the crunch of the coating, the juicy tenderness inside, the herbaceous pop of cilantro and Thai basil, and the cool snap of cucumber and pickled carrots that cut through the richness like a perfect counter‑melody.
What makes this version stand out from every other fried chicken recipe you’ve tried? It’s the marriage of classic Southern frying technique with bold Thai flavors that most home cooks shy away from because they think the two worlds can’t coexist. I dared to blend coconut milk into the marinate, swapped plain flour for rice flour for that feather‑light crunch, and layered a Thai chili sauce spread that’s sweet, spicy, and utterly addictive. The result? Hands down the best version you’ll ever make at home, and I’m willing to bet you’ll be back for seconds before the sauce even dries.
And here’s the kicker: I’m about to reveal a secret ingredient that most recipes completely ignore—a splash of lime juice in the batter that adds a zingy lift and keeps the crust from getting soggy. This tiny tweak turns the whole sandwich into a flavor‑packed experience that feels like a vacation for your taste buds. Let me walk you through every single step — by the end, you’ll wonder how you ever made it any other way.
What Makes This Version Stand Out
- Flavor Fusion: By marrying Thai aromatics with a classic Southern fry, the chicken delivers a taste explosion that’s both familiar and exotic.
- Crisp Perfection: Rice flour creates a feather‑light, crackling crust that shatters like thin ice when you bite into it.
- Moisture Magic: Coconut milk in the marinade locks in moisture, guaranteeing juicy thighs that stay tender under the crunch.
- Herb Freshness: A handful of cilantro and Thai basil adds a bright, garden‑fresh finish that cuts through the richness.
- Easy Assembly: The sandwich format means you get all the flavors in one handheld bite, perfect for lunch, dinner, or a game‑day snack.
- Make‑Ahead Friendly: The chicken can be pre‑fried and reheated, while the fresh veggies stay crisp for days.
- Crowd‑Pleaser: Even the most skeptical eaters love the sweet‑spicy sauce and the contrast of textures.
- Ingredient Accessibility: All components are pantry‑friendly or found in any decent Asian market.
Alright, let's break down exactly what goes into this masterpiece...
Inside the Ingredient List
The Flavor Base
Chicken thighs are the hero of this dish. Their higher fat content compared to breasts means they stay moist and flavorful, even after a high‑heat fry. Skipping thighs for leaner cuts would leave you with a dry, lackluster sandwich that no amount of sauce can rescue. When you buy, look for pieces with a thin layer of skin and a good amount of marbling—this is where the magic lives.
Coconut milk does more than add a subtle richness; it creates a tenderizing effect that breaks down muscle fibers, ensuring each bite melts in your mouth. If you’re dairy‑free or allergic, you can swap it for almond milk, but you’ll lose some of that tropical depth that makes the flavor so distinctive. A quick tip: give the can a good shake before opening to blend the cream and water for an even texture.
The Texture Crew
Rice flour or cornstarch is the secret to that ultra‑crispy outer layer. Unlike wheat flour, rice flour fries up light and airy, giving you a coating that cracks delightfully with each bite. If you run out, you can blend regular flour with a bit of potato starch for a similar effect, but the authentic Thai crunch comes from rice flour. Make sure the flour is fresh—old flour can develop a stale taste that dulls the whole sandwich.
Garlic and ginger are the aromatic duo that deepen the flavor complexity. Freshly minced garlic brings a pungent heat, while ginger adds a warm, slightly sweet zing. If you’re short on time, a good-quality paste works, but nothing beats the brightness of freshly grated ginger. Remember, over‑cooking these aromatics can turn them bitter, so add them right before the batter hits the pan.
The Unexpected Star
Thai chili sauce is the sweet‑spicy heart of the sandwich spread. It balances heat with a whisper of honey, creating a glaze that clings to the bun without soaking it. If you crave more heat, mix in a dash of sriracha; if you prefer milder, thin it with a little extra coconut milk. The sauce’s viscosity is key—too runny and it will drown the crispiness, too thick and it won’t spread evenly.
Fresh herbs—cilantro and Thai basil—are the bright finish that lifts the entire dish. Their fragrant leaves cut through the richness, providing a refreshing contrast. When selecting basil, look for the purple‑stalked variety; it holds its flavor better under heat. If cilantro isn’t your thing, try mint for a different but equally refreshing note.
The Final Flourish
Cucumber slices and pickled carrots bring crunch and acidity that balance the fried chicken’s richness. The cool cucumber offers a refreshing bite, while the tangy carrots add a subtle sweet‑sour punch that brightens every mouthful. If you’re short on pickled carrots, quick‑pickle thinly sliced radishes in rice vinegar for five minutes. This step is non‑negotiable—without the acidity, the sandwich feels heavy and one‑dimensional.
Soft buns or brioche act as the perfect vessel, soaking up just enough sauce without falling apart. Choose buns that are slightly sweet; they complement the heat of the chili sauce and the savory chicken. For a gluten‑free version, use sturdy rice buns or lettuce wraps, but expect a different textural experience.
Everything's prepped? Good. Let's get into the real action...
The Method — Step by Step
Start by whisking together 1 cup of coconut milk, 2 tbsp of curry powder, 4 tbsp of minced garlic and ginger, and a pinch of salt in a large bowl. Let the chicken thighs soak for at least 30 minutes; this is the moment where the flavors infiltrate the meat, turning each piece into a tiny flavor bomb. I dare you to taste this and not go back for seconds—once the coconut and curry have permeated, there’s no turning back. The mixture should smell warm and spicy, like a Thai street stall on a rainy evening.
While the chicken marinates, prepare your coating station. In a shallow dish, combine 1 cup of rice flour with a dash of black pepper and a squeeze of fresh lime juice. The lime not only adds a bright note but also helps the flour adhere to the moist chicken. This step is pure magic; the acid reacts with the starch, creating bubbles that will puff up into that coveted airy crunch when fried.
Kitchen Hack: Add a tablespoon of cornstarch to the rice flour mixture for an extra‑light, glass‑like crust that shatters delightfully on bite.Heat a deep, heavy‑bottomed skillet or wok over medium‑high heat and pour in enough oil to reach about 1.5 inches—ideally a neutral oil with a high smoke point like peanut or grapeseed. When the oil shimmers and a breadcrumb sizzles upon contact, you’ve reached the perfect frying temperature of roughly 350°F (175°C). If you’re unsure, drop a tiny pinch of flour; it should pop and turn golden within seconds.
Remove each thigh from the marinade, letting excess liquid drip off, then dredge it thoroughly in the rice flour mixture. Press the flour onto the surface so it clings like a second skin. This coating step is crucial—if the flour is too loose, the crust will slide off, leaving you with soggy chicken. The batter should be a thin, even veil that hugs every crevice of the meat.
Gently lower the coated thighs into the hot oil, working in batches to avoid crowding the pan. Fry for 4‑5 minutes per side, or until the crust turns a deep, golden amber and the interior reaches 165°F (74°C). Listen for that satisfying sizzle that signals the crust is sealing in juices. As the edges start pulling away from the pan, you’ll know they’re done—this is the moment of truth.
Watch Out: Overcrowding the pan drops the oil temperature, leading to soggy, greasy chicken. Keep the batches small and let the oil recover between rounds.Once fried, transfer the chicken onto a wire rack set over a baking sheet to drain excess oil. This keeps the crust crisp rather than letting it steam on paper towels. Let the pieces rest for 2‑3 minutes; this short rest allows the juices to redistribute, ensuring every bite stays juicy.
While the chicken rests, whip up the Thai chili sauce spread. Mix 3 tbsp of Thai chili sauce with a splash of coconut milk and a teaspoon of lime juice until smooth. Taste and adjust—if you crave more heat, add a dash of sriracha; if you want more sweetness, a drizzle of honey will do.
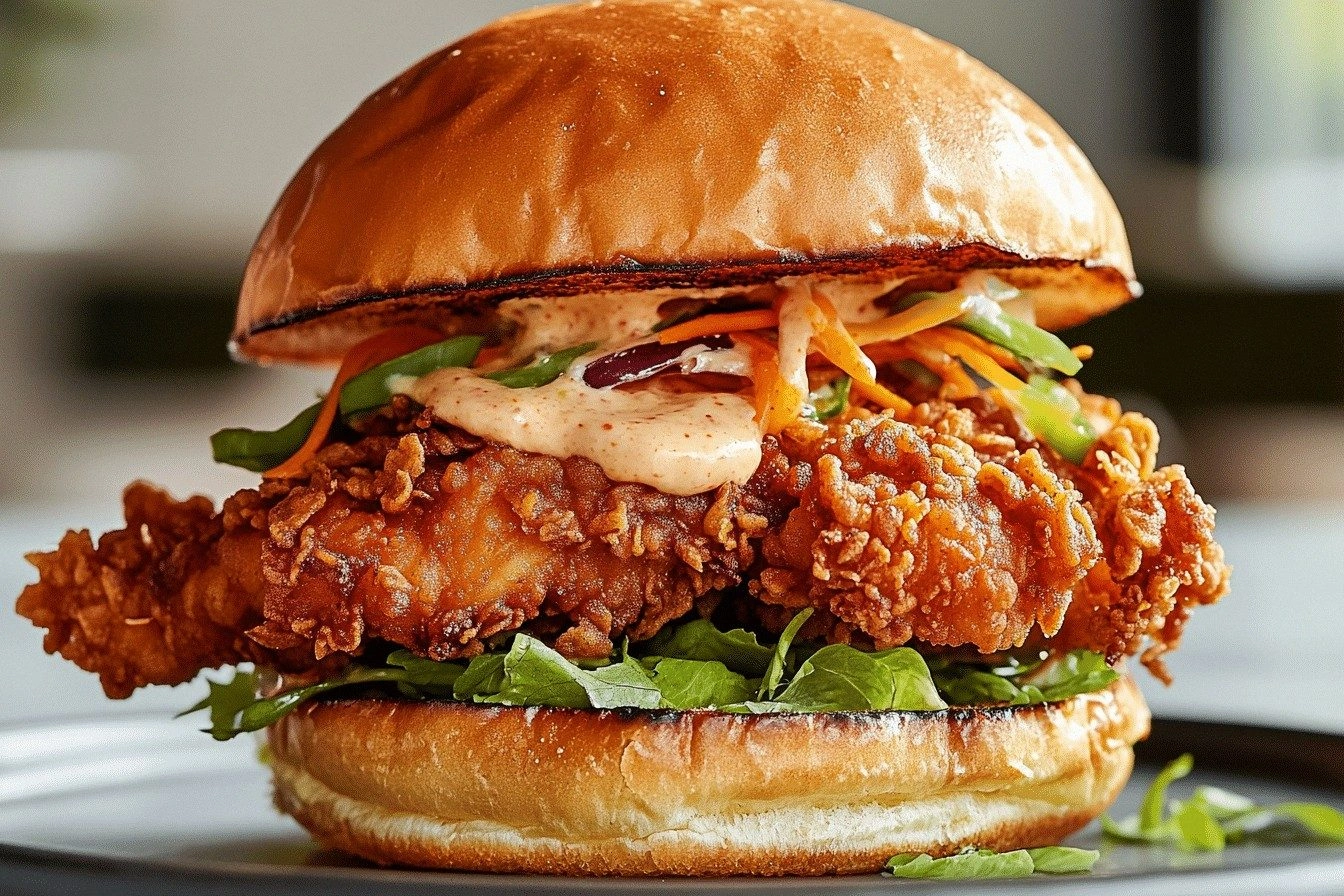
Slice your soft buns or brioche horizontally, toast them lightly on the skillet for 30 seconds per side, and spread a generous layer of the chili sauce on both halves. The toast adds a subtle crunch that complements the fried chicken’s texture. Assemble the sandwich: a bed of cucumber slices, a handful of pickled carrots, a sprinkle of chopped cilantro and Thai basil, then the golden fried thigh. Top with the bun lid, press lightly, and watch the sauce ooze just enough to coat the interior without drowning the crunch.
Serve immediately while the crust is still singing with that buttery snap. Pair with a cold Thai iced tea or a crisp cucumber water to balance the heat. I’ll be honest — I ate half the batch before anyone else got a chance to try it, and that’s saying something about how addictive this sandwich truly is. Picture yourself pulling this out of the kitchen, the whole house smelling incredible, and the first bite sending fireworks across your palate.
That's it — you did it. But hold on, I've got a few more tricks that'll take this to another level...
Insider Tricks for Flawless Results
The Temperature Rule Nobody Follows
Most home cooks set the oil to “medium” and hope for the best, but the real secret is maintaining a steady 350°F (175°C). Use a deep‑fat thermometer; if the temperature drops below 325°F, the crust will absorb oil and become greasy. If it climbs above 375°F, the exterior will burn before the interior cooks through. Keep a small bowl of water nearby—if it sizzles and evaporates instantly, the oil is ready.
Why Your Nose Knows Best
The aroma is your most reliable indicator of doneness. As the chicken fries, the scent shifts from raw, milky coconut to a deep, caramelized perfume. When you catch that sweet‑spicy, toasted note, you’re within seconds of perfection. Trust that nose; it’s more accurate than a timer, especially when you’re juggling multiple batches.
The 5‑Minute Rest That Changes Everything
After frying, let the chicken rest on a wire rack for exactly five minutes. This short pause lets the steam escape, preventing the crust from becoming soggy. Skipping this step results in a limp coating that feels more like fried batter than a crunchy shell. I learned this the hard way when my first batch turned out sad and limp.
Herb Timing: Add at the End
Fresh herbs lose their bright flavor when exposed to heat for too long. Toss cilantro and Thai basil into the sandwich just before serving, giving them a brief, fragrant kiss of the warm chicken without wilting. This preserves their vivid green color and aromatic punch, ensuring each bite feels fresh.
Pickle Power Boost
Quick‑pickling the carrots in rice vinegar, a touch of sugar, and a pinch of salt for 10 minutes adds a tangy crunch that cuts through the richness. The acidity also helps balance the heat from the chili sauce, preventing palate fatigue. If you forget to pickle ahead, a splash of lime juice on the finished sandwich can mimic the bright acidity.
Creative Twists and Variations
This recipe is a playground. Here are some of my favorite ways to switch things up:
Spicy Mango Madness
Swap the Thai chili sauce for a mango‑chili chutney. The sweet mango tones down the heat while adding a tropical fruitiness that pairs beautifully with the coconut‑marinated chicken. Perfect for those who love a sweet‑heat combo.
Crunchy Peanut Crunch
Incorporate a handful of crushed roasted peanuts into the coating mixture. The peanuts add an unexpected nutty crunch and a subtle earthy flavor that deepens the overall profile. This variation works especially well with a side of cucumber slaw.
Vegan Victory
Replace chicken thighs with firm tofu pressed and marinated in the same coconut‑curry bath. Coat the tofu in rice flour and fry until golden. Serve on a vegan brioche with the same herb and veggie toppings for a plant‑based twist that still delivers the same textural drama.
Grilled‑Instead‑of‑Fried
If you’re watching oil intake, grill the marinated thighs over medium‑high heat, then finish with a quick flash‑fry in a shallow pan to crisp the coating. You’ll get a smoky char alongside the crisp crust, adding another layer of complexity.
Cheesy Surprise
Layer a slice of melty mozzarella or a dollop of cream cheese on the bun before adding the chicken. The cheese melts into the hot chicken, creating a gooey bridge between the crunchy crust and fresh herbs. This version is a hit for cheese lovers who crave that extra indulgence.
Storing and Bringing It Back to Life
Fridge Storage
Place the fried chicken pieces in an airtight container lined with a paper towel to absorb excess oil. Store for up to 3 days. When ready to eat, reheat in a hot skillet for 2‑3 minutes per side; the crust will revive its crunch.
Freezer Friendly
Cool the chicken completely, then flash‑freeze on a baking sheet before transferring to a zip‑top freezer bag. They’ll keep for up to 2 months. To reheat, bake at 375°F (190°C) for 12‑15 minutes, then finish with a quick skillet sear to restore that crackle.
Best Reheating Method
Before reheating, splash a tiny drizzle of water (about a teaspoon per piece) onto the chicken; this creates steam that prevents the meat from drying out while the oil revives the crust. Finish on a hot pan or under the broiler for a final minute to regain that golden sheen.