Picture this: it’s a rainy Thursday night, the kind where the world feels like a soggy blanket and your stomach is growling louder than the thunder outside. You’ve tried the classic boxed mac and cheese, but it tasted like cardboard that had been left out in the rain. I was there, staring at a half‑cooked mess, daring my taste buds to forgive the disappointment. I whispered a challenge to myself – “I dare you to taste this and not go back for seconds” – and set out to create a stovetop mac and cheese that would make even the most skeptical foodie weep with joy.
The kitchen soon filled with a symphony of sounds: the gentle clatter of a whisk against the pan, the sizzle as butter kissed the hot surface, and that unmistakable, comforting hum of cheese melting into a silky river. The aroma rose like a warm hug, buttery and nutty, with a hint of smoky paprika that made my nose do a little happy dance. I could feel the steam on my face, the heat of the pan radiating through the wooden spoon, and the buttery gloss of the sauce coating every curve of the pasta like velvet. When I finally took that first bite, the cheese stretched like a golden ribbon, the pasta was perfectly al‑dente, and the flavors hit my palate with a confident, buttery punch that shouted, “You’ve just discovered the best version you’ll ever make at home.”
Most recipes get this completely wrong. They either over‑cook the pasta, turn the sauce into a gloopy swamp, or use a cheese blend that tastes like processed plastic. This version stands out because it respects each ingredient, balances texture with flavor, and employs a few secret tricks that most home cooks overlook. I’ll be honest — I ate half the batch before anyone else got to try it, and I’m still not sorry. The secret? A dash of mustard powder that cuts the richness, and a splash of heavy cream that turns the sauce from ordinary to luxurious without turning it into a greasy puddle.
Okay, ready for the game‑changer? I’m about to walk you through every single step — from selecting the perfect cheese to mastering the roux that holds everything together. By the end, you’ll wonder how you ever settled for anything less, and you’ll be armed with enough confidence to brag at every dinner party. Let me walk you through every single step — by the end, you’ll wonder how you ever made it any other way.
What Makes This Version Stand Out
- Flavor Explosion: The combination of sharp cheddar, creamy mozzarella, and nutty parmesan creates a layered taste that evolves with every bite, making it impossible to stop at one forkful.
- Silky Texture: A perfectly timed roux and a splash of heavy cream give the sauce a velvet‑smooth finish that clings to the pasta without becoming gummy.
- Simplicity Meets Sophistication: Only a handful of pantry staples are needed, yet the result feels like a restaurant‑quality dish you’d pay top dollar for.
- Unexpected Kick: A pinch of mustard powder and smoked paprika add depth, cutting through the richness and adding a subtle smoky note that surprises the palate.
- Crowd‑Pleaser Factor: This mac and cheese consistently earns rave reviews from kids, picky eaters, and cheese connoisseurs alike – it’s the ultimate comfort food that brings everyone to the table.
- Ingredient Quality: Using freshly shredded cheese instead of pre‑shredded guarantees meltability and prevents that dreaded “cardboard” flavor.
- Stovetop Mastery: No oven required, meaning you can whip up a batch in under an hour, even on a cramped apartment stove.
- Make‑Ahead Friendly: The sauce holds up beautifully for leftovers, and a quick reheating with a splash of water brings it back to life like nothing happened.
Alright, let's break down exactly what goes into this masterpiece...
Inside the Ingredient List
The Flavor Base
Butter (2 tablespoons): Acts as the golden foundation, providing richness and a nutty aroma once it browns slightly. Skipping butter for oil will rob the sauce of its signature depth. If you’re dairy‑free, try a high‑quality plant‑based butter that melts similarly.
All‑purpose Flour (2 tablespoons): The glue that binds the sauce together, forming a roux that thickens without clumping. Using too much flour makes the sauce pasty; too little leaves it runny. Sift it into the melted butter to avoid lumps.
Mustard Powder (1 teaspoon): This tiny superhero cuts the dairy richness, brightening the flavor profile. It’s the secret that makes the sauce taste like it’s been aged in a cheese cellar. If you don’t have mustard powder, a pinch of dry mustard or a splash of Dijon works in a pinch.
The Texture Crew
Whole Milk (2 cups): Provides the creamy body while keeping the sauce from feeling too heavy. Skim milk will make it thin, and ultra‑rich whole milk ensures that luxurious mouthfeel. For a lactose‑free version, substitute with oat milk – it foams nicely and still carries the cheese.
Heavy Cream (1 cup): This is the magic that turns a simple cheese sauce into a velvety masterpiece. It adds a buttery richness that prevents the cheese from becoming grainy. If you’re watching calories, you can halve the cream and replace the rest with low‑fat milk, but expect a slightly thinner sauce.
Elbow Macaroni (2 cups dry): The classic shape that holds onto sauce in every nook and cranny. Over‑cooking it will make it mushy; under‑cooking leaves a hard center. Cook it al‑dente, then drain and set aside – the sauce will finish the pasta in the pan.
The Unexpected Star
Smoked Paprika (½ teaspoon): Adds a whisper of smoky depth that makes the sauce feel more complex than a simple cheese melt. It also gives the sauce a gorgeous golden hue. If you don’t have smoked paprika, regular sweet paprika plus a dash of liquid smoke will do the trick.
Cayenne Pepper (¼ teaspoon, optional): For those who like a subtle heat that sneaks up on the palate. It’s the perfect contrast to the creamy cheese, keeping the dish from feeling one‑dimensional. Omit if you prefer a milder profile.
The Final Flourish
Sharp Cheddar (2 cups shredded): The star of the show, delivering that tangy, bite‑back flavor. Freshly shredding the cheese ensures it melts evenly; pre‑shredded versions contain anti‑caking agents that can affect texture.
Mozzarella (1 cup shredded): Contributes stretchiness and a mild milky sweetness that balances cheddar’s sharpness. It also creates that glorious cheese pull you see in food videos.
Parmesan (½ cup grated): Adds a salty, umami kick and helps thicken the sauce further. Its granular texture also prevents the sauce from feeling overly slick.
Salt (1 teaspoon) and Black Pepper (½ teaspoon): Essential seasoning that brings all the flavors together. Taste as you go – the cheese already brings salt, so adjust accordingly.
Everything's prepped? Good. Let's get into the real action...
The Method — Step by Step
Start by bringing a large pot of salted water to a rolling boil. Once it’s bubbling like a jacuzzi, add the elbow macaroni and cook it just shy of al‑dente – about 7 minutes. Drain the pasta, but don’t rinse; you want that starchy coating to help the sauce cling. Set the pasta aside while you build the sauce, because this is the moment where timing becomes your best friend.
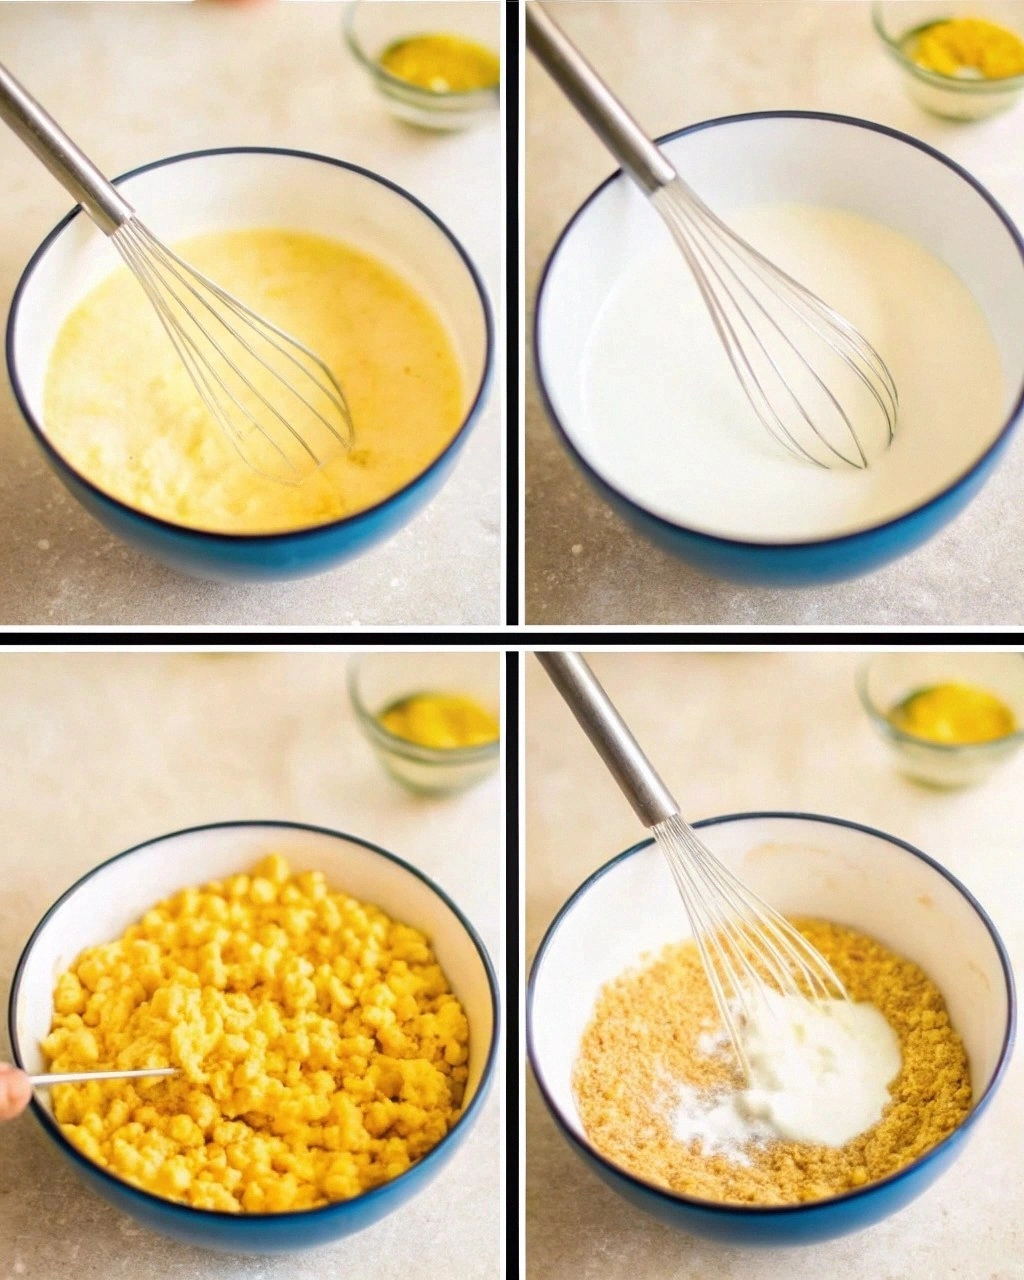
In the same pot (or a heavy‑bottomed saucepan if you prefer), melt the butter over medium heat. Listen for that gentle sizzle – that’s the sound of flavor being unlocked. When the butter foams, sprinkle in the flour, whisking constantly to form a smooth roux. Keep whisking for about 2 minutes until the mixture turns a light golden hue, signaling that the raw flour taste has vanished.
Now, the magic begins. Slowly pour in the whole milk, whisking vigorously to avoid lumps. The mixture will look thin at first, but as it heats, it will thicken into a glossy béchamel. This is the moment of truth – the sauce should coat the back of a spoon and have a velvety sheen. Watch Out: If you let the heat climb too high, the milk can scorch, leaving a bitter aftertaste.
Watch Out: Stir continuously during this stage; a stuck bottom will create a burnt layer that ruins the entire sauce.When the béchamel has reached a thick, coat‑the‑spoon consistency, stir in the heavy cream. This addition transforms the sauce from creamy to luxurious, giving it a body that feels like liquid gold. Let the mixture bubble gently for another minute, then lower the heat to a gentle simmer. This is where the sauce starts to whisper “we’re almost there.”
Add the mustard powder, smoked paprika, cayenne (if using), salt, and black pepper. The spices should release a fragrant perfume that makes your kitchen smell like a gourmet cheese shop. Taste the sauce now – it should be bright, slightly smoky, and just a hint of heat. Adjust seasoning if necessary, because the cheese will mellow these flavors later.
Time to bring in the cheese. Sprinkle in the shredded cheddar and mozzarella first, stirring constantly until each strand melts into a smooth river of goo. Then fold in the grated parmesan, which will thicken the sauce further and add that savory depth. Kitchen Hack: Add the cheese in batches, letting each addition melt completely before the next – this prevents clumping and ensures a silk‑smooth finish.
Kitchen Hack: Use a silicone spatula to fold the cheese in; its flexibility helps keep the sauce smooth without over‑working it.Now, reintroduce the cooked macaroni to the pot, tossing it gently so every piece gets cloaked in the cheese sauce. The pasta should glisten, each curve holding a pocket of molten cheese. Let the mixture sit over low heat for 2–3 minutes, allowing the pasta to absorb some of the sauce – this is the secret to that creamy interior you love.
Give the mac and cheese a final taste test. The sauce should be thick enough to cling, but still pourable; if it looks too thick, whisk in a splash of milk or water. If it’s too thin, let it simmer a minute longer. Once satisfied, remove from heat and let it rest for a minute – the flavors meld together, and the sauce thickens just enough for a perfect bite.
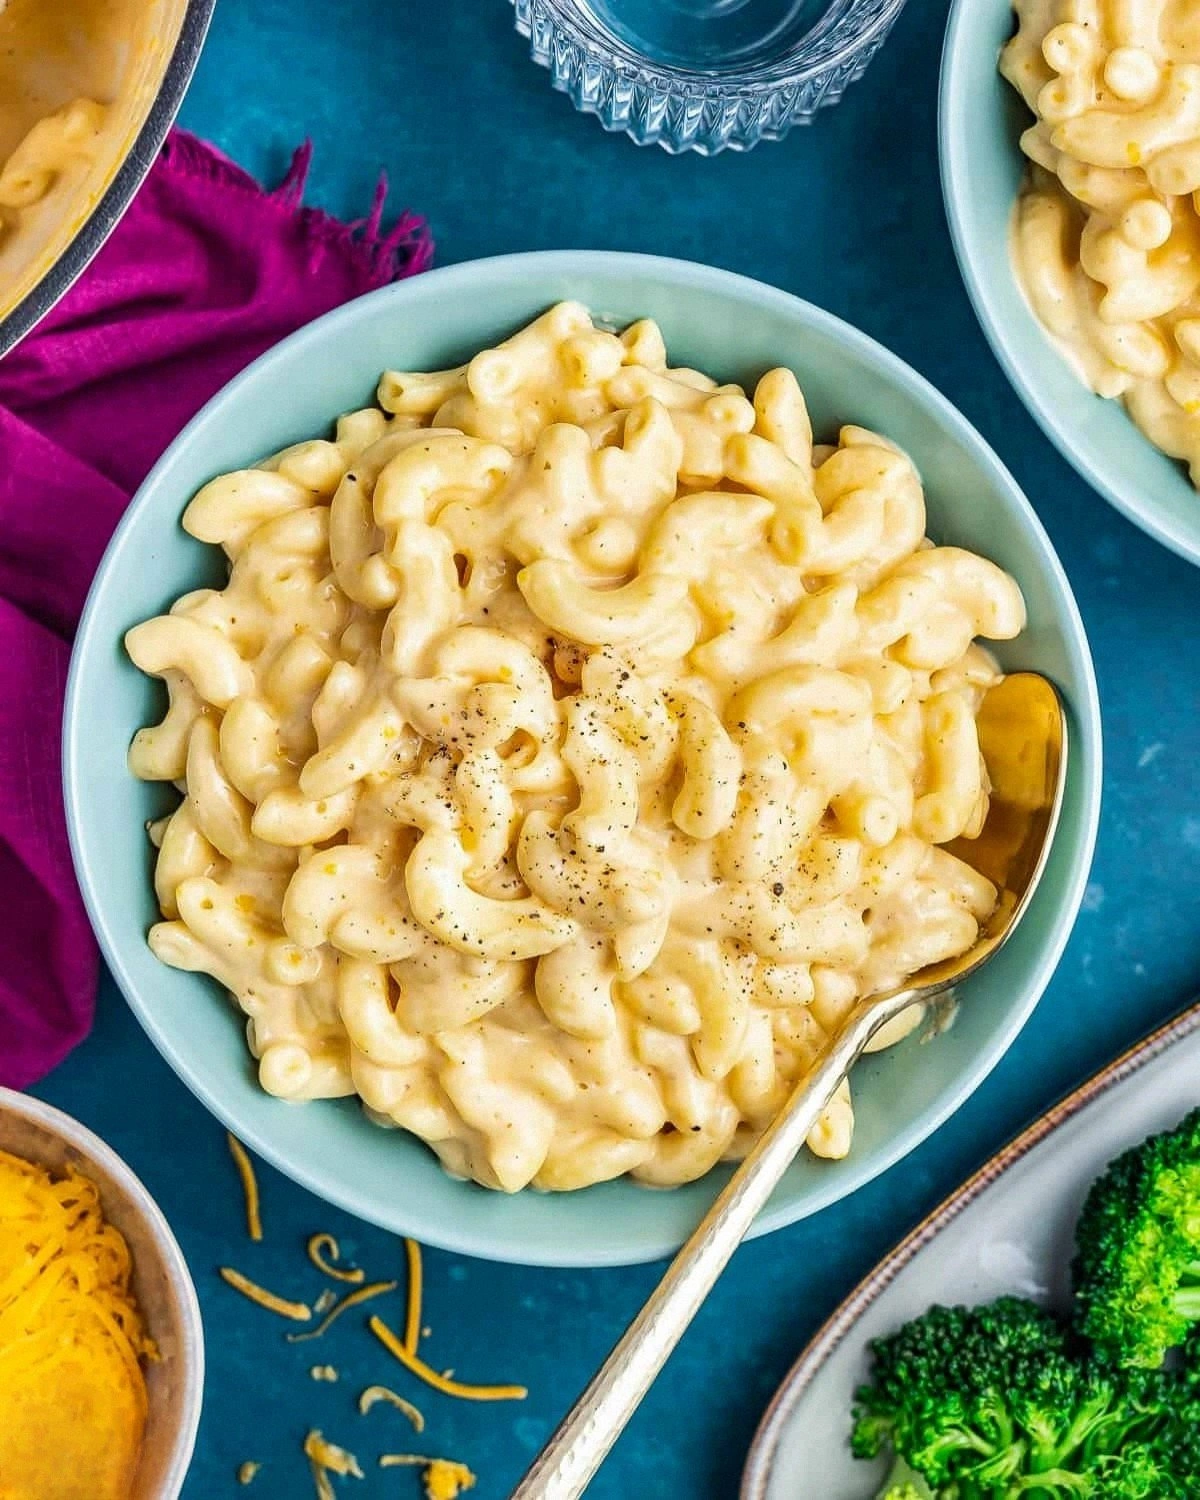
Serve immediately, or if you’re feeling extra daring, sprinkle a handful of extra shredded cheddar on top and let it melt into a glossy crown. Picture yourself pulling this out of the pot, the whole kitchen smelling incredible, and the first bite delivering that creamy, cheesy hug you’ve been dreaming of. And now the fun part – dive in, and I dare you not to go back for seconds.
That's it — you did it. But hold on, I've got a few more tricks that'll take this to another level...
Insider Tricks for Flawless Results
The Temperature Rule Nobody Follows
Never cook the roux on high heat. A medium‑low flame gives you control, preventing the flour from scorching and the butter from separating. I once tried to speed things up on high, and the sauce turned a nasty brown, tasting like burnt toast. Keep the heat gentle, and the sauce will stay buttery and smooth.
Why Your Nose Knows Best
Before you even taste, trust the aroma. When the butter first hits the pan, you should smell a nutty, slightly sweet scent; when the cheese melts, a rich, dairy‑forward perfume should fill the room. If anything smells “off” – like a burnt or sour note – it’s a sign something’s gone awry. My friend once skipped the smell check and ended up with a bland batch that needed a rescue of extra cheese.
The 5‑Minute Rest That Changes Everything
After you finish cooking, let the mac and cheese sit off the heat for five minutes. This rest allows the starches in the pasta to absorb the sauce, creating a creamier interior. Skipping this step is like serving a cake before it sets – the texture will be loose and unsatisfying. Use this time to set the table, because you’ll be back for seconds in a flash.
Cheese Blend Mastery
Don’t rely on a single cheese. Combining sharp cheddar, mozzarella, and parmesan gives you tang, stretch, and umami all in one bite. A friend once tried using only cheddar and complained about a “one‑note” flavor. The blend is the secret weapon that turns a simple dish into a gourmet experience.
Stirring Technique That Saves the Day
When you add the milk to the roux, use a whisk in a circular motion, pulling the mixture from the edges toward the center. This technique prevents lumps and creates a uniform thickness. If you stir too aggressively, you’ll incorporate air and the sauce can become foamy. Gentle, consistent whisking is the key to that flawless, glossy finish.
Creative Twists and Variations
This recipe is a playground. Here are some of my favorite ways to switch things up:
Truffle‑Infused Elegance
Swap out a tablespoon of butter for truffle oil and finish the dish with a drizzle of truffle essence. The earthy aroma elevates the mac and cheese to a fine‑dining level, perfect for a date night or a special celebration.
Spicy Jalapeño Kick
Stir in finely diced jalapeños and a splash of hot sauce during step 5. The heat pairs beautifully with the creamy cheese, creating a contrast that makes every bite exciting. Serve with a side of cool ranch to balance the fire.
Smoky Bacon &‑Cheddar
Cook crisp bacon bits separately and fold them into the finished mac and cheese. The salty crunch adds texture, while the smoky flavor deepens the overall profile. It’s the ultimate comfort food for a football night.
Veggie‑Packed Power
Add steamed broccoli florets or roasted cauliflower in step 7. The veggies bring a subtle sweetness and a pop of color, making the dish feel lighter without sacrificing indulgence. It’s a great way to sneak in some greens.
Four‑Cheese Deluxe
Introduce Gruyère and Fontina alongside the cheddar and mozzarella for a richer, nuttier flavor. These cheeses melt beautifully and add a sophisticated depth that will impress even the most discerning cheese lovers.
Breadcrumb Crunch (Optional)
For a crunchy topping, toast panko breadcrumbs with a bit of melted butter and sprinkle over the mac before serving. The golden crust adds a satisfying contrast to the creamy interior, turning a stovetop dish into a textural masterpiece.
Storing and Bringing It Back to Life
Fridge Storage
Transfer any leftovers into an airtight container and refrigerate for up to three days. The sauce may thicken as it cools; simply reheat on low heat, adding a splash of milk or water to loosen it back to the perfect consistency.
Freezer Friendly
Portion the mac and cheese into freezer‑safe bags or containers, leaving a little headspace for expansion. Freeze for up to two months. When ready to eat, thaw overnight in the fridge, then reheat gently on the stovetop, stirring in a tablespoon of cream to revive the silkiness.
Best Reheating Method
For the ultimate reheated bite, place the mac and cheese in a skillet over medium‑low heat, add a teaspoon of water per cup, and stir constantly until the sauce becomes glossy again. This steam‑infused method prevents drying and restores that fresh‑out‑the‑pot feeling.