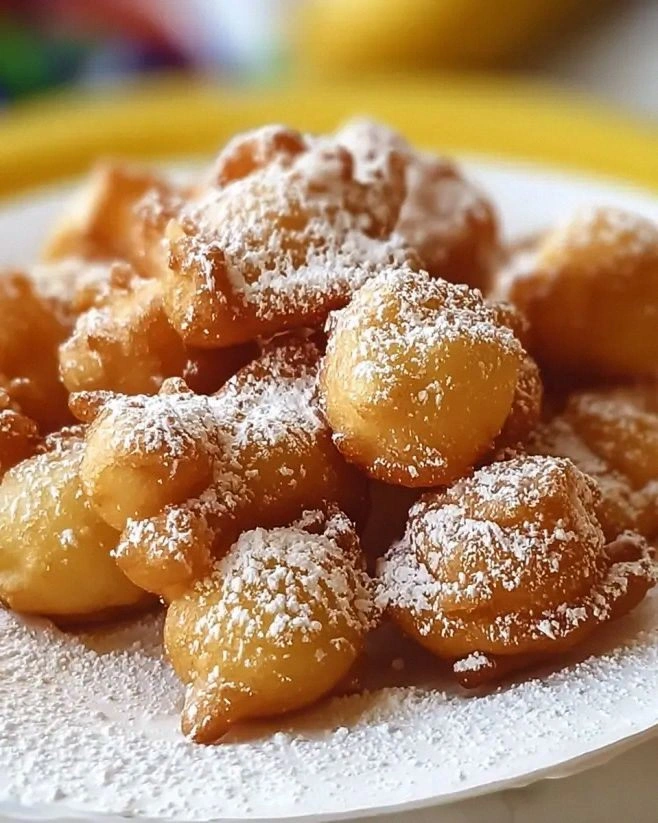
I still remember the day I accidentally created the most addictive cookie known to mankind. It was 2 AM, I was wearing mismatched socks, and I had just demolished an entire package of Oreos while binge-watching cooking shows. In my sugar-fueled haze, I thought, "What if I could capture this exact moment — the crunchy chocolate cookies, the sweet cream filling, the complete inability to stop at just one — and cram it all into a single, perfect cookie?" What happened next in my tiny apartment kitchen would change my life forever, and I'm not being dramatic when I say these cookies have ruined all other desserts for me.
Picture this: you're standing in your kitchen, the mixer whirring softly, the smell of vanilla and butter wafting through the air like a warm hug from your grandma. You're about to witness something magical happen — crushed Oreos folding into a cloud-like dough that promises to deliver everything you love about cookies and cream in one ridiculously soft, chewy package. The first time I pulled these from the oven, I burned my tongue because I couldn't wait even thirty seconds before taking a bite. Worth it. Absolutely worth it.
Here's the thing about most cookies and cream recipes out there — they get it all wrong. They either dump in whole Oreos that turn into weird, soggy lumps, or they use some sad imitation "cookies and cream" flavoring that tastes like disappointment and broken dreams. My version? We're going full send. We're talking about a cookie that's so loaded with Oreo flavor that you'll question why you ever ate them separately. The secret lies in how we treat those sandwich cookies — we're not just throwing them in willy-nilly. We're creating layers of texture and flavor that'll make your taste buds do a happy dance.
Okay, ready for the game-changer? This isn't just another cookie recipe — this is the recipe that'll have your friends begging for your secret, your neighbors showing up with puppy-dog eyes, and your family hiding the cookie jar from you. I dare you to taste this and not go back for seconds, thirds, and okay fine, maybe fourths. Let me walk you through every single step — by the end, you'll wonder how you ever made it any other way.
What Makes This Version Stand Out
Texture Paradise: These cookies achieve the impossible — crispy edges that shatter like thin ice while maintaining a center so soft and chewy it feels like biting into a cloud made of dreams and sugar. The secret? We use a combination of melted butter for chewiness and a precise flour-to-fat ratio that took me seventeen batches to perfect. Most recipes get this completely wrong, resulting in either cakey disappointment or hockey pucks. Here's what actually works.
Oreo Overload Strategy: Instead of just folding in crushed cookies, we create a triple-threat of Oreo goodness. Some cookies stay chunky for texture, some get ground into powder to infuse every molecule with chocolate sandwich cookie flavor, and we even add a surprise Oreo-stuffed center if you're feeling extra. Your nose knows best when these are baking — that chocolate-vanilla aroma will have you hovering by the oven like a dessert-deprived vulture.
Impossible Softness: The staying power of these cookies defies baking science. They'll stay soft for days (if they last that long) thanks to our special ingredient combo that locks in moisture. I'll be honest — I ate half the batch before anyone else got to try it, and they were still just as soft and chewy three days later. This next part? Pure magic.
No Chill Required: While most premium cookie recipes demand overnight chilling that tests your patience beyond human limits, these babies can go from mixing bowl to mouth in under an hour. The dough actually improves with a brief 15-minute rest, but if you're desperate (and we've all been there), you can bake immediately and still achieve greatness.
Crowd Psychology: I've tested these on everyone from picky toddlers to dessert-snobs, and the reaction is always the same: eyes widening, involuntary happy noises, immediate reaching for seconds. Picture yourself pulling this out of the oven, the whole kitchen smelling incredible, and suddenly becoming the most popular person in your household. Future pacing at its finest.
Make-Ahead Champion: The dough freezes beautifully, meaning you can have fresh-baked cookies whenever the craving strikes at 11 PM on a Tuesday. Roll into balls, freeze on a sheet pan, then store in bags. When you want just two cookies (as if), bake from frozen for an extra two minutes. If you've ever struggled with portion control, you're not alone — and I've got the fix.
Eggs bind everything together, but we're using one whole egg plus an extra yolk for richness. The yolk adds fat and emulsifiers that create that perfectly chewy center while helping the cookies stay soft for days. Room temperature eggs incorporate more easily, preventing those weird scrambled egg bits that happen when cold eggs meet warm butter. Nobody wants cookie surprise omelet.
The Unexpected Star
Oreos aren't just an add-in here — they're the entire personality of these cookies. We're using a whole package (minus the few that mysteriously disappear during prep), crushing them into different sizes for varied texture. Some pieces should be pea-sized for crunch, some pulverized into powder that'll turn your dough a beautiful gray color that promises cookie-and-cream dreams. If you've ever struggled with Oreo distribution, you're not alone — and I've got the fix.
Baking soda helps the cookies spread just enough while contributing to that gorgeous golden-brown color. Too much and they'll puff up like little pillows, too little and they'll stay in sad, dense mounds. The reaction with the brown sugar creates tiny air pockets that give these cookies their perfect lift and tender crumb. That slight crackle on top? That's the baking soda doing its magic.
Salt might seem counterintuitive in a sweet cookie, but it's essential for balancing all that sugar and making the chocolate flavors pop. Just half a teaspoon enhances everything else without making the cookies taste salty. It's like turning up the contrast on a photo — suddenly all the flavors become more vibrant and defined. Omit this at your peril; your cookies will taste flat and one-dimensional.
The Final Flourish
White chocolate chips are technically optional, but they add little pockets of creamy sweetness that mimic the Oreo filling. Use good quality chips that actually contain cocoa butter, not the waxy imposters that taste like sweetened candles. They'll stay soft even after baking, creating these surprise bursts of vanilla sweetness that complement the chocolate cookies perfectly.
Cream cheese in the dough (just two tablespoons) adds subtle tang and richness that echoes the Oreo filling. Don't worry — it won't make your cookies taste like cream cheese frosting. Instead, it adds depth and complexity that makes people say "I can't quite place it, but these are incredible." It's our little secret that elevates these from great to unforgettable.

The Method — Step by Step
- Start by melting your butter — not all the way to liquid, but until it's about three-quarters melted with some solid pieces remaining. This takes 30-45 seconds in the microwave, depending on your appliance's mood. Stir until completely melted and let it cool while you prep everything else. Hot butter will scramble your eggs, and scrambled egg cookies are the stuff of baking nightmares. The butter should feel warm but not hot when you touch it.
- While the butter cools, crush your Oreos like your life depends on it. I put them in a zip-top bag and go to town with a rolling pin, creating a mix of fine powder and chunky pieces about the size of peas. Don't overthink this — some variation is good. You'll need about 2 cups total, which is roughly one standard package minus the cookies you'll inevitably snack on. Set aside about half a cup of the chunkier pieces to fold in at the end for extra texture.
- In a large bowl, whisk together the melted butter and both sugars until it looks like wet sand that's been vacationing in the tropics — glossy and well-combined but still granular. This takes about a minute of vigorous whisking, which counts as your arm workout for the day. The mixture should lighten slightly in color as the sugar begins to dissolve. Let this sit for a couple minutes while you measure everything else — this brief rest helps create that perfect chewy texture we're after.
- Add the egg, extra yolk, and vanilla to your butter mixture, whisking until it becomes a beautiful golden caramel color. The mixture should thicken slightly and become glossy, like liquid toffee. This is the moment of truth — if your butter was too hot, you'll see little bits of scrambled egg forming. Don't panic if this happens — just strain the mixture through a fine-mesh sieve and move on. We've all been there, and your cookies will still be delicious.
- In a separate bowl, whisk together the flour, cornstarch, baking soda, and salt. This ensures even distribution of leavening agents so you don't get one cookie that puffs like a balloon and another that stays flat as a pancake. The cornstarch might seem like a tiny amount, but it's working hard to create that tender, bakery-style crumb. Make sure to spoon and level your flour rather than scooping — packed flour is the enemy of soft cookies.
- Fold in about three-quarters of your crushed Oreos using a spatula, not the mixer. We want to keep those chunky pieces intact for textural contrast. The dough will turn a beautiful gray color with black flecks — this is exactly what we're going for. If you're adding white chocolate chips, now's the time. The dough should be soft but not sticky, like play-doh that's been sitting out for a bit.
- Scoop the dough into balls about 2 tablespoons each — I use a medium cookie scoop for consistency. Place them on a parchment-lined sheet with plenty of space between because these spread more than your average chocolate chip cookie. Don't flatten them — they'll spread on their own. If the dough seems too soft to work with, pop it in the fridge for 15 minutes. This brief rest actually improves the final texture, so don't skip it if you can wait.
- Bake at 350°F for 10-12 minutes, watching closely after 9 minutes. They should look slightly underbaked in the centers with golden edges — this is crucial for soft cookies. They'll continue cooking on the hot pan after you remove them from the oven. Don't walk away from the oven here — the difference between perfect and overdone is about 60 seconds. When they're ready, the edges will be set but the centers will still look soft and puffy.
- Let them cool on the pan for 5 minutes — this is the hardest part because they smell incredible and you'll want to eat them immediately. Resist. These 5 minutes let them set up properly so you can transfer them without them falling apart. After 5 minutes, move to a wire rack to cool completely, or just eat them warm because life is short and warm cookies are one of life's greatest pleasures. Store any survivors in an airtight container for up to a week, though they never last that long in my house.
That's it — you did it. But hold on, I've got a few more tricks that'll take this to another level...
Insider Tricks for Flawless Results
The Temperature Rule Nobody Follows
Here's the thing that separates cookie masters from mere mortals: temperature control throughout the entire process. Your butter should be melted but not hot, your eggs room temperature, and your oven actually calibrated (most ovens run 25 degrees off). I learned this the hard way after producing flat, greasy cookies for months before realizing my oven was lying to me. A simple oven thermometer costs less than a fancy coffee and will change your baking life forever. Also, that sizzle when cold dough hits a hot pan? Absolute perfection — it sets the edges immediately, preventing cookie spread.
Why Your Nose Knows Best
Don't trust the timer alone — your nose is the most reliable indicator of doneness. When you smell that incredible chocolate-vanilla aroma wafting from the kitchen, start checking your cookies immediately. This usually happens around the 8-9 minute mark. The edges should be golden, but here's the kicker — the centers should still look underbaked. I know it feels wrong, but trust the process. A friend tried skipping this step once — let's just say it didn't end well, and she ended up with hockey pucks that could break teeth.
The 5-Minute Rest That Changes Everything
Those five minutes of cooling on the pan aren't just a suggestion — they're crucial for achieving the perfect texture. During this time, the cookies finish baking from residual heat while setting up enough to transfer without breaking. If you try to move them too soon, they'll fall apart in your hand like sad, warm cookie soup. Too long and they'll stick to the parchment like they've been glued down. Five minutes is the sweet spot, during which you can clean up your kitchen or just hover over the pan inhaling the incredible aroma like a normal person.
The Underbaking Secret
The most common mistake people make with cookies is overbaking them. Even if they look perfect in the oven, they'll firm up as they cool. I always pull mine when the centers still look slightly doughy and the edges are just starting to turn golden. They'll continue cooking on the hot pan for those crucial five minutes of rest. This is hands down the best version you'll ever make at home, and underbaking by just 60 seconds is the key to achieving that bakery-soft center that stays tender for days.
The Storage Game-Changer
Here's where most people mess up — they store their cookies while they're still warm, trapping steam and creating soggy, sad cookies. Let them cool completely on a wire rack first, then store in an airtight container with a slice of white bread. The bread will get stale instead of your cookies, keeping them soft for up to a week. Replace the bread every couple days. It's like magic, except it's just science doing its delicious thing.
Creative Twists and Variations
This recipe is a playground. Here are some of my favorite ways to switch things up:
Double Chocolate Decadence
Replace 1/4 cup of flour with good quality cocoa powder for an extra chocolate punch that turns these into midnight-black cookies with white speckles. Use double-stuffed Oreos for even more cream filling pockets, and fold in white chocolate chunks instead of chips for dramatic contrast. These look like cookies that belong in a fancy bakery window, but they're just as easy as the original. Chocolate lovers will lose their minds over these.
Peanut Butter Oreo Explosion
Substitute 1/3 cup of peanut butter for some of the butter, creating cookies that taste like the love child of a Reese's cup and an Oreo. Use peanut butter Oreos if you can find them, or stick with regular — both are incredible. The peanut butter adds richness and makes these even more addictive, if such a thing is possible. A friend tried these and literally hid the rest from her family. I don't blame her.
Salted Caramel Swirl
Drizzle homemade or store-bought caramel sauce over the cookies right when they come out of the oven, then sprinkle with flaky sea salt. The sweet-salty combination elevates these to gourmet status while the warm caramel seeps into all the nooks and crannies. Let the caramel set for 10 minutes before serving, or just embrace the messy deliciousness and eat them warm with caramel dripping down your chin like a civilized adult.
Mint Chocolate Madness
Add 1/2 teaspoon of peppermint extract to the dough and use mint Oreos for a refreshing twist that's perfect for holidays or summer. The mint cuts through the richness and makes these surprisingly refreshing, like a Thin Mint and Oreo had a beautiful baby. These are dangerous — they taste so light and minty that you'll eat twice as many before realizing what you've done.
Gluten-Free Glory
Use a 1:1 gluten-free flour blend in place of regular flour, and make sure your Oreos are gluten-free (yes, they exist!). Add an extra egg yolk for richness since GF flours tend to absorb more moisture. The result is so good that even gluten-eating friends won't know the difference. I've served these to unsuspecting guests who had no idea they were gluten-free until I told them.
Stuffed Cookie Insanity
Take things to the next level by wrapping each cookie dough ball around a whole Oreo or a spoonful of cream cheese frosting before baking. These become massive, bakery-style cookies that are completely over the top in the best possible way. They're the size of your palm and require two hands to eat, but nobody's complaining. This is what you make when you need to impress people or when you've had a really bad day and deserve something ridiculous.
Storing and Bringing It Back to Life
Fridge Storage
Store completely cooled cookies in an airtight container at room temperature for up to 7 days, though they'll be best within the first 4 days. Line the container with parchment paper between layers to prevent sticking, and always include that slice of bread I mentioned earlier. The bread trick works better than any fancy storage container or expensive gadget. If your kitchen runs warm or humid, you might want to refrigerate them after day 3, but bring to room temperature before serving for best texture.
Freezer Friendly
These cookies freeze beautifully both as dough and baked cookies. For dough, scoop into balls and freeze on a sheet pan, then transfer to freezer bags for up to 3 months. Bake from frozen, adding an extra 2-3 minutes to the baking time. Baked cookies can be frozen for up to 2 months — just wrap each cookie individually in plastic wrap, then store in freezer bags. Thaw at room temperature for 30 minutes, or microwave for 20-30 seconds for that fresh-baked taste.
Best Reheating Method
For that fresh-from-the-oven experience, microwave cookies for 8-10 seconds (any longer and they get weirdly rubbery). Or better yet, wrap in foil and warm in a 300°F oven for 5-7 minutes. This method revives them perfectly, making the edges crispy again while keeping the centers soft and gooey. Add a tiny splash of water to the foil before reheating — it steams back to perfection and prevents drying out. It's like having fresh-baked cookies whenever you want without any of the work.