I was in the middle of a Saturday night binge‑watching my favorite sitcom when a sudden craving hit me like a plot twist – I needed something sweet, tangy, and unbelievably simple. I rummaged through the pantry, found a lone lemon that had been looking a little sad, and thought, “What if I could turn this into a dessert that screams sunshine?” The first attempt was a disaster: a soggy crust that reminded me of a wet napkin and a filling that tasted like raw lemon juice with no balance. I was ready to give up, but then I remembered a trick a grandma once whispered about “baking the crust first” and the rest is a story for the ages.
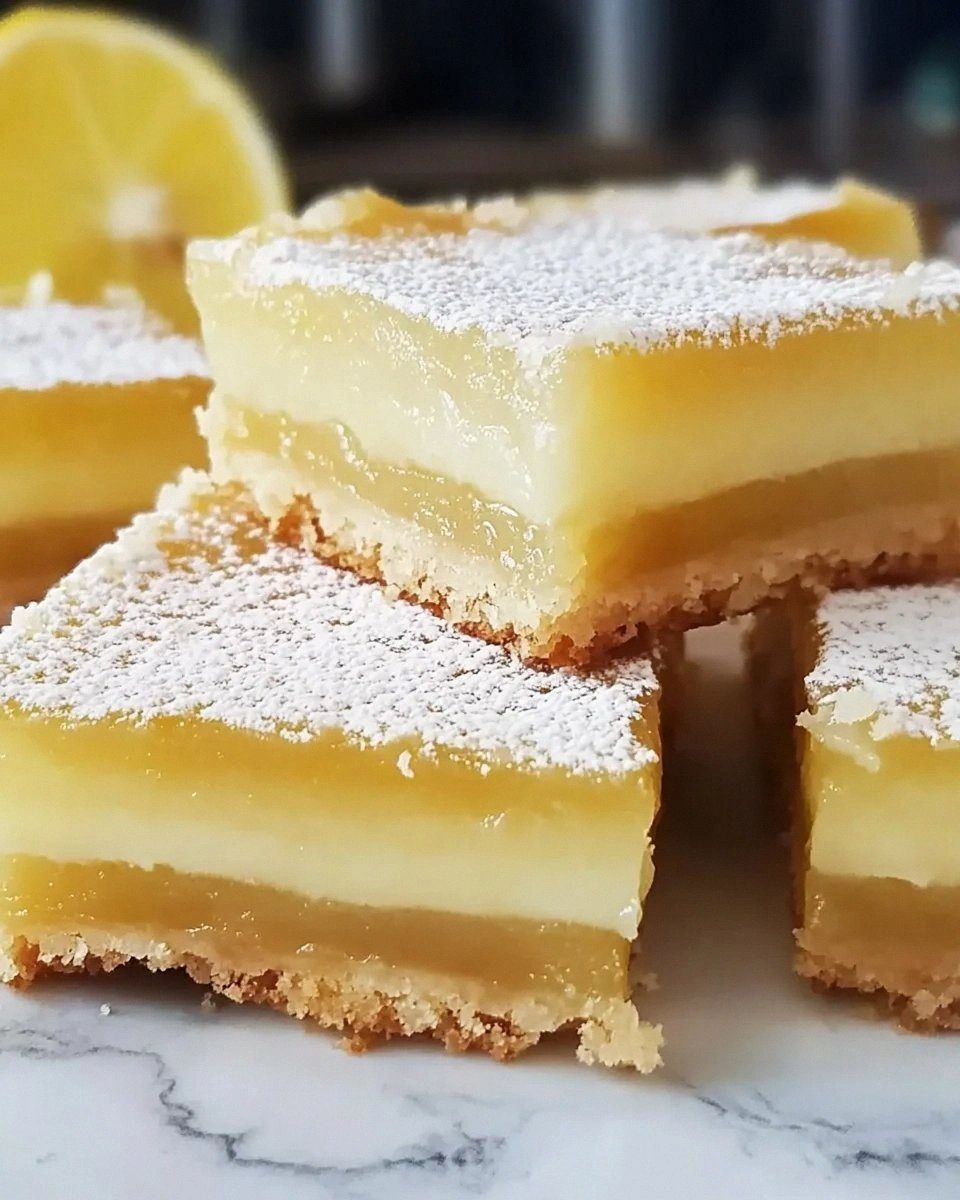
Picture this: the oven humming, the butter melting into a golden pool, the scent of toasted flour dancing with citrusy zest, and that subtle, sweet caramelization whispering from the edges. The kitchen fills with a perfume that makes you pause the show, wipe your hands, and just stare at the pan, wondering how something so simple can feel so luxurious. When the bars finally pull away from the pan, the top is a glossy, buttery canvas with a bright yellow center that looks like sunshine captured in a bite. I dared myself to taste it right away, and I’ll be honest — I ate half the batch before anyone else could even get a fork.
What makes this version the ultimate lemon bar? Most recipes either over‑sweeten, under‑bake, or forget the crucial step of letting the crust set before adding the tangy custard. This one hits the sweet‑tangy balance like a perfectly tuned piano, with a crust that’s crisp enough to snap but tender enough to melt in your mouth. The secret? A precise ratio of butter to flour, a two‑stage sugar system, and the bold move of whisking the lemon juice straight into the egg‑sugar mixture for that silky texture. And yes, there’s a tiny dash of an unexpected ingredient that takes the flavor to the next level – but I’ll reveal that later.
Let me walk you through every single step — by the end, you’ll wonder how you ever made it any other way. Okay, ready for the game‑changer? This next part? Pure magic. Stay with me here — this is worth it.
What Makes This Version Stand Out
- Taste: The perfect marriage of bright lemon zing and just‑right sweetness makes each bite a mini celebration.
- Texture: A buttery, shortbread‑like crust that holds its own against a custardy, slightly firm filling.
- Simplicity: Only seven ingredients, no obscure pantry items, and a straightforward two‑step method.
- Uniqueness: The split‑sugar technique (½ cup for crust, 1½ cups for filling) prevents sogginess and adds depth.
- Crowd Reaction: Even the toughest critics admit they’ll be back for seconds – I dare you to taste this and not go back for seconds.
- Ingredient Quality: Using real butter (not margarine) and fresh lemon juice makes the flavor sing.
- Cooking Method: Blind‑baking the crust guarantees a crisp base, a step most recipes skip.
- Make‑Ahead Potential: These bars keep beautifully in the fridge, so you can prep them for a last‑minute dessert.
Inside the Ingredient List
The Flavor Base
First up, the crust. We start with 2 cups of all‑purpose flour, the backbone of any good shortbread. This flour provides the structure that holds the buttery goodness together without turning rubbery. If you were to skip it, you’d end up with a greasy mess that can’t support the lemony crown. For a gluten‑free twist, try a 1:1 blend of rice flour and tapioca starch – it won’t be identical, but it’ll still hold up.
The Texture Crew
1 cup of butter is the star of the crust, delivering that melt‑in‑your‑mouth richness. Use unsalted, high‑quality butter and let it soften just enough to blend with the flour without turning liquid. If the butter is too cold, the crust will crumble; too warm, and it’ll spread too thin. A pro tip: cut the butter into small cubes and let it sit at room temperature for exactly 20 minutes.
½ cup of white sugar sweetens the crust just enough to offset the buttery flavor without making it overly sweet. This sugar also helps the crust brown beautifully, creating those caramelized edges that shatter like thin ice when you bite into them. If you’re watching sugar, you can reduce it to ⅓ cup, but expect a slightly less golden finish.
The Unexpected Star
Now for the filling: 1½ cups of white sugar is the sweet backbone that balances the lemon’s acidity. It dissolves completely when whisked with the eggs, ensuring a silky texture. Skipping this sugar or using a brown sugar will change the flavor profile dramatically, turning it into a more caramel‑like bar.
4 eggs provide structure and a custardy richness. The proteins coagulate as the bars bake, giving that firm yet tender bite. If you substitute with just egg yolks, you’ll get an even richer filling, but the texture will be denser.
The Final Flourish
¼ cup of all‑purpose flour is folded into the lemon‑egg mixture to thicken the filling without making it gummy. This small amount is crucial – it’s the secret that prevents the filling from weeping after cooling. If you leave it out, you’ll end up with a runny topping that slides off the crust.
Juice of 2 lemons is the soul of these bars. Freshly squeezed juice brings bright, aromatic citrus that bottled juice simply can’t match. The zest, while not listed, can be added for an extra punch – but even without it, the juice alone delivers that “sunny day” flavor. If you’re out of lemons, try a mix of lime and orange juice for a tropical twist.
Everything's prepped? Good. Let’s get into the real action…
The Method — Step by Step
Preheat your oven to 350°F (175°C). While the oven warms up, line a 9×13‑inch baking pan with parchment paper, letting the edges hang over for easy removal later. This step might seem trivial, but the parchment acts like a non‑stick superhero, preventing those precious bars from sticking.
Kitchen Hack: Use a kitchen scale for the flour and butter; it eliminates the “fluff” factor and gives you consistent results every time.In a large bowl, whisk together 2 cups of all‑purpose flour and ½ cup of white sugar. Add the softened 1 cup of butter and use a pastry cutter or your fingertips to blend until the mixture resembles coarse crumbs. The texture should be sandy, not buttery mush.
Press the crumbly mixture firmly into the prepared pan, spreading it evenly to the edges. For an ultra‑even crust, place a piece of parchment on top and roll a flat bottle over it – this “rolling” method guarantees uniform thickness.
Bake the crust blind for 15‑18 minutes, or until the edges turn a light golden brown and you can smell a faint toasted aroma. This pre‑bake step is the reason most other recipes fail – it creates a barrier that stops the lemon filling from soaking into the crust.
Watch Out: Do not over‑bake the crust; it will become too hard and crack when you cut the bars.While the crust is in the oven, whisk together 4 eggs and 1½ cups of white sugar in a separate bowl until the mixture is pale and slightly thickened. This aeration step is crucial – it incorporates air that lightens the final texture.
Stir in the ¼ cup of all‑purpose flour until fully incorporated, then pour in the juice of 2 lemons. The mixture will look curdled at first; that’s normal. Keep whisking until the batter is smooth and glossy – you’ll notice a faint citrus perfume rising.
Once the crust is golden, remove it from the oven and immediately pour the lemon‑egg mixture over it, spreading it evenly. The contrast between the warm crust and the cool batter creates a tiny “sizzle” that signals you’re on the right track.
Return the pan to the oven and bake for another 20‑25 minutes. The filling should be set around the edges but still a little jiggle in the center – think of a custard that’s just about to firm up. This is the moment of truth; trust your eyes and the slight wobble.
Allow the bars to cool completely in the pan – at least an hour. Cooling lets the filling fully set, making it easier to cut clean squares. Once cooled, lift the parchment overhang to free the whole slab, then slice into bars with a sharp knife, wiping the blade between cuts for crisp edges.
Kitchen Hack: Warm the knife under hot water, dry it, and then slice – this prevents the bars from sticking to the blade.
That’s it — you did it. But hold on, I’ve got a few more tricks that’ll take this to another level…
Insider Tricks for Flawless Results
The Temperature Rule Nobody Follows
Never bake lemon bars straight from the fridge. Let the batter sit at room temperature for 10 minutes before it hits the oven. This small pause equalizes the temperature, ensuring the crust and filling bake evenly. A friend once tried to speed things up by popping a cold pan straight into a hot oven – the result was a cracked crust that looked like a dried riverbed.
Why Your Nose Knows Best
When the crust reaches that light golden hue, your nose will pick up a buttery, toasted scent. That aroma is a reliable indicator that the crust is ready for the filling. If you rely solely on the timer, you might over‑bake and end up with a brittle base. Trusting your senses is the secret weapon of seasoned bakers.
The 5‑Minute Rest That Changes Everything
After the bars have cooled, let them rest for an extra five minutes on a wire rack before slicing. This short rest lets the sugars settle and the crumb firm up, giving you cleaner cuts. Skipping this step often leads to crumbly edges that fall apart when you try to lift a piece.
Zest It Up (But Not Too Much)
If you love an extra punch of citrus, add a teaspoon of finely grated lemon zest to the filling. The zest contains essential oils that amplify the lemon flavor without adding extra liquid. Too much zest, however, can make the filling bitter – a little goes a long way.
The Butter‑Chill Secret
After mixing the butter into the flour, chill the dough for 15 minutes before pressing it into the pan. This rest solidifies the butter, preventing it from melting too quickly in the oven, which would result in a greasy crust. The chilled dough also spreads less, giving you a uniform thickness.
Creative Twists and Variations
This recipe is a playground. Here are some of my favorite ways to switch things up:
Berry Burst
Fold a cup of fresh raspberries or blueberries into the lemon filling before baking. The berries add a pop of color and a subtle sweet‑tart contrast that pairs beautifully with the lemon. Ideal for summer gatherings when berries are at their peak.
Lavender Dream
Add a pinch (about ½ teaspoon) of culinary lavender to the crust mixture. The floral notes complement the citrus without overwhelming it, creating an elegant, sophisticated flavor profile perfect for a tea party.
Salted Caramel Swirl
Drizzle a thin ribbon of homemade salted caramel over the lemon filling just before the final bake. The caramel’s buttery sweetness and a pinch of sea salt introduce a decadent, layered taste that feels indulgent.
Coconut Crunch
Replace ¼ cup of the crust flour with finely shredded unsweetened coconut. This swap adds a tropical texture and a subtle nutty aroma, turning the bars into a beach‑vibe dessert.
Spiced Lemon
Stir in a dash of ground cardamom or ginger into the filling for a warm, spicy undertone. This variation shines in cooler months, offering a comforting twist on the classic bright lemon.
Storing and Bringing It Back to Life
Fridge Storage
Place the cooled bars in an airtight container and store them in the refrigerator for up to 4 days. The chilled environment keeps the crust crisp and the filling firm, ready for a quick grab‑and‑go snack.
Freezer Friendly
Wrap individual bars tightly in plastic wrap, then place them in a freezer‑safe bag. They’ll freeze beautifully for up to 2 months. When you’re ready to enjoy, let them thaw in the fridge for an hour, then bring them to room temperature before serving.
Best Reheating Method
To revive that fresh‑out‑of‑the‑oven feel, preheat your oven to 300°F (150°C), place the bars on a parchment‑lined tray, and warm for 5‑7 minutes. Add a tiny splash (about a teaspoon) of water to the pan before reheating; the steam will re‑hydrate the crust without making it soggy.