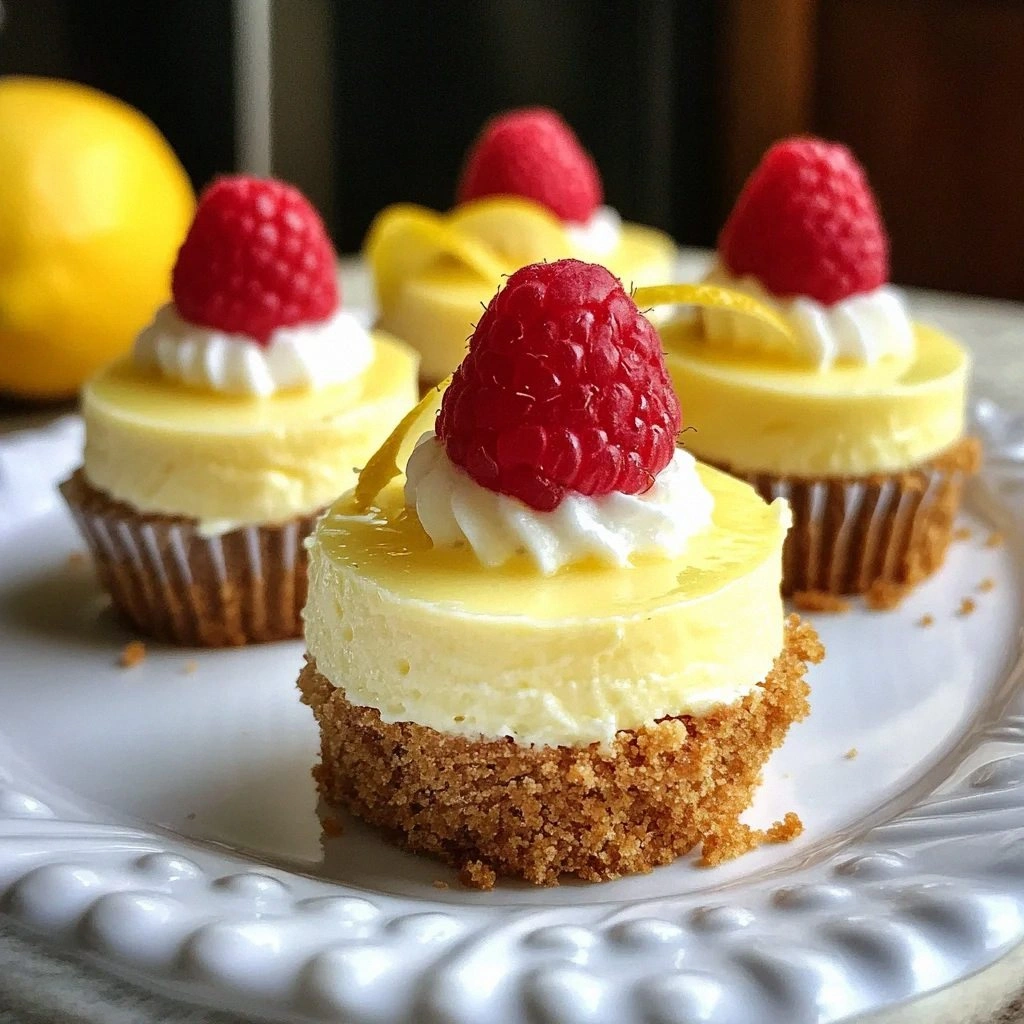
I still remember the day I nearly gave up on baking forever. There I was, standing in my kitchen at 2 AM, surrounded by the sad remains of what was supposed to be a sophisticated lemon cheesecake. Instead, I had created something that looked like it had been run over by a truck and tasted like disappointment with a hint of rubber. The top was cracked like the Sahara desert, the texture resembled cottage cheese mixed with concrete, and my roommate diplomatically suggested it might make a good doorstop. Fast forward through three more failed attempts, a minor kitchen fire (don't ask), and what felt like a lifetime of lemon-scented nightmares, and I finally cracked the code to creating the most perfect, creamy, tangy mini lemon cheesecakes you'll ever taste. These little beauties are everything their full-sized cousin wishes it could be — no cracks, no fuss, no need for a water bath, and they bake up in individual portions that make you look like a pastry chef prodigy.
Picture this: a buttery graham cracker base that's been kissed with just enough butter to hold together but not so much that it feels like you're eating sand at the beach. On top sits this cloud-like filling that's so smooth and creamy, it makes silk feel like sandpaper. The lemon flavor hits you in waves — first a gentle citrus whisper, then a bright, sunny punch that makes your taste buds do a happy dance. And here's the kicker — they're so foolproof that even my friend who once managed to burn water (again, don't ask) can make these successfully. I dare you to taste one of these mini marvels and not immediately reach for a second. Actually, I double-dog dare you, because I ate six of them while writing this post, and I'm not even sorry.
What makes these mini cheesecakes absolutely irresistible isn't just their adorable size or their Instagram-worthy appearance (though they do photograph like supermodels). It's the way the tangy lemon cuts through the rich creaminess of the filling, creating this perfect balance that makes them feel light and indulgent at the same time. The texture is what really gets people — when you take a bite, it should feel like the cheesecake is melting on your tongue, releasing all that bright, zesty flavor in slow motion. Most recipes get this completely wrong by overbaking or using too much flour, resulting in that dense, heavy texture that sits in your stomach like a brick. But not these little gems. They stay light, airy, and perfectly creamy every single time.
Okay, ready for the game-changer? The secret isn't just in the ingredients (though we'll get to those in a moment) — it's in the technique. Most people overmix their batter, creating too much air that causes cracks. Others bake at too high a temperature, turning their cheesecakes into hockey pucks. The magic happens when you treat the batter like it's made of clouds and bake it low and slow, like you're lulling it to sleep. Stay with me here — this is worth it. By the time we're done, you'll have a recipe that works every single time, impresses everyone who tries it, and might just ruin all other cheesecakes for you forever. Let me walk you through every single step — by the end, you'll wonder how you ever made it any other way.
What Makes This Version Stand Out
Silky Smooth Texture: These mini cheesecakes achieve that restaurant-quality smoothness because we use room temperature ingredients and mix them just enough to combine. No more grainy, lumpy disappointments. The filling is so creamy, it practically melts on your tongue like lemon-flavored silk.
Zero Cracks Guaranteed: Unlike traditional cheesecakes that crack if you look at them wrong, these mini versions stay perfectly smooth on top. The secret? Individual portions mean even cooking, and the lower baking temperature prevents the dreaded surface split that ruins so many desserts.
Make-Ahead Magic: These little beauties actually taste better the next day, making them perfect for dinner parties or busy weeknight desserts. Make them Sunday night, and you'll have elegant desserts ready all week long. They also freeze beautifully for up to three months.
Portion Control That Actually Works: Each mini cheesecake is the perfect single serving, eliminating the awkward "how big is too big?" slice debate. Plus, they're so rich and satisfying that one is genuinely enough — though I'll be honest, I ate half the batch before anyone else got to try it.
Beginner-Friendly Brilliance: No water bath, no special pans, no culinary degree required. If you can operate a mixer and read a recipe, you can make these. My neighbor's twelve-year-old made them successfully on her first try, much to her mother's amazement.
Flavor Explosion: The lemon flavor is bright and bold without being puckeringly sour. We use both lemon zest and juice for maximum impact, creating a two-punch combo that makes your taste buds sing. Picture yourself pulling this out of the oven, the whole kitchen smelling like a lemon grove in summer.
Crowd-Pleasing Power: These disappear faster than free samples at Costco. I've taken them to potlucks where people actually followed me to my car asking for the recipe. If you've ever struggled with desserts that look better than they taste, you're not alone — and I've got the fix.
Inside the Ingredient List
The Flavor Base
Cream cheese is obviously the star here, but not all cream cheese is created equal. You want the full-fat brick style, not the whipped stuff in a tub. The whipped variety has too much air beaten in, which will make your cheesecakes deflate and crack. Let it come to room temperature for at least two hours — cold cream cheese is the enemy of smooth batter. If you've ever tried to mix cold cream cheese and ended up with cottage cheese-like lumps, you know exactly what I'm talking about. The difference between using room temperature cream cheese versus cold is like the difference between silk and sandpaper.
Granulated sugar provides the sweetness, but we're not going overboard here. These aren't meant to be cloying — the lemon needs room to shine through. I use superfine sugar when I have it because it dissolves faster, but regular granulated works perfectly. Whatever you do, don't substitute with powdered sugar. It contains cornstarch that will throw off the texture and make your cheesecakes grainy. Trust me on this one — I learned the hard way, and my first batch tasted like I was eating sweetened chalk.
The Texture Crew
Eggs are the binding agent that holds everything together, but they're also where most people go wrong. Too many eggs and your cheesecakes taste like lemon-flavored scrambled eggs. Too few and they won't set properly. We use just enough to create that perfect custard-like texture. Make sure your eggs are room temperature too — cold eggs will seize up the cream cheese and create lumps that no amount of mixing will smooth out. And please, for the love of all things dessert, don't overmix once you add the eggs. That's how you end up with rubbery, dense cheesecakes that bounce when you drop them.
Sour cream is our secret weapon for texture and tang. It adds moisture without making the cheesecakes wet, and the slight acidity enhances the lemon flavor beautifully. Full-fat is best here — low-fat sour cream has stabilizers that can make your cheesecakes grainy. If you don't have sour cream, you can substitute with Greek yogurt, but it will give you a slightly tangier result. Greek yogurt works in a pinch, but sour cream gives you that restaurant-quality richness that makes people close their eyes when they take a bite.
The Unexpected Star
Vanilla extract might seem like an afterthought, but it's crucial for depth of flavor. Don't use imitation vanilla — real vanilla extract adds warm, complex notes that make the lemon pop. Just a teaspoon is all you need; any more and it starts competing with the lemon instead of complementing it. I use Madagascar vanilla because it's my favorite, but any good quality pure vanilla extract works. The vanilla acts like a flavor bridge, connecting the tangy lemon to the rich cream cheese in a way that makes each bite more complex than the last.
Lemon zest is where the real magic happens. The zest contains essential oils that give you that bright, sunny lemon flavor you can't get from juice alone. Use a microplane grater and only zest the yellow part — the white pith underneath is bitter and will ruin everything. I zest directly over the mixing bowl so none of those precious oils escape into the ether. One medium lemon gives you about a tablespoon of zest, which is exactly what we need. Don't even think about using that pre-zested stuff from a jar. It's like comparing fresh herbs to dusty potpourri.
The Final Flourish
Lemon juice provides the acidic punch that makes these cheesecakes sing. Fresh is mandatory — bottled lemon juice tastes like cleaning products and will ruin your dessert. Roll your lemon on the counter before cutting to get maximum juice. You need about two tablespoons, which is roughly one large lemon. Strain out the seeds and pulp unless you enjoy crunchy surprises in your smooth cheesecake. The juice not only flavors the cheesecakes but also activates the proteins in the cream cheese, helping everything set properly.
Butter for the crust needs to be melted but not hot. Hot butter will turn your graham cracker crumbs into a greasy mess that won't hold together. I melt it in the microwave for 30-second bursts until just liquid. Salted butter works fine here — the slight saltiness actually enhances the sweetness of the crust. If you're using unsalted butter, add a pinch of salt to the crust mixture. The salt brings out the flavors and prevents the crust from tasting flat and one-dimensional.
The Method — Step by Step
- Prep your pan properly because this is where success begins. Line a 12-cup muffin tin with paper liners, but don't use those flimsy ones from the dollar store. You want sturdy liners that won't peel away from your cheesecakes like a bad sunburn. Give each liner a quick spritz of non-stick spray — this prevents the cheesecake from sticking to the paper and tearing when you peel it off. Trust me, there's nothing sadder than a beautiful mini cheesecake with half its sides stuck to the wrapper. Set your oven to 325°F (160°C) and position the rack in the center. While we're at it, take all your cold ingredients out now. Cold cream cheese is the enemy of smooth batter, and nobody wants lumpy cheesecake.
- Make the crust that dreams are made of by combining graham cracker crumbs with just enough melted butter to hold everything together. You want the texture of wet sand at the beach — not too dry, not too greasy. Mix in two tablespoons of sugar for a touch of sweetness that balances the tangy lemon. The mixture should hold together when you squeeze it in your palm but still feel crumbly. Press about one tablespoon of this mixture into the bottom of each liner, using the bottom of a shot glass to compact it firmly. Don't go crazy here — you're not building a foundation for a skyscraper. Just press until it's evenly distributed and slightly compacted. The crust should be about 1/4 inch thick, giving you that perfect crunch without overwhelming the delicate filling.
- Create the filling by beating cream cheese until it's smooth as silk and lighter than air. This is where patience pays off — beat the cream cheese on medium speed for a full two minutes. It should look like thick, luxurious icing and be completely free of lumps. Add the sugar gradually, beating until it's fully incorporated and the mixture is fluffy. This step dissolves the sugar so you don't end up with grainy cheesecakes. Scrape down the bowl religiously — there's nothing worse than finding a pocket of unmixed cream cheese when you're portioning out your batter. The mixture should be pale, fluffy, and smooth enough that you'd happily eat it with a spoon (and I won't judge if you do).
- Introduce the eggs one at a time, mixing just until the yellow disappears. This is the moment of truth — add the eggs one by one, mixing on low speed just until each one disappears. Overmixing here incorporates too much air, which causes cracks and a rubbery texture. Think of it like you're folding clouds together rather than whipping up a meringue. The batter should be smooth and glossy, not fluffy and full of bubbles. If you see air bubbles, tap the bowl on the counter to pop them. Your goal is a batter that's thick enough to mound slightly but fluid enough to pour smoothly.
- Add the flavor bombs that make these cheesecakes unforgettable. Stir in the sour cream, vanilla, lemon zest, and lemon juice just until combined — no more than 30 seconds of mixing. The sour cream adds tang, the vanilla provides depth, the zest gives bright citrus notes, and the juice adds that perfect lemon punch. Don't overmix here — you're just bringing everything together. The batter should be pale yellow and smell like lemon heaven. If it tastes good now (and it should), it will taste incredible after baking. Give it a taste and adjust the lemon if you want more zip.
- Fill the cups with confidence, knowing that each one is going to be perfect. Divide the batter evenly among your prepared muffin cups — they should be about 3/4 full. I use an ice cream scoop for consistent portions, but a spoon works fine too. Give the pan a gentle tap on the counter to release any trapped air bubbles and level the tops. The batter should settle into a smooth, slightly domed shape. Don't worry if they look a bit full — they won't rise much during baking, and you want a generous portion that feels indulgent.
- Bake low and slow for the creamiest texture possible. Slide the pan into your preheated 325°F oven and bake for 18-22 minutes. The edges should be set but the centers should still jiggle slightly when you gently shake the pan. Don't walk away from the oven here — these go from perfect to overbaked faster than you can say "lemon cheesecake." The tops should look matte, not shiny, and a toothpick inserted near the edge should come out clean. They'll continue cooking from residual heat, so err on the side of slightly underdone rather than overbaked.
- Cool with patience because rushing this step ruins everything. Turn off the oven and crack the door open, letting the cheesecakes cool gradually for 10 minutes. This prevents the dramatic temperature change that causes cracks and sinking. Remove from the oven and cool completely at room temperature for an hour. They'll sink slightly as they cool — this is normal and creates the perfect little well for toppings. Don't panic if they look a bit deflated; that's exactly what you want. The texture firms up as they cool, transforming from custardy to perfectly creamy.
- Chill thoroughly for the best texture and easiest removal from the liners. Cover the pan with plastic wrap and refrigerate for at least 4 hours, preferably overnight. This is where the magic happens — the flavors meld, the texture sets perfectly, and they become easy to remove from the liners. I know it's tempting to rush this step, but cold cheesecakes are infinitely better than warm ones. The lemon flavor develops, the texture becomes silky smooth, and they hold their shape beautifully. If you try to eat them warm, you'll be disappointed by the texture and muted flavors.
That's it — you did it. But hold on, I've got a few more tricks that'll take this to another level...
Insider Tricks for Flawless Results
The Temperature Rule Nobody Follows
Room temperature ingredients aren't just a suggestion — they're the difference between smooth, creamy perfection and lumpy disappointment. I leave my cream cheese, eggs, and sour cream out for at least two hours before baking. If you're in a hurry (and we've all been there), you can speed this up by placing the cream cheese in a zip-top bag and submerging it in warm water for 15 minutes. Eggs warm up quickly in a bowl of warm water too. Cold ingredients don't incorporate smoothly, leading to tiny lumps that never quite disappear, no matter how much you mix. A friend tried skipping this step once — let's just say it didn't end well, and she ended up with cheesecakes that looked like they had cottage cheese mixed in.
Why Your Nose Knows Best
Your sense of smell is your most reliable indicator of doneness. When the cheesecakes are perfectly baked, your kitchen will smell like sweet lemon and buttery graham crackers. If you start to smell something that reminds you of scrambled eggs, you've gone too far and they're overbaked. This next part? Pure magic. The aroma changes subtly as they bake — from raw ingredients to something that smells like sunshine and happiness. Learn to trust your nose; it's rarely wrong. I can tell when mine are done just by the smell, even before I open the oven door.
The 5-Minute Rest That Changes Everything
After you remove the cheesecakes from the oven, let them rest in the pan for exactly 5 minutes before moving to a cooling rack. This brief rest allows the proteins to finish setting without overcooking. Most recipes skip this step, but it's crucial for achieving that perfect creamy texture. During these five minutes, the residual heat finishes the cooking process gently, preventing the dramatic temperature drop that can cause cracking. I set a timer because I'm impatient and would otherwise pull them out too soon.
Creative Twists and Variations
This recipe is a playground. Here are some of my favorite ways to switch things up:
Berry Swirl Dreams
Drop 1/2 teaspoon of raspberry or blueberry jam on top of each cheesecake before baking, then swirl it gently with a toothpick. The jam creates beautiful marbled patterns and adds a fruity burst that complements the lemon perfectly. Use good quality jam with whole fruit pieces for the best texture. The berries add natural sweetness and create stunning color contrasts that make these look like they came from a fancy bakery.
Lavender Honey Elegance
Add 1/2 teaspoon of culinary lavender and replace 2 tablespoons of sugar with honey for a sophisticated floral version. The lavender should be ground fine so you don't end up eating potpourri. This variation tastes like a summer garden party and pairs beautifully with afternoon tea. It's surprisingly popular with people who claim they don't like dessert.
Coconut Lemon Clouds
Replace 1/4 cup of the graham cracker crumbs with toasted coconut flakes, and add 2 tablespoons of coconut cream to the filling. Top with toasted coconut before serving. This version tastes like a tropical vacation and stays extra moist thanks to the coconut oil. It's my go-to for summer barbecues when I want something that feels lighter than traditional cheesecake.
White Chocolate Indulgence
Melt 2 ounces of good white chocolate and let it cool slightly before folding it into the batter. The white chocolate adds richness and creates these little pockets of sweetness throughout. Be careful not to overmix — you want ribbons of chocolate, not a completely blended mess. This version is for those days when lemon alone just won't cut it.
Ginger Snap Base
Replace the graham cracker crumbs with crushed ginger snaps for a spicy kick that warms up the lemon flavor. The ginger creates this incredible flavor bridge between the tangy lemon and the creamy filling. It's especially good around the holidays when you want something that feels both fresh and comforting.
Mini Lemon Meringue
Top each cooled cheesecake with a dollop of Italian meringue and torch it for that classic lemon meringue pie vibe in miniature form. The contrast between the cold, tangy cheesecake and the warm, sweet meringue is absolutely irresistible. Just be prepared — these disappear faster than you can make them.
Storing and Bringing It Back to Life
Fridge Storage
Store your mini cheesecakes in an airtight container in the refrigerator for up to 5 days. Place a piece of parchment paper between layers if you're stacking them. They actually taste better on day two as the flavors have time to meld and develop. Keep them away from strong-smelling foods — cheesecakes are like sponges and will absorb garlic or onion odors if stored nearby. The texture stays perfect for the full 5 days, making these ideal for meal prep or entertaining.
Freezer Friendly
These freeze beautifully for up to 3 months. Wrap each cheesecake individually in plastic wrap, then place in a freezer bag. Thaw overnight in the refrigerator for best results. Don't thaw at room temperature — it makes the texture grainy. Frozen cheesecakes are slightly firmer than fresh, which some people actually prefer. They're perfect for emergency dessert situations or when you want to impress unexpected guests.
Best Reheating Method
While these are meant to be served cold, if you prefer them slightly warmer, let them sit at room temperature for 15-20 minutes. Never microwave them — it ruins the texture and makes them rubbery. If they've been frozen and taste slightly dense, add a tiny splash of water before serving — it steams back to perfection. For an extra special touch, let them warm for 10 minutes, then serve with a hot berry compote for a temperature contrast that makes people close their eyes in delight.