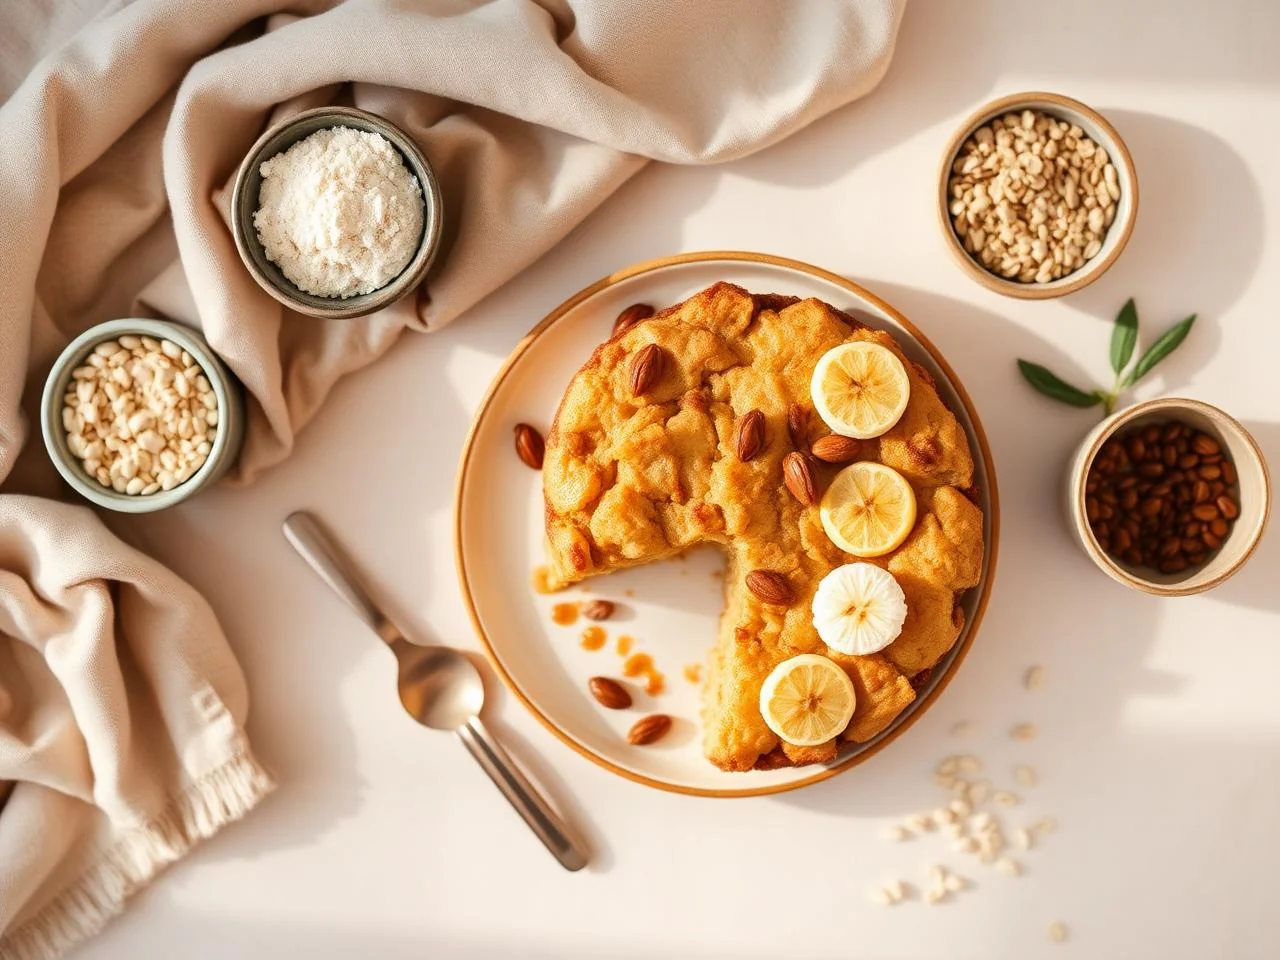
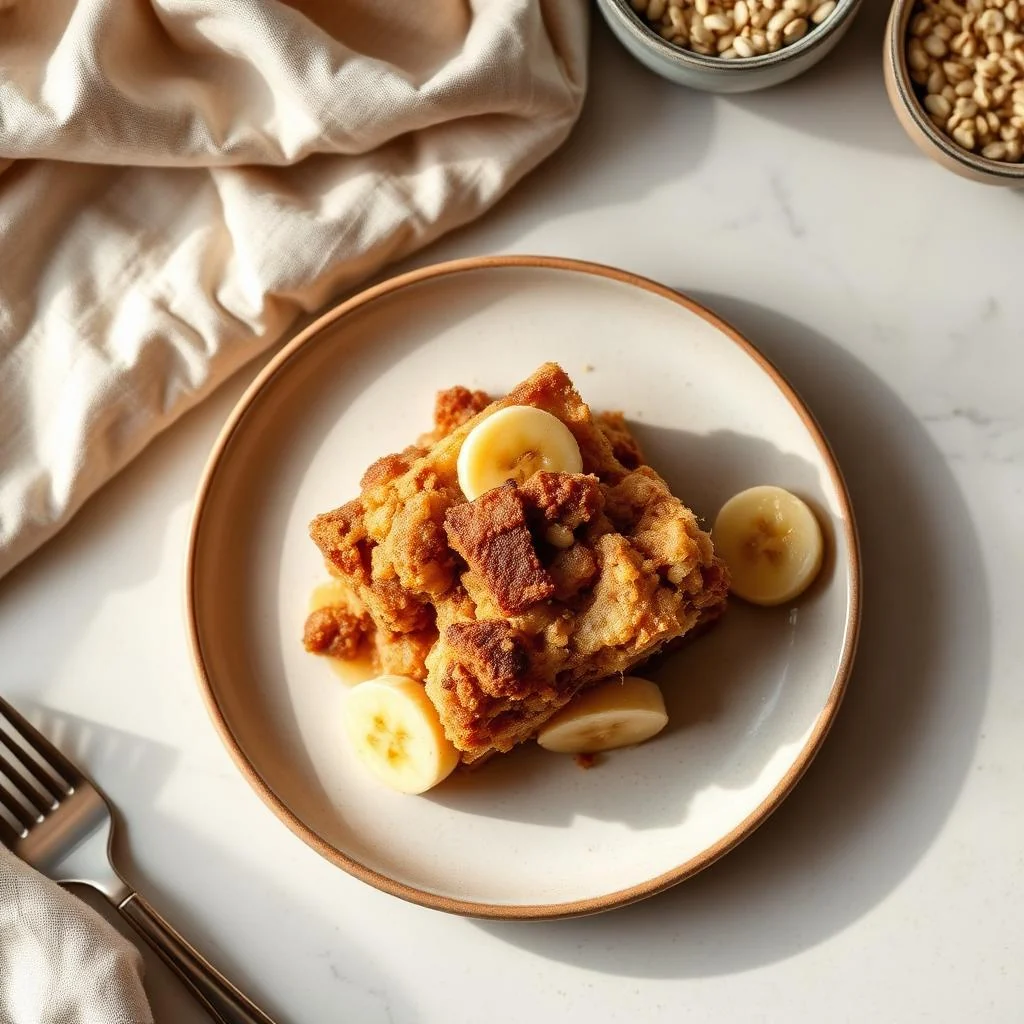
Gluten Free Banana Bread Pudding
I still remember the first time I made a gluten free banana bread pudding for my family. It was a huge hit, and everyone asked for seconds. As a gluten-free home cook, I'm always on the lookout for recipes that are not only delicious but also easy to make and accessible to everyone.
This gluten free banana bread pudding recipe is a game-changer. It's made with a balanced flour blend, ripe bananas, and a hint of spice. The best part? It's incredibly easy to make and requires minimal special equipment.
One of the things I love about this recipe is that it's perfect for using up ripe bananas. You know, the ones that are too spotty to eat on their own but are still perfect for baking. It's also a great way to reduce food waste and get creative in the kitchen.
This recipe is also very versatile. You can serve it as a dessert, a snack, or even as a breakfast option. It's also perfect for potlucks, family gatherings, or special occasions. So, whether you're a gluten-free veteran or just starting out, this recipe is sure to become a favorite.
In this article, I'll walk you through the recipe step by step, sharing tips and tricks along the way. I'll also cover some common mistakes to avoid and provide some variations to try. So, let's get started and make some delicious gluten free banana bread pudding!
Why You’ll Love This Recipe
- This recipe is easy to make and requires minimal special equipment.
- It's perfect for using up ripe bananas and reducing food waste.
- The pudding is moist and flavorful, with a delicate texture.
- It's versatile and can be served as a dessert, snack, or breakfast option.
- It's perfect for potlucks, family gatherings, or special occasions.
- The recipe is gluten-free, making it accessible to those with dietary restrictions.
Why This Recipe Works
This recipe works because it uses a balanced flour blend that's designed for gluten-free baking. The blend includes rice flour, tapioca starch, and xanthan gum, which provides structure and texture to the pudding. The ripe bananas add natural sweetness and moisture, while the eggs and butter provide richness and flavor.
The key to this recipe is to not overmix the batter. This can lead to a dense and tough pudding. Instead, gently fold the wet and dry ingredients together until just combined. This will help preserve the delicate texture of the pudding.
Another important aspect of this recipe is the resting time. After mixing the batter, it's essential to let it rest for at least 20-30 minutes. This allows the starches to hydrate and the flavors to meld together, resulting in a tender and flavorful pudding.
Ingredients You’ll Need
When it comes to making a delicious gluten free banana bread pudding, the ingredients are crucial. You'll need a balanced flour blend, ripe bananas, eggs, butter, and a few other pantry staples. In this section, we'll go over the ingredients you'll need and provide some tips for choosing the best ones.
One of the most important ingredients in this recipe is the flour blend. Look for a blend that's specifically designed for gluten-free baking and contains a mix of rice flour, tapioca starch, and xanthan gum. This will provide the structure and texture you need for a tender and flavorful pudding.
- 2 cups (250g) gluten-free flour blendLook for a blend that's specifically designed for gluten-free baking and contains a mix of rice flour, tapioca starch, and xanthan gum. This will provide the structure and texture you need for a tender and flavorful pudding.
- 1/2 cup (100g) granulated sugarYou can also use brown sugar or a combination of both for a richer flavor.
- 1/2 cup (115g) unsalted butter, meltedMake sure to use high-quality butter for the best flavor.
- 4 large eggsFresh eggs are essential for a light and fluffy pudding.
- 2 teaspoons vanilla extractUse high-quality vanilla extract for the best flavor.
- 1/2 teaspoon saltUse kosher salt or sea salt for a more nuanced flavor.
- 1/4 teaspoon ground cinnamonYou can also use other spices like nutmeg or cardamom to give the pudding a unique flavor.
- 1/4 teaspoon ground nutmegFreshly grated nutmeg is essential for the best flavor.
- 4 ripe bananas, slicedUse ripe bananas for the best flavor and texture.
- 1/2 cup (60g) chopped walnutsYou can also use other nuts like pecans or hazelnuts for a different flavor.
- 1/4 cup (60g) heavy creamUse high-quality heavy cream for the best flavor and texture.

Equipment You’ll Need
How to Make Gluten Free Banana Bread Pudding
- 1Preheat the oven to 350°F (180°C) and grease a 9x13-inch baking dish with butter or cooking spray.
- 2In a large mixing bowl, whisk together the flour blend, sugar, and salt.
- 3In a separate bowl, whisk together the melted butter, eggs, vanilla extract, and heavy cream.
- 4Add the wet ingredients to the dry ingredients and stir until just combined. Do not overmix.
- 5Gently fold in the sliced bananas and chopped walnuts.
- 6Pour the batter into the prepared baking dish and smooth the top.
- 7Bake for 35-40 minutes, or until the pudding is golden brown and the internal temperature reaches 190°F (88°C).
- 8Remove the pudding from the oven and let it cool for 10 minutes.
- 9Use a sharp knife to cut the pudding into squares or slices.
- 10Serve the pudding warm, topped with whipped cream or ice cream if desired.
- 11Let the pudding rest for at least 20-30 minutes before serving to allow the flavors to meld together.
Expert Tips
- Use high-quality ingredients for the best flavor and texture.
- Don't overmix the batter, as this can lead to a dense and tough pudding.
- Let the pudding rest for at least 20-30 minutes before serving to allow the flavors to meld together.
- Use a sharp knife to cut the pudding into squares or slices.
- Serve the pudding warm, topped with whipped cream or ice cream if desired.
- You can also make this recipe in individual ramekins or cups for a fun and easy dessert.
- Experiment with different spices and flavorings, such as cinnamon or nutmeg, to give the pudding a unique flavor.
- Use fresh and ripe bananas for the best flavor and texture.
Common Mistakes to Avoid
- Overmixing the batter, which can lead to a dense and tough pudding.
- Not letting the pudding rest for at least 20-30 minutes before serving, which can result in a pudding that's not fully flavored.
- Using low-quality ingredients, which can affect the flavor and texture of the pudding.
- Not greasing the baking dish properly, which can cause the pudding to stick and be difficult to remove.
- Not checking the internal temperature of the pudding, which can result in a pudding that's not fully cooked.
- Not using a sharp knife to cut the pudding, which can cause it to tear or break apart.
Variations and Substitutions
- Add a teaspoon of cinnamon or nutmeg to the batter for a unique flavor.
- Use different types of milk, such as almond or soy milk, for a non-dairy version.
- Add a handful of chocolate chips or nuts to the batter for a fun and tasty twist.
- Use fresh fruit, such as blueberries or raspberries, instead of bananas for a different flavor.
- Make individual servings of the pudding in ramekins or cups for a fun and easy dessert.
- Top the pudding with whipped cream or ice cream for a decadent treat.
- Experiment with different spices and flavorings, such as cardamom or ginger, to give the pudding a unique flavor.
What to Serve With Gluten Free Banana Bread Pudding
This gluten free banana bread pudding is perfect for serving warm, topped with whipped cream or ice cream if desired. You can also serve it with a side of fresh fruit or a drizzle of caramel sauce. It's a great dessert option for any occasion, and it's also perfect for a special treat or snack.
Some other serving ideas include serving the pudding with a side of coffee or tea, or using it as a base for a sundae or parfait. You can also top the pudding with chopped nuts or chocolate shavings for a fun and tasty twist.
Make-Ahead, Storage, Freezing and Reheating
This gluten free banana bread pudding can be stored in the fridge for up to 3 days or frozen for up to 2 months. To store in the fridge, simply cover the pudding with plastic wrap or aluminum foil and refrigerate. To freeze, wrap the pudding tightly in plastic wrap or aluminum foil and place in a freezer-safe bag.
To reheat the pudding, simply thaw it overnight in the fridge or reheat it in the microwave or oven. You can also reheat individual servings in the microwave for a quick and easy dessert.
When reheating the pudding, make sure to check the internal temperature to ensure that it reaches 165°F (74°C) for food safety. You can also add a splash of milk or cream to the pudding to give it a creamy and smooth texture.
In addition to storing and reheating the pudding, you can also make it ahead of time and store it in the fridge or freezer until you're ready to serve. This makes it a great option for busy weeknights or special occasions.
Frequently Asked Questions
What type of flour blend should I use for this recipe?
Look for a gluten-free flour blend that's specifically designed for baking and contains a mix of rice flour, tapioca starch, and xanthan gum. This will provide the structure and texture you need for a tender and flavorful pudding.
Can I use different types of milk for this recipe?
Yes, you can use different types of milk, such as almond or soy milk, for a non-dairy version of the pudding.
How do I know when the pudding is fully cooked?
Check the internal temperature of the pudding to ensure that it reaches 190°F (88°C). You can also check for doneness by inserting a toothpick into the center of the pudding. If it comes out clean, the pudding is fully cooked.
Can I make this recipe ahead of time?
Yes, you can make this recipe ahead of time and store it in the fridge or freezer until you're ready to serve. Simply thaw and reheat the pudding according to the instructions above.
What type of bananas should I use for this recipe?
Use ripe bananas for the best flavor and texture. You can also use a combination of ripe and unripe bananas for a slightly different flavor.
Can I add other ingredients to the pudding for extra flavor?
Yes, you can add other ingredients, such as chopped nuts or chocolate chips, to the pudding for extra flavor. Simply fold them into the batter before baking.
How do I store the pudding to keep it fresh?
Store the pudding in the fridge for up to 3 days or freeze for up to 2 months. To store in the fridge, simply cover the pudding with plastic wrap or aluminum foil and refrigerate. To freeze, wrap the pudding tightly in plastic wrap or aluminum foil and place in a freezer-safe bag.
Can I make individual servings of the pudding?
Yes, you can make individual servings of the pudding in ramekins or cups. Simply divide the batter evenly among the ramekins and bake according to the instructions above.
Ingredients
- 2 cups (250g) gluten-free flour blend
- 1/2 cup (100g) granulated sugar
- 1/2 cup (115g) unsalted butter, melted
- 4 large eggs
- 2 teaspoons vanilla extract
- 1/2 teaspoon salt
- 1/4 teaspoon ground cinnamon
- 1/4 teaspoon ground nutmeg
- 4 ripe bananas, sliced
- 1/2 cup (60g) chopped walnuts
- 1/4 cup (60g) heavy cream
Instructions
- Preheat the oven to 350°F (180°C) and grease a 9x13-inch baking dish with butter or cooking spray.
- In a large mixing bowl, whisk together the flour blend, sugar, and salt.
- In a separate bowl, whisk together the melted butter, eggs, vanilla extract, and heavy cream.
- Add the wet ingredients to the dry ingredients and stir until just combined. Do not overmix.
- Gently fold in the sliced bananas and chopped walnuts.
- Pour the batter into the prepared baking dish and smooth the top.
- Bake for 35-40 minutes, or until the pudding is golden brown and the internal temperature reaches 190°F (88°C).
- Remove the pudding from the oven and let it cool for 10 minutes.
- Use a sharp knife to cut the pudding into squares or slices.
- Serve the pudding warm, topped with whipped cream or ice cream if desired.
- Let the pudding rest for at least 20-30 minutes before serving to allow the flavors to meld together.